


User’s Manual for InterForm400® 77
Step 1. Making a Work Copy of the Overlay IF400DEMO
In order to keep the original sample we should first make a copy of the overlays to work
with. To prevent the changes we make to be overwritten by future updates of the SAMPLE
file-set, we will do the changes in our TEST file-set which was created on page 28 in the
Getting Started section.
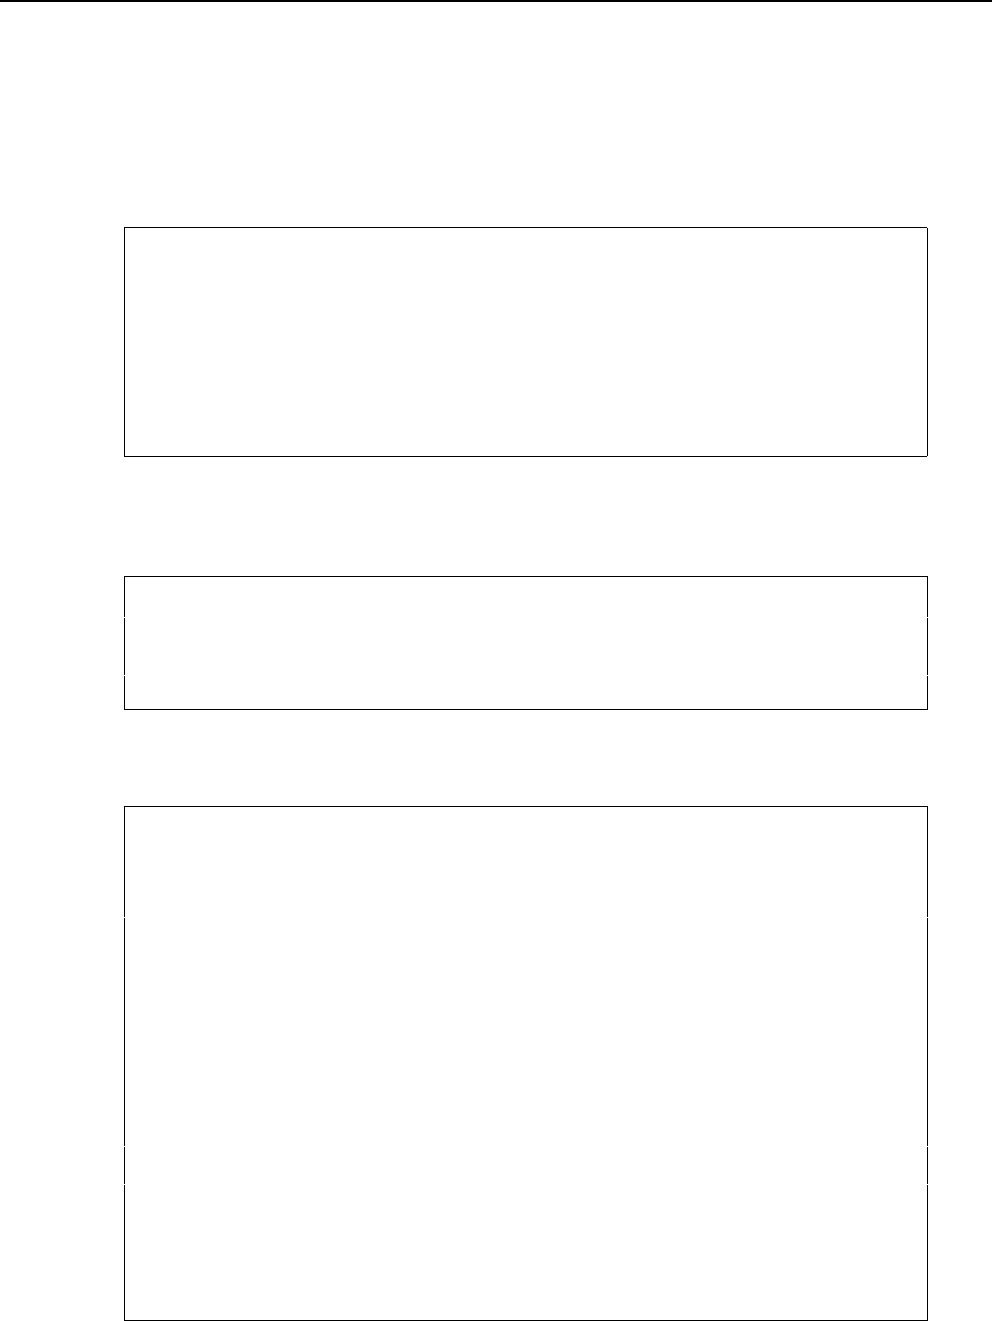
Enter 8 in the option field on the main menu::
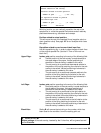
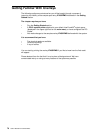
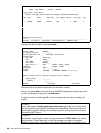
Select File-set
Select one of the following file-sets, then press Enter.
1=Select
Opt File-ID Description
_ SAMPLE InterForm 400 Samples
1 TEST Test file-set
F3=Exit F12=Cancel
Now enter 1 In the option field to select TEST and press Enter
Now enter 1. Design Overlay on the main menu and press Enter:
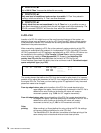
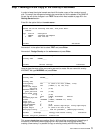
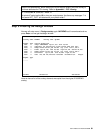
Design InterForm 400 overlay APF300D
Overlay name MYDEMO_____
F3=Exit F4=List overlays F12=Cancel
Here we type the name of the new overlay we want to create. We can name this overlay
MYDEMO. We type MYDEMO and press Enter:
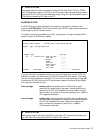
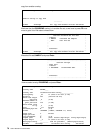
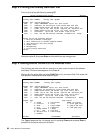
Design InterForm 400 overlay APF300D
Overlay name MYDEMO____
Overlay text __________________________________
Line spacing 040 in 1/240 of an inch (*INPUT, 1-720)
Rotation 000 (*INPUT, 0, 90, 180, 270)
Extra left margin
positions 0 (0-99)
Maximum number of
print positions 378 (1-378)
Extra blank lines
on top 0 (0-99)
Font 0066 *INPUT, fontnumber F4=List
Extended page def. N (Y N)
Drawer *PRINTER (*INPUT, *PRINTER 1-9, 20-39)
Paper Size 0 F4=List
Pages per side __
Copy management N (Y N)
Duplex print N (N=no S=short edge margin L=long edge margin)
Duplex margin __0 in 1/240 of an inch (1-720)
Back page overlay __________ Code for placement _ (B=back page F=front)
F3=Exit F4=Prompt F9=Copy from another overlay F12=Cancel
F13=Set view/print parameters F14=PCL-view
This screen already has some options filled in. All that will be overwritten by the settings of
the overlay IF400DEMO we are copying from. We notice that since we are actually
creating a new overlay it is possible to copy an existing overlay with F9. We press F9 to