432
User’s Manual for InterForm400
®
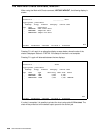
- to display the NetServer Name and Domain of the AS/400. The Netserver name is the
name, that you should use for your AS/400 when configuring Client Access Express.
M WARNING M
The NetServer Name should not be the same as the AS/400 System name. The system
name can be displayed with the command, DSPNETA. If the names are identical you
could change the Netserver name with the command, APF3812/CHGNETSVRA.
3. Start the NetServer with the command:
APF3812/STRNETSVR
4. The person that should be able to view, must have full authorisation over the folder
\\system\\qdls\\apf3812\\view. You can grant these rights with the command:
CHGDLOAUT DLO(VIEW) FLR(APF3812) USRAUT((*PUBLIC *CHANGE))
G NOTE G
When viewing graphically (PCL or PDF) a file will be created in the APF3812/VIEW
folder, that others can access/view. To avoid that you can specify, that the PUBLIC
authority of these temporary files should be *EXCLUDE. Refer to page 27 for more
information.
5. The user must be added to the system directory. You can add a user to the system
directory with the following command:
ADDDIRE USRID(KURT SYSTEM) USRD(’Jensen, Kurt’) USER(KURT)
6. Create a new AS/400 connection in Client Access stating the new AS/400 server name.
7. Start up a new session and change the new network name to Qxxxxxxxx
under option 2. Setup default output queue and printer type, in 80. Administration Menu.
8. If you are running Client Access Express, you should also make sure to start the
Netserver on the AS/400. This can be done with the command: STRHOSTSVR
SERVER(*ALL). You should also make sure to use the AS/400 system name (on the PC
and in InterForm400
®
, that you can find using the Explorer and opening the Other
Computers folder.
9. Boot your PC and connect to the new server name Qsxxxxxxx via the Operations
navigator.
10. If you are running Window95/98 is it necessary to have to same User-ID and
password on the PC as on the AS/400.
J TIP J
You can choose to map a Network drive to QDLS from Explorer on your PC: Choose
‘Tools’ and ‘Map Network drive..’ and ‘\\<Netserver name>\QDLS’ as the folder. This
is helpful later when moving resources to/from the shared APF3812 folder.
When configuring Netserver and share these commands could be very helpful:
(All are placed in library, APF3812)
NetServer commands:
DSPNETSVRA Display NetServer Attributes
CHGNETSVRA Change NetServer Attributes
STRNETSVR Start NetServer
ENDNETSVR End NetServer


