Groundsmaster 4010--D Operator CabPage 9 -- 7
To gain access to the heater core and air conditioning
components that are locatedunder thecab roof, the roof
panel can be loosened, raised and supported.
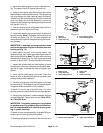
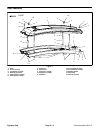
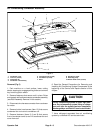
Removal (Fig. 3)
1. Park machine on a level surface, lower cutting
decks, stop engine, engage parking brake and remove
key from the ignition switch.
2. Remove screw (item 2), flat washer (item 3) and
bushing (item 4) that secure the rear of the roof to the
roof mount.
3. Remove the cap screw (item 15) and rubber washer
(item 14) that secure the front of the roof.
4. Remove four (4) hex nuts (item 16), flat w ashers
(item 3) and bushings (item 4) that secure roof to front
and rear fasteners.
5. Carefully lift front of roof while leaving rear of roof
against headliner. Support front of roof in the raised
position to allow access to heater and air conditioning
components.
Installation (Fig. 3)
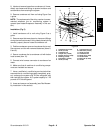
1. Make sure that all components in headliner and roof
are installed and secure.
2. Remove support and carefully lower roof into posi-
tion.
3. Secure roof to headliner with all removed fasteners.
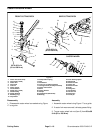
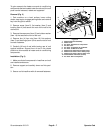
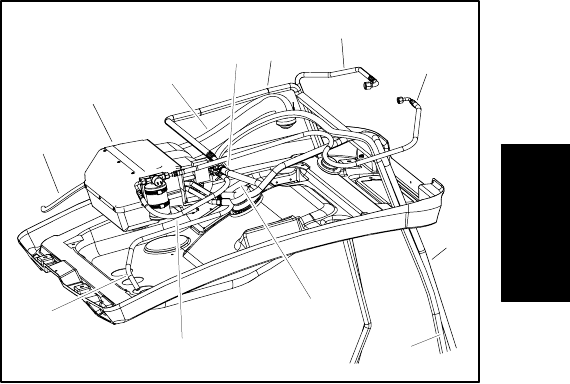
1. Heater/evaporator assembly
2. Heater valve
3. A/C hose: evaporator to compressor
4. Air duct hose
5. A/C hose: compressor to condenser
6. A/C hose: condenser to drier
7. Heater hose: thermostat to heater valve
8. Heater hose: heater core to water pump
9. Heater hose: heater valve to heater core
10. Condensation drain hose (2 used)
11. A/C hose: drier to evaporator
Figure 4
2
1
3
4
7
8
6
5
9
10
11
10
Operator
Cab


