Groundsmaster 4000--D/4010--D Hydraulic SystemPage 4 -- 91
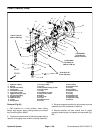
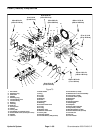
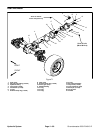
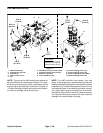
Removal (Fig. 71)
1. Park machine on a level surface, lower cutting
decks, stop engine, apply parking brake and remove
key from the ignition switch.
2. Read the General Precautions for Removing and
Installing Hydraulic System Components at the begin-
ning of the Service and Repairs section of this chapter.
NOTE: Toease installation, label the hydraulic hoses to
show their correct position on the axle motor.
3. Disconnect hydraulic hoses from motor. Put caps or
plugs on motor ports and hose openings to preventcon-
tamination.
IMPORTANT: Support axle motor to prevent motor
from falling during removal.
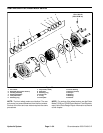
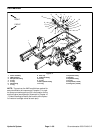
4. Remove motor from rear axle using Figure 71 as a
guide.
5. If hydraulic fittings are to be removed from motor,
mark fitting orientation to allow correct assembly. Re-
move fittings from motor and discard O--rings.
Installation (Fig. 71)
IMPORTANT: Refer to Traction Circuit Component
Failure in the General Information section of this
chapter forinformation regarding the importance of
removing contamination from the traction circuit.
1. If fittings were removed from motor, lubricate and
place new O--rings onto fittings. Install fittings into port
openingsusingmarks madeduringthe removalprocess
to properly orientate fittings. Tighten fittings (see Hy-
draulic Fitting Installation in the General Information
section of this chapter).
2. If removed, install pinion gear(item 10)to axle motor.
3. Install O--ring (item 6) onto motor. Position motor to
rear axle assembly making sure that arrows on the side
of motor case point upward. Align gear teeth and slide
motor into place.
4. Secure motor to axle with cap screws and flat wash-
ers. Torque screws from 59 to 73 ft--lb (80 to 99 N--m).
5. Remove plugs from motor ports and hose openings.
Using labels placed during motor removal, correctly at-
tach hydraulic hoses to axle motor (see Hydraulic Hose
and Tube Installation in the General Information section
of this chapter).
6. Fill reservoir with hydraulic fluid as required.
7. Properly fill hydraulic system (see Charge Hydraulic
System in this section).
8. After assembly is completed, verify that hydraulic
hoses and fittings do not contact anything.
Hydraulic
System


