


8
9
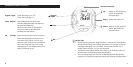
How to prepare the wrist unit
1. Since the display is blank when the wrist unit leaves the factory, you have
to activate the wrist unit by pressing the OK button twice, after which
the Time of day display appears. This is a one-off procedure; once you
have turned on your wrist unit you can not turn it off anymore.
2. You may start measuring your heart rate right away using the default
settings. However, the following settings are ones that it would be useful
to change as soon as possible: Time of day (see section Setting the watch)
and personal user settings (see section User information settings).
3. Your running/cycling computer has various functions that you can use
according to your personal training needs. For more information, see
section All that you can do with your running/cycling computer. You can
either manually enter the settings by pressing the wrist unit buttons or
you can define your settings with Polar Precision Performance software,
after which the data should be transferred from your PC to the wrist unit.
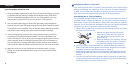
4. Wear the wrist unit as you would wear an ordinary watch. If you go
biking, we recommend attaching the wrist unit to the accessory Polar
Bike Mount.
Easy start
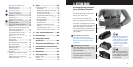
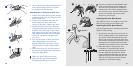
Installing the Polar S1 foot pod
First, make sure that there is a battery in the foot pod. You can check this by
pressing and holding the red button on the foot pod. If a green light starts
to flash, you can start attaching the foot pod on your shoe. If there is no
light, start from the chapter Assembling the S1 foot pod battery.
Assembling the S1 foot pod battery
The estimated average battery life span of the foot pod is 20 hours of use. If
you prefer Polar to replace the battery, you can send or take the sensor to a
Polar Service Center. There the sensor is tested after the battery is replaced.
However, the S1 foot pod was designed so that you can replace the battery
yourself. If you do so, follow the instructions below carefully:
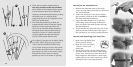
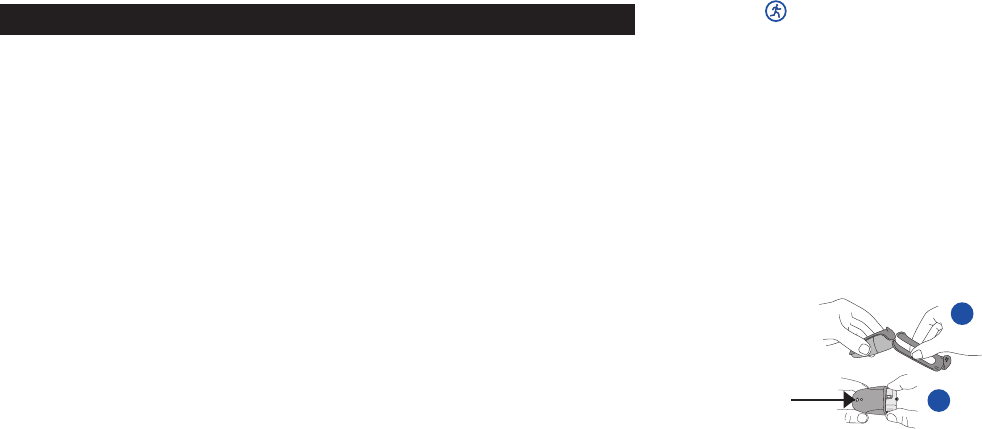
1. Detach the foot pod from its holder by unfastening the flap and lifting
the foot pod from the rear.
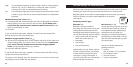
2. Remove the black top cover from the
foot pod by lifting the cover from the
rear. Use the fork to remove the cover
(see picture 2).
3. Open the battery cover carefully. Pull out
the battery case. (See picture 3.) Replace
the old battery (AAA) with a new one.
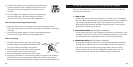
4. Insert the battery case back inside the foot pod. Make sure that the
battery case slides into the grooves of the sensor. Be careful not to touch
the switch on the foot pod (see the arrow in picture 3).
5. Check that the sealing rings are in the grooves. Close the battery cover
and place the black top cover on top of the foot pod. Make sure that it is
secured.
6. Test the foot pod by checking that the green light starts to flash after
you press and hold the red button on the foot pod. Press and hold the
red button again to turn the foot pod off.
3
2