


36
37
Tests on/off
If you start from the Time of day display, repeat steps 1-4.
5. Scroll up or down until Tests is displayed.
6. Press OK to start setting the tests. On/OFF starts to flash.
7. Scroll up or down to set the tests on or off. Press OK.
Predicted maximum heart rate on/off (HR
max
-p)
If you start from the Time of day display, repeat steps 1-4.
5. Scroll up or down until HRmax-p is displayed.
6. Press OK to start setting the HR
max
-p. On/OFF starts to flash.
7. Scroll up or down to set the HR
max
-p on or off. Press OK.
HR
max
-p can be turned on only if Polar Fitness Test is on.
Altitude and thermometer on/off
If you start from the Time of day display, repeat steps 1-4
5. Scroll up or down until Altitude is displayed.
6. Press OK to start setting the altitude measurement and thermometer.
On/OFF starts to flash.
7. Scroll up or down to set the altitude on or off. Press OK.
If you turned Altitude off, skip the rest of the altitude settings.
8. If you turned Altitude on, “Wait...” appears for a few seconds.
9. Altitude and a flashing number appear. Start adjusting the starting
point altitude. Adjustable units of 1/ 2 can be changed by pressing and
holding the signal/light button.
Scroll up or down until the desired altitude is displayed. Press OK.
If dirt is blocking the air pressure channels, send the wrist unit to a Polar
Service Center. Do not insert any objects into the openings.
It is recommended that you calibrate the altitude whenever a reliable
reference is available. For most accurate altitude readings, calibrate the
altimeter every time before an exercise.
To use the thermometer the altitude must be turned on. Because your
body temperature affects the actual temperature reading, the best way
to obtain accurate temperature is to take your wrist unit off for at least
10 minutes.
To continue setting your settings, press the stop button or to return to the
Time of day display, press and hold the stop button.
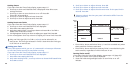
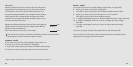
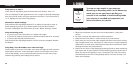
AutoLap on/off
When you use the AutoLap function, the running/cycling computer
automatically records lap times continuously after each time you have run or
cycled the preset distance. For example if you set the AutoLap distance at
400 meters, the first lap will be recorded at 400 meters, the second lap at
800 meters and so on.
If you start from the time of the day display, repeat steps 1-4.
5. Scroll up or down until AUTOLAP is displayed.
6. Press OK to start setting the AutoLap. On/Off starts to flash.
7. Scroll up or down to set the AutoLap on or off. Press OK.
OFF: skip the rest of AutoLap settings.
8. Set A. Lap Distance is displayed. Scroll up or down to set the AutoLap
distance. Press OK to select the lap distance.
AutoLap can be turned on only if the speed function is activated in
speed settings.