


Service Manual Repair procedures 87
Removing the left side panel
1. Remove the battery pack (“Removing the single battery pack” on page 66).
2. Open the monitor (“Opening the monitor” on page 68).
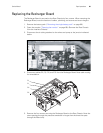
3. Remove the Recharger Board (“Replacing the Recharger Board” on page 83).
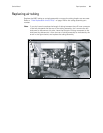
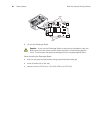
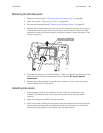
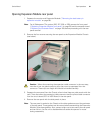
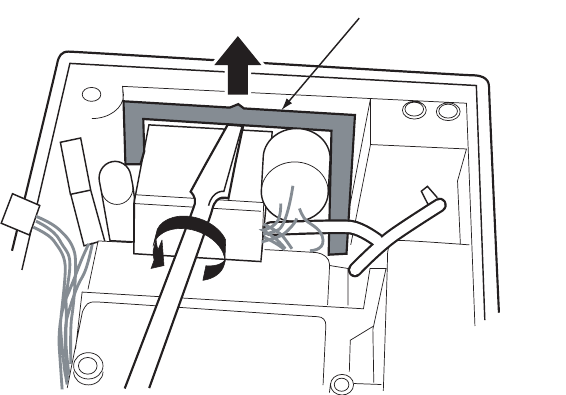
4. Remove the U-shaped clamp that secures the left side panel assembly by inserting a
small screwdriver between the clamp and plastic and the end of another flat blade
screwdriver under the clamp and gently rotating the blade to loosen the clamp. Then
slide the clamp out.
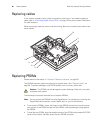
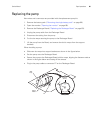
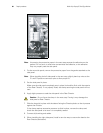
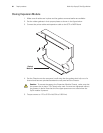
5. Press the side panel out of the Rear Chassis. There is an adhesive gasket around the
side panel which requires considerable force to separate. Do not pry against
components.
6. Remove the tubing attached to the cuff hose connector. You can reuse this tubing
when installing the new side panel.
Installing side panels
1. Clean all gasket material from the Rear Chassis where the side panel is to be
installed. (The adhesive side of duct tape can be used to pull away old gasket
residue.)
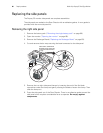
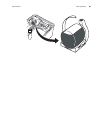
2. Attach the tubing to the NIBP cuff hose connector.
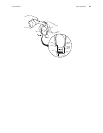
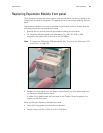
3. Route the bundle of cabling with the bead under the temperature connector housing
so that when the side panel is installed the connectors will extend out of the Rear
Chassis along the bottom of the Chassis. (See the figure below.)
0696-43
INSERT SMALL SCREWDRIVER
BETWEEN PLASTIC AND CLAMP
TO RELIEVE TENSION AGAINST
PLASTIC