


GB
9
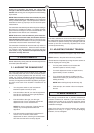
Fasten the transmitter just below the chest firmly
enough so that the electrodes remain in contact with
the skin while running, but not so tight that normal breathing
is prevented.
NOTE! If the electrode surfaces are not moist, the pulse
reading will not appear on the display. If the electrodes
are dry, moisten them again. It is also important to allow the
electrodes to warm up properly to ensure accurate pulse
measurement.
The transmitter automatically transmits the pulse reading to
the meter up to a distance of about 1 m. Display will show
pulse when the small light is on next to the PULSE text. The
light flashes in time with the user’s heartbeat.
NOTE! If there are several telemetric pulse measure-
ment devices next to each other, the distance between
them should be at least 1.5 m. Similarily, if there is only one
receiver and several transmitters in use, only one person with
a transmitter should be within transmission range.
The transmitter is switched to an active state only when it is
being used for measurement. Sweat and other moisture
can, however, keep the transmitter in an active state and
waste battery energy. Therefore it is important to dry the
electrodes carefully after use.
3. ADJUSTMENTS
Monitor belt tracking during exercise and make adjustments
as needed (described below).
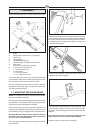
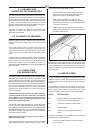
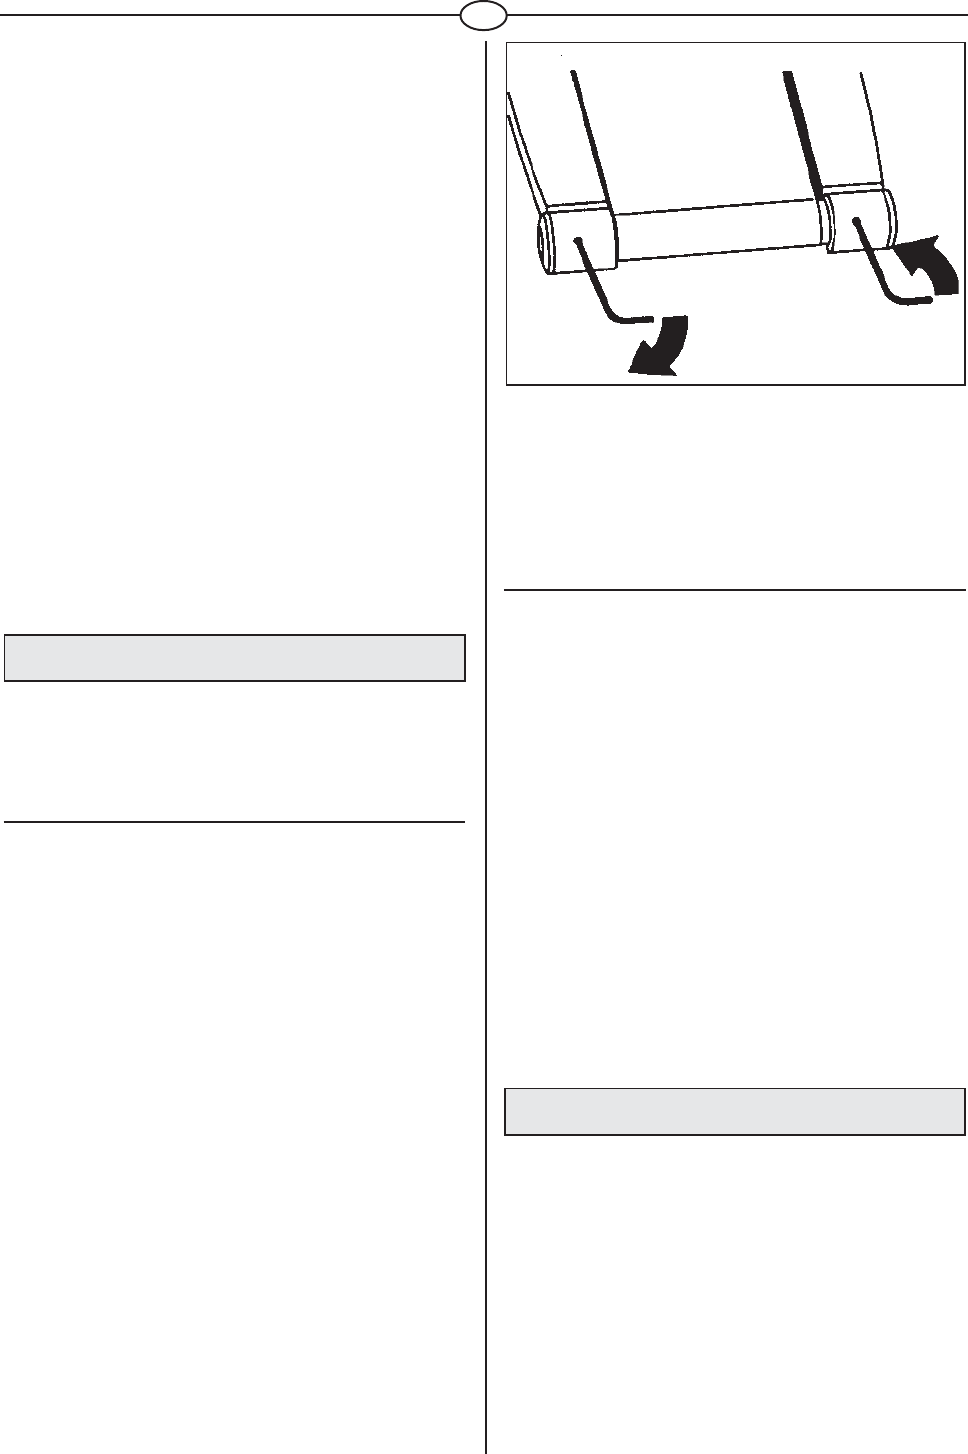
3.1. ALIGNING THE RUNNING BELT
The running belt should remain centered on the J 660 at all
times. Normally when the unit is in the horiziontal position
and the belt properly tightened the belt will stay in the
middle. It is, however, possible for the belt to be pushed to
one side due to the user’s running style (e.g. more weight on
one foot). The alignment of the belt is adjusted by turning the
two bolts at the back of the treadmill. Proceed then as
follows:
1. Turn the power switch on and increase the
treadmill’s speed to 5 km/h (3 mph).
2. If the belt drifts to the left, turn the left adjustment
bolt 1/8 turn clockwise and the right adjustment
bolt 1/8 turn anticlockwise.
3. If the belt drifts to the right, turn the right
adjustment bolt 1/8 turn clockwise and the left
adjustment bolt 1/8 turn anticlockwise.
NOTE! Do not turn more than 1/8 at the time as
already very small adjustments effect the
alignment.
4. If the belt remains centralised the adjustment is
correct. If not, continue to make small
adjustments as above, checking for centralisation
each time until the belt is correctly aligned.
If the belt is allowed run across to one side for long periods
the edges of the belt may be damaged and the treadmill may
not continue to operate correctly. Any damage to the belt
caused by the lack of necessary adjustment will not be
covered by the warranty.
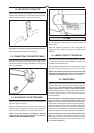
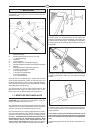
3.2. ADJUSTING THE BELT TENSION
The belt must be tensioned if it begins to slip on the rollers.
NOTE! However, keep the belt as loose as possible!
The belt tension is adjusted by turning the same screws as
used for aligning the running belt.
1. Turn the power switch on and increase the
treadmill’s speed to 5 km/h (3 mph).
2. Turn both adjustment screws an equal amount,
approximately 1/8 turn clockwise.
3. Try to slow the belt down by holding onto the
handrails and braking as you walk (as if you were
walking downhill).
NOTE! When braking heavily the belt may slip.
4. If the belt slips, turn another 1/8 turn and repeat
the test.
4. MAINTENANCE
We strongly recommend that a periodic maintenance
schedule is adhered to. However, if you wish to have the
maintenance carried out by a trained technician please
contact your local TUNTURI dealer for details of service
available and charges.
Check from time to time that all fasteners are properly
tightened and wiring is in place. To avoid damaging
fasteners, do not overtighten.