


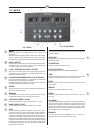

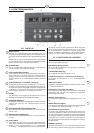

2.4. USER SET UP MODE
This treadmill features a user set up mode, which enables the
user to choose between certain set up parameters: English
(mile, mph, lbs) or metric units (km, km/h, kg), audio signals
on or off and pause time-out duration. In addition you can
enable or disable memory protection from the user set up
mode.
1. Press and hold the STOP key while pressing the
SCAN/SELECT (when meter displays “enter
weight” mode).
2. The meter will display either “EngL” (for English
units) or “ISo” (for metric units). Choose the
desired units by using the arrow keys.
3. Press the SCAN/SELECT key again. The meter
will display either “Aud 1” (= Audio signal on) or
“Aud 0” (= Audio signal off). Choose the desired
parameter by using the arrow keys.
4. Press the SCAN/SELECT key again. The meter
will display either “to 1”, “to 2”, “to 3”, “to 4” or
“to 5” (= time out). Choose the desired pause
time-out duration by using the arrow keys. If you
have chosen e.g. “to 4”, the meter will memorize
the exercising data for 4 minutes allowing you to
continue training within that time without losing
any numerical data.
5. Press the SCAN/SELECT key again. The meter
will display either “PEnb” (memory protection off)
or “PdIS” (memory protection on). When the
memory protection is switched on, the training
programmes saved in the memory of the meter
cannot be modified. Choose the desired
parameter by using the arrow keys.
6. Press the ENTER-key to return to “enter weight”
mode.
2.5. ENTER YOUR WEIGHT
When the treadmill is switched on, the J 660 display will read
“Tunturi J 660” and then display the “enter weight” mode.
1. The small light next to WEIGHT will blink and the
display shows the last entered weight.
2. Set your own weight to the meter in kg or lbs by
using the arrow keys. The unit depends on the
chosen parameter in the user set up mode.
3. Press ENTER to confirm the set weight.
4. The small light next to SPEED turns on and the
display shows 0.0 speed.
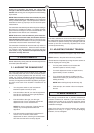
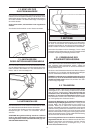
2.6. BEGIN TRAINING
Always hold the handrail for support when getting on or off
the treadmill and when changing the speed during exercise.
Do not jump off the running belt while it is moving!
6
Stand on the landing rails to the left and right of the
running belt. Do not stand on the running belt.
2.7. CHOOSE MANUAL
OR PROGRAMME MODE
2.7.1. MANUAL MODE
If you do not want to use the preprogrammed workouts (see
2.7.2. PROGRAMME MODE), start the training by pressing
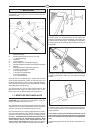
the HARE key (SPEED / FAST) once. The belt will start
moving at 1.5 km/h (or 1.0 mph). Steady yourself by holding
onto the handlebars and carefully stepping onto the moving
belt. Increase speed by pressing the HARE key until the
desired speed is reached. To slow down, press the
TORTOISE key (SPEED / SLOW).
CAUTION! Never step onto the running belt at speeds
greater than 1.5 km/h or 1.0 mph.
If requested you can change the elevation angle of the
treadmill during the training by using the UP and DOWN
arrow keys. The UP-key increases the elevation in 1 %
increments. The back of the treadmill goes down increasing
the elevation. The DOWN-key decreases the elevation in 1
% increments. The back of the treadmill will rise decreasing
the elevation.
2.7.2. PROGRAMME MODE
If you want to choose one of the preprogrammed workouts
or a user programme, press the MEMORY key. NOTE: If a
user programme has not been recorded earlier you can only
choose a preprogrammed workout. Choose the desired
programme alternative by using the arrow keys (SET/
ADJUST). Confirm by pressing the ENTER key.
If you have selected one of the preprogrammed profiles,
press then the arrow keys (SET/ADJUST) until the desired
intensity level is displayed; IL 1 = Beginner, IL 2
= Intermediate, IL 3 = Advanced Intermediate, IL 4
= Advanced, and IL 5 = Athletic. Press the ENTER key to
confirm the selected intensity level.
Start the programme by pressing the HARE key (SPEED/
FAST). The display beeps twice and the running belt begins
to move. The meter also beeps for 15 seconds before each
change in speed and/or elevation during the programme.
2.8. THE SCAN FUNCTION
Pressing the SCAN/SELECT key once starts scanning
through the different computer functions. Each display is
active for 3 seconds. NOTE: Pulse is displayed only when
the pulse transmitter is attached around the chest (see 2.13.
PULSE MEASUREMENT).
By pressing the SCAN/SELECT key again, the SCAN
function will stop and the computer will continue to show the
current function in the display window.
GB