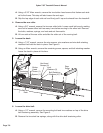
3. Remove the motor cover and side rails.
A. Remove the two Phillips head screws that fasten the motor cover to the frame. Lift the
cover and set it aside. This will allow you to remove the side rails.
B. Using a 3/16” Allen wrench, remove the two button head screws on the sides of each
side rail.
C. Grasp the top edge of each side rail and pull up and away from the deck. This will
enable you to see the deck and edges of the belt. It is not necessary to remove the
side rails completely off the frame.
4. Check the belt and deck condition.
A. Look at the edges of the belt while you roll it by hand. If the belt has any rips or looks
excessively worn the belt needs to be replaced.
B. Run your hand under the belt on the top of the deck surface. If you feel excessive
ridges or cracks, or if the deck feels grooved, yet highly polished, the deck should be
flipped so that an unused surface faces the top. If the deck is worn on both sides it
should be replaced. In time, a worn belt and deck can cause high current draw and
ultimately, motor failure. See Running Belt and Deck in the Removal and Replacement
chapter of the Service Manual.
! WARNING: Keep wet items away from inside parts of the treadmill. Electrical shock
could occur even if the treadmill is unplugged. The motor voltage test
should be performed by a qualified service technician. Do not touch the
resistor labeled R34 or black capacitors to avoid electrical shock.
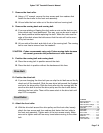
5. Remove the front panel.
A. Using a 3/16” Allen wrench, remove the four button head screws and four starwashers
that hold the front panel in position.
B. Place the front panel on the floor or temporarily screw two of the button head screws
into the frame where they came out, and then hang the front panel on the screws.
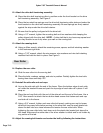
6. Measure motor voltage.
A. Press START/ENTER twice to enter Manual Mode.
B. Without standing on the belt, press the + key to bring the
speed of the treadmill up until the treadmill reaches its
highest speed, 10 mph (20 kph).
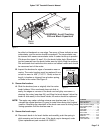
C. Touch the voltage meter leads to the lower board + and -
solder points. See Figure 1. Touch the red lead to
positive, and the black lead to negative. On a 115V unit
the motor voltage at 10 mph (16 kph) with no load should
not go below 83 VDC. On a 220V unit the motor voltage at
Cybex 710T Treadmill Owner’s Manual
Page 7-6
115V
New Motor = 94 VDC
Minimum = 83 VDC (or
12% demag)
230V
New Motor = 191 VDC
Minimum = 168 VDC (or
12% demag)


