


Assembling the Treadmill 27
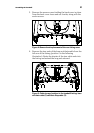
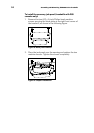
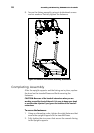
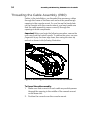
4. Secure the left-hand upright support to the side bracket
using four socket head screws, four black washers, and
two locknuts. Partially tighten the fasteners.
Figure 11: Upright support attachment, left side
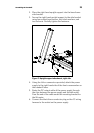
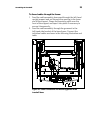
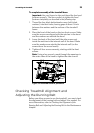
5. Lower the treadmill fairing assembly over the upright
supports and align it to them.
Important: In the following step, take care not to unseat any
of the components in the stop switch.
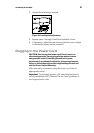
6. Feed the upper end of the cable assembly through the
fairing so that its upper end extends through the bottom
opening in the center column and out the round opening
in the console mounting plate.
7. Route the cable assembly through the cable guides in the
fairing, then wrap the guides around the cable assembly
to secure it. Push any extra cable into the upright support.
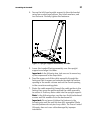
Note: In the following step, use the zinc-finish buttonhead
screws and flat washers from the hardware kit.
Important: Do not wrench-tighten the fasteners in the
following step until the unit has been fully assembled. Make
sure the fasteners do not pinch any cables. The Precor Limited
Warranty does not cover cables damaged by improper
installation.