


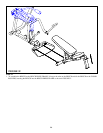
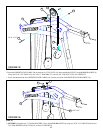
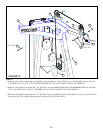

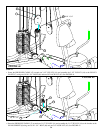


STEP 42:
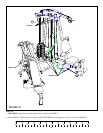
FIGURE 41
3/8 X 1-3/4” 88
3/8 X 2-1/2” 89
32
34
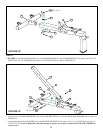
• Assemble two 1” SQ. GLIDES (68) to the PRESS FRAME (32) and two 1” SQ. GLIDES (68) to the inside of the PRESS ADJUST
BRACKETS (37) at the point where the PRESS ADJUST BRACKETS come into contact with the PRESS FRAME (32) as shown in
FIGURE 42.
• Route the PRESS/LEG CABLE (47) around one 4-1/2” PULLEY (43) and assemble the 4-1/2” PULLEY (43) to the PRESS ADJUST
BRACKETS (37) using one 3/8 X 1-3/4” BOLT (88) and one 3/8” LOW HEIGHT LOCK NUT (83). See FIGURE 42.
• Assemble two PRESS ADJUST BRACKETS (37) to the INTERIOR PRESS ADJUST (34) using two 3/8 X 2-1/2” BOLTS (89) and
two 3/8” LOW HEIGHT LOCK NUTS (83) as shown in FIGURE 42.
37
68
83
47
43
35
3/8 X 1-3/4” 88
44
82
9
47
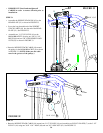
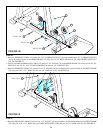
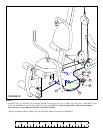
STEP 43:
FIGURE 43
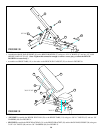
• Route the PRESS/LEG CABLE (47) thru the tube and behind the GUIDE RODS on the BASE FRAME (9) as shown in FIGURE 43.
Slide GUIDE RODS up just enough to get the cable end thru. Push GUIDE RODS down when finished.
• Route the PRESS/LEG CABLE (47) around one 3-1/2” PULLEY (44) and assemble the 3-1/2” PULLEY (44) to the bracket on the
BASE FRAME (9) using one 3/8 X 1-3/4” BOLT (88) and one 3/8” LOCK NUT (82). See FIGURE 43.
83