9.3x Low-Impact Treadmills Assembly Guide 3
Assembly Steps
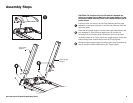
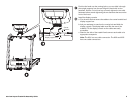
CAUTION: The location of the On/Off switch is beneath the
cutout on the base frame. Make sure the power switch is in the
Off position. Make sure the power cord is disconnected from its
power source.
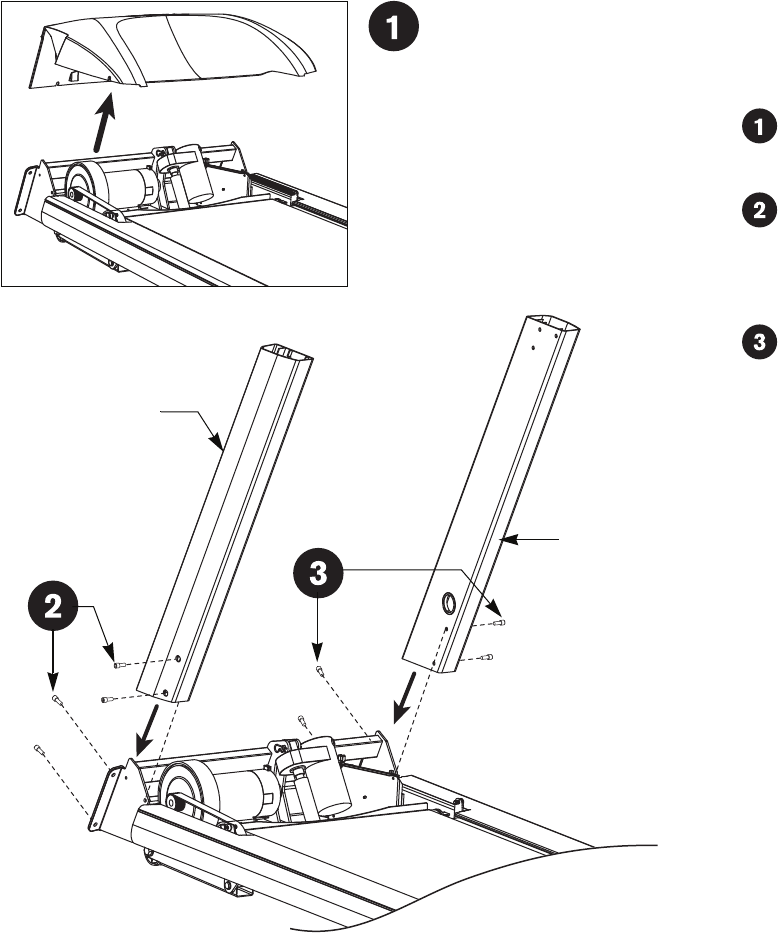
Loosen, but do not remove, the two front fasteners and two side
fasteners on the hood using the ³⁄₁₆-inch hex key. Remove the hood
and set it aside.
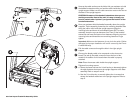
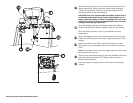
Place the left upright support into the base frame side bracket. Ask
your assistant to insert a socket head screw (A) into the top
mounting hole on the front panel. Thread the screw so the other
mounting holes line up. Then, secure the upright support to the side
bracket using three socket head screws (A). Finger tighten.
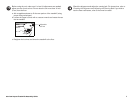
Attach the right upright support by following the same procedure as
step 2 using four socket head screws (A). Finger tighten.
Left Upright
Support
Right Upright
Support


