


ENG-14
Before use
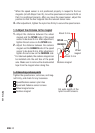
* Select “YES” by pressing the MODE1 or MODE2 button for
the formatting operation. As the formatting operation de-
letes all data, select “NO” for the restarting operation. See
“Formatting/Restarting operation” on page 20 for differ-
ences between the formatting and restarting operations.
The restarting operation will be cancelled if no button has ben *
pushed for 3 minutes and the wristwatch will enter the Clock screen automatically.
In this case, press the 4 buttons simultaneously and do the restart operation again.
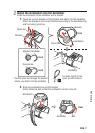
Setting the clock/date
Set the current time and date.
Press and hold the * MODE1 or MODE2 button to increase/decrease the number quickly.
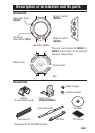
1.
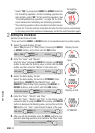
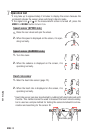
Select the clock display format.
Select “24h (24 hour)” or “12h (12 hour)” pressing the MODE1
or MODE2 buttons, and confirm with the SSS button.
24h
↔
12h :
MODE2
MODE1
(or)
Confirm :
SSS
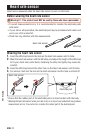
2.
Enter the “Hour” and “Minute”.
Enter the “Hour” pressing the MODE1 to increase, and MODE2
button to decrease the flashing value, confirm with the SSS
button, and then enter the “Minute” in the same way.
Edit value :
MODE2
MODE1
(or)
Confirm :
SSS
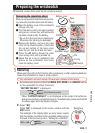
3.
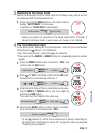
Select the date display format.
Select the date display format from YYMMDD (Year/
Month/Day), DDMMYY (Day/Month/Year) , and
MMDDYY (Month/Day/Year) pressing the MODE1 or
MODE2 buttons, and confirm with the SSS button.
Switch the display :
MODE2
MODE1
(or)
Confirm :
SSS
4.
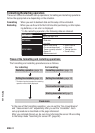
Enter the “Year”, “Month” and “Day”.
Enter the “Year”, “Month” and “Day” in the display order
selected in Step 3 using the MODE1 to increase, and MODE2
button to decrease the flashing value, and confirm with the
SSS button. For “Year”, enter the last 2 digits of the year.
Edit value :
MODE2
MODE1
(or)
Confirm :
SSS
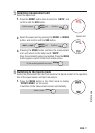
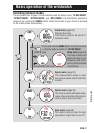
After you set the clock/date, press the
5.
MENU button to com-
plete the restarting operation, and switch to the Clock mode.
To Clock mode (setup is completed):
MENU
2
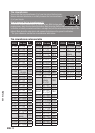
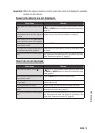
Display format
Formatting
Display format
Hour
Minute
YY/MM/DD