


2240-15
Turning a Track Point’s Display Status On and Off
You can use the following procedure to turn display of track points on (display)
and off (not displayed). When track point display is turned off, no track points
appear on the GPS Mode Plot Screen.
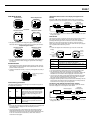
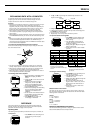
To turn a track point’s display status on or off
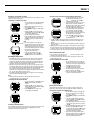
1. While the Plot Screen is on the display in
the GPS Mode, press MENU to display
the FUNCTION Screen.
2. Use K and L to move the cursor to
DISP TRK (Display Track), and then
press ● to display the DISP TRK Screen.
3. Use K and L to move the cursor to ON
(display) or OFF (do not display).
• The initial default setting for all tracks is
display off.
4. After the setting is the way you want,
press ●.
• This saves your settings and returns to
the Plot Screen.
Making a Landmark Your Destination
You can configure a specific landmark so it becomes a “destination landmark,”
which means it is treated as your destination by the watch. If a landmark in
your route plan is a destination landmark, the Graphical Navigation Screen of
the GPS Mode shows the bearing and distance to it. You should always make
a route plan landmark a destination landmark whenever you plan to use the
Graphical Navigation Screen for navigation.
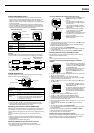
To create a landmark destination
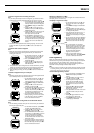
1. While the Graphical Navigation Screen is
on the display in the GPS Mode, press
MENU to display the FUNCTION Screen.
2. The cursor should already be located
next to GO TO, so press ● to display the
GO TO Screen.
3. Use K and L to select the landmark
you want.
• Holding down either button changes the
setting at high speed.
4. Press ●.
• This makes the selected landmark a
destination landmark and returns to the
Graphical Navigation Screen.
Specifying the Bearing Orientation
This setting specifies the watch orientation that should be used when
displaying the bearing on the GPS Mode Graphical Navigation Screen. The
setting you make here specifies whether the top (12 o’clock position) of the
watch is defined as north, or as your current heading (direction of travel). The
watch uses this setting when producing bearing readings on the Graphical
Navigation Screen.
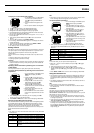
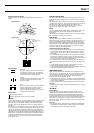
To specify the bearing orientation
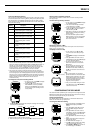
1. While the Graphical Navigation Screen is
on the display in the GPS Mode, press
MENU to display the FUNCTION Screen.
2. Use K and L to move the cursor to
DISPLAY, and then press ● to display
the Bearing Screen.
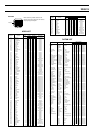
3. Use K and L to select the bearing
orientation you want to use, as described
in the table, below.
Note
• The initial default for this setting is NORTH UP.
4. After the setting is the way you want, press ● to save it and return to the
Graphical Navigation Screen.
Specifying True or Magnetic North
Use this procedure to specify either true (geographic) north or magnetic north
for the northerly indication on the Graphical Navigation Screen. If you select
magnetic north, you must also input the magnetic declination (the angle by
which magnetic north differs from true north). See “USER MAG Setting” for
more information.
To specify true north or magnetic north
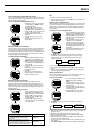
1. While the Graphical Navigation Screen is
on the display in the GPS Mode, press
MENU to display the FUNCTION Screen.
2. Use K and L to move the cursor to
NORTH, and then press ● to display the
NORTH Screen.
3. Use K and L to move the cursor to
TRUE (true north) or USER MAG
(magnetic north), and then press ●.
• If you selected TRUE, pressing ● in the
above step sets true north and returns to
the Graphical Navigation Screen to end
the procedure.
• If you selected USER MAG in the above
step, perform steps 4 and 5 below.
4. Use MODE to move the flashing around the display in the sequence
shown below, and specify how many degrees it is east or west from
magnetic north to true north in relationship to your current position
(magnetic declination).
E/W
Declination value digits
• See “To change a numeric setting”.
• When the E/W setting is selected, use K and L to toggle it between E
and W.
5. After everything is the way you want, press ● to save your settings and
return to the Graphical Navigation Screen.
Setting an Arrival Alarm
You can specify a distance value, so the arrival alarm beeps once when you
reach a point that is the specified distance from your destination.
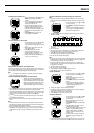
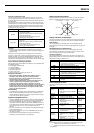
To set the arrival alarm
1. In the Timekeeping or GPS Mode, press
MENU twice to display the MENU
Screen.
2. Use K and L to move the cursor to
SET UP, and then press ● to display the
SET UP Screen.
3. Use K and L to move the cursor to
ALARM, and then press ● to display the
Alarm Setting Screen.
4. Use K and L to move the cursor to
ARRIVAL ALM, and then press ●.
5. Use MODE to move the flashing around the display in the sequence
shown below.
Distance (integer) Distance (decimal)
ARRIVAL ALM
ON/OFF
6. While the distance digits are selected (flashing), use K (+) and L (–) to
change the setting.
• Holding down either button changes the setting at high speed.
• While the ARRIVAL ALM ON/OFF setting is selected, use K and L to
toggle the arrival alarm on and off.
7. After everything is the way you want, press ● to exit the Setting Screen
and return to the Alarm Setting Screen.
8. Confirm that the cursor is next to DONE and then press ● to return to the
SET UP Screen.
9. Press MODE or MENU twice to return to the Timekeeping or GPS Mode.
L
L
NORTH UP
HEADING UP
Define the top of the watch as north for all GPS
measurement modes (One-Shot, AUTO,
Continuous)
Define the top of the watch as your current
heading for heading measurements in the
Continuous Mode only. NORTH UP orientation is
used for One-Shot and AUTO measurements
To do this: Select this orientation:
L
L
L