EPSON Stylus Pro 7000 Revision B
Adjustment Self-Diagnostic Mode Menus 184
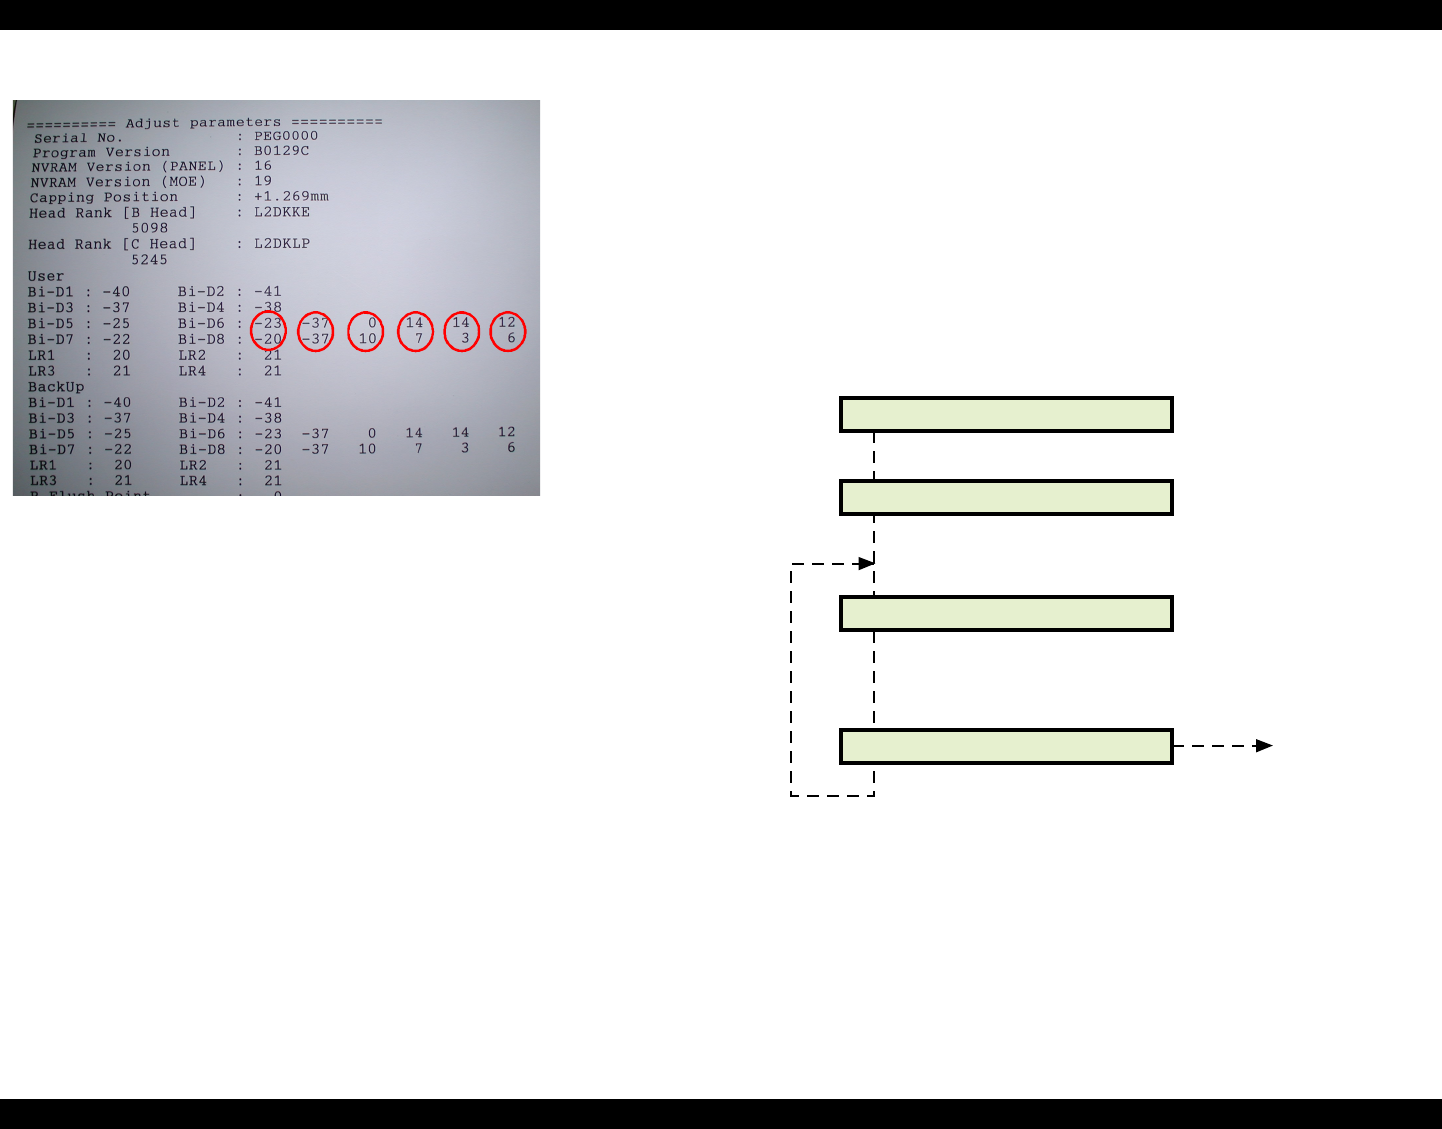
Figure 5-26. Adjustment Parameter Printout
3. Press Item to make sure “Print: Adj Variables” appears, and then press
Enter. The printer prints a list of adjustment patterns related to the logical
printhead positioning.
4. Using this list and referring to Figure 5-25 and Figure 5-26, you can easily
determine whether or not the current parameters are correct.
To modify the adjustment parameters:
1. Enter the Self Diagnostics mode by holding down the “Paper Feed +”,
“Paper Feed -”, and “Enter” buttons while turning on the printer.
2. Press the Item button until “Check: Adjustment” appears on the display, and
then press Enter.
3. Press the Item button until “Adj:Bi-d” appears on the display, and then
press Enter.
4. Make sure “[Enter] Adjust Print” appears, and press Enter. The printer prints
the Bi-D adjustment patterns, and “BiD, 200, N, B y” appears on the display
when finished. (y = adjustment value)
Figure 5-27. Bi-D Adjustment Operation
5. Determine which patterns are incorrect and need adjustment. You judge
patterns #1~5 and 7 the same as always; they are correct if they line up
vertically. See Figure 5-25 for details on judging the correct item in
patterns #6 and #8.
Adjust parameters printout:
User = current parameters
BackUp = Default parameters
Circled numbers are for the two new adjustment patterns;
#6 = normal dot, #8 = micro dot
1 = Overall Bi-D values
2 = Initial stored values (always = -37)
3 = Current Base values
4 = Light Cyan adjustment values
5 = Light Magenta adjustment values
6 = Yellow adjustment values
[Enter] Adjust Print
Printing Pattern
[SelecType]/[Item]
BiD, XXX, Y, Z: O
XXX="300" or "200"/
Y="N" or "M"
Z="B" or "C"
Based on the printed pattern, make sure each
numbered pattern is vertically aligned.
[Enter]
End
adjustment/
next menu
Bi-D End
