EPSON Stylus Pro 7000 Revision B
Adjustment Self-Diagnostic Mode Menus 170
P_EDGE Sensor adjustment
1. If necessary, remove the access cover on the rear cover and enter the
"Test Menu" in the self-diagnostic mode. Select "Sensors" check mode
2. Select “Sen:EdgeAD” from the sensor menu.
3. Push the cutter cap to release the carriage lock and move the carriage
about 20cm (roughly 9 inches) to the left. Make sure the panel shows 018
or less.
4. Push the Paper Set Lever back and load a sheet of A3-size (portrait)
normal copy paper using the guide on the right side of the roll paper
cover. Pull the Paper Set Lever forward to lock the paper in place.
5. Open the front cover, and press down the cutter and move the carriage
over the paper. Close the front cover.
6. The LCD will display “Sen:EdgeAD ttt vvv”
ttt = threshold; 0E0~0E8; ideal = 0E0
vvv = volume; 040 or more
Make sure that the vvv signal level indicated on the LCD is over 040 and
the ttt signal level indicated on the LCD is between 0E0~0E8.
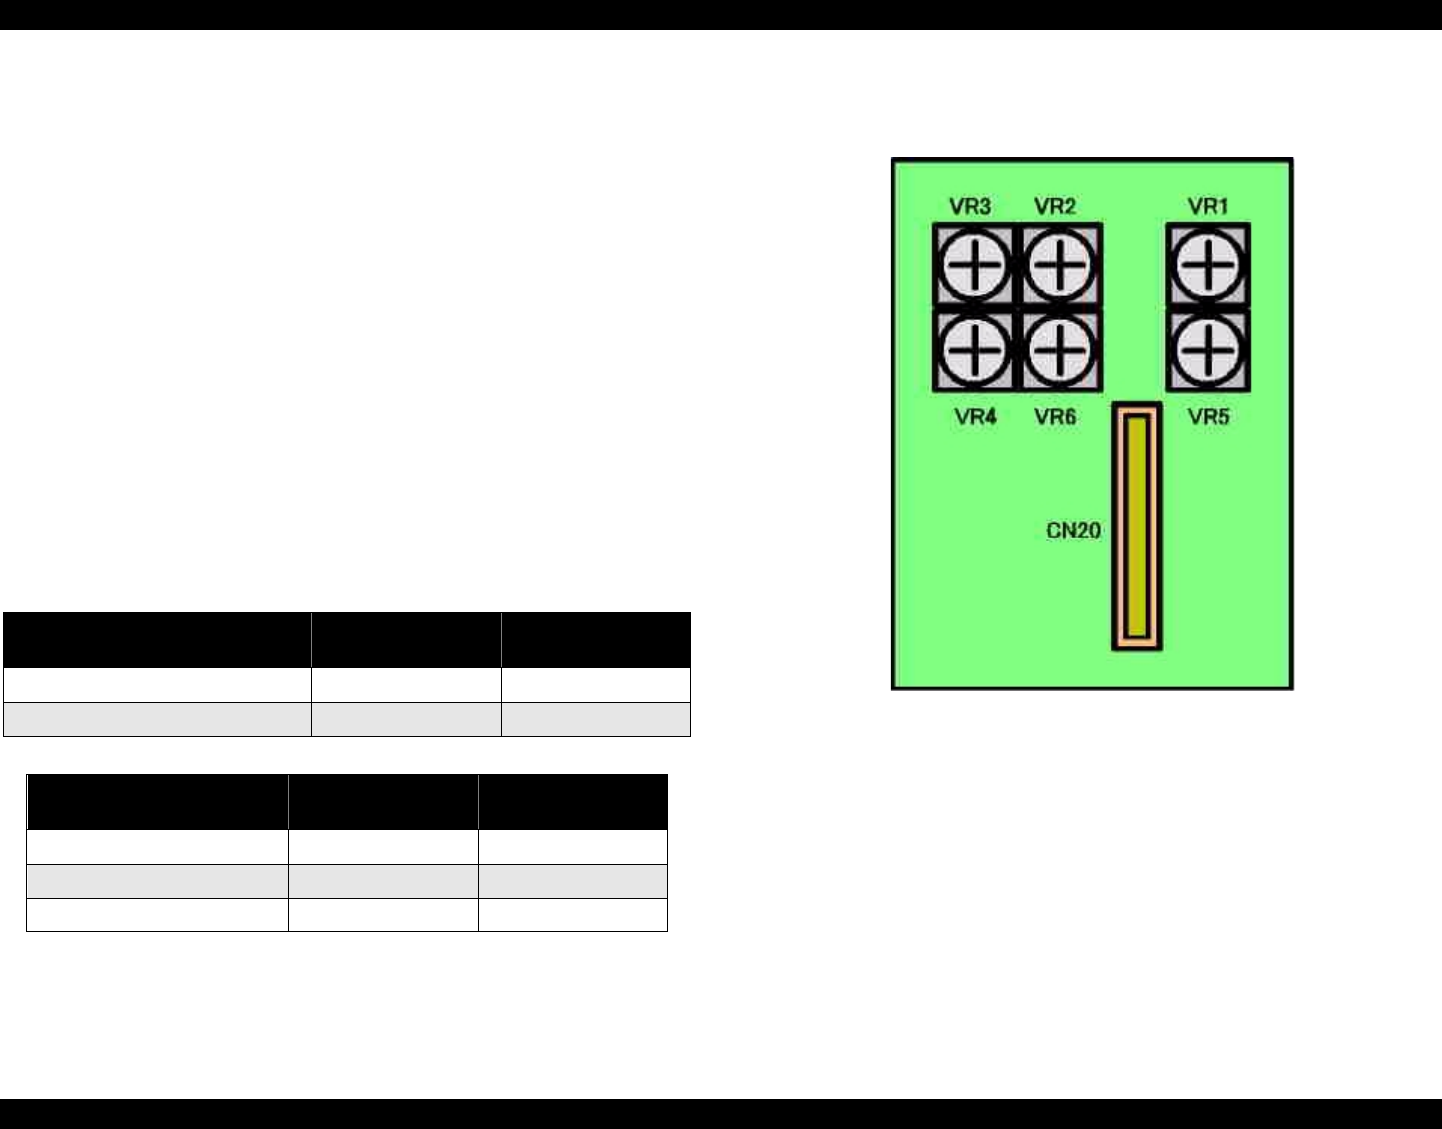
7. Through the access cover, adjust the volume on
VR1
(rough adjustment)
and
VR5
(precise adjustment) so that vvv = 0E0~0E8. However, if ttt = less
than 040, adjust vvv to 0E8.
Figure 5-7. VR1~VR6 Positions Viewed Through Access Cover
NOTE: If the signal level cannot be adjusted properly, check the
position of the sensor and if this does not correct the signal
level, replace the sensor.
8. Open the front cover, and move the carriage back to the home position.
9. Release the Paper Set Lever, remove the paper, and return the Lever to
the Set position. Then press the SelecType button and proceed to the
next sensor adjustment (if necessary).
Table 5-6. P_Edge, P_Front, and P_Rear Sensor Adjustment
Sensor
ttt Parameter
(no paper)
vvv Parameter
P_Edge 040 or higher 0E0~0E8
P_Front & P_Rear 040 or higher 095 or less
Table 5-7. Sensor Volume Adjustment
Sensor
Rough Volume
Adjustment
Precision Volume
Adjustment
P_Edge VR1 VR5
P_Front VR2 VR6
P_Rear VR3 VR4
