


3
11
Functional verification
This procedure helps to confirm the proper operation of the Micropaq monitor. No monitor
disassembly is required. The following equipment is required:
Visual check
Perform this check if the monitor is being serviced in the field by a biomedical/clinical
engineer.
1. Verify the rubber gasket is not protruding from the case.
2. Verify the rubber feet and screw plugs have been installed.
3. Verify the screw covers are in place over all four screws in the battery compartment
and the small recessed connector next to the battery connector is covered.
4. Verify the SpO
2
connector and connector clip (Model 408) or cover (Model 406) are
not cracked or broken.
5. Verify the correct labels have been applied to the case. (See “Attaching labels” on
page 58 for Model 408 monitors or “Attaching labels” on page 74 for Model 406
monitors.)
a. Verify the correct rear case label and battery label are attached.
b. Verify the serial number label is attached and that the correct information has
been recorded for the model number, part number and serial number.
c. Verify the clear label cover has been applied over the serial number label, if serial
number label has been replaced.
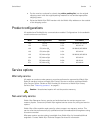
Model Required equipment
406 and 408 • Fluke Patient Simulator PS415, PS420, or MPS450 (or equivalent ECG patient simulator)
• Micropaq ECG Cable (008-0522-XX)
• Fully charged battery
• Access to a properly functioning FlexNet network with an access point within range
408 with
Masimo
• Masimo adult SpO
2
sensor for finger (008-0960-00)
• Fluke Index 2 Pulse Oximetry Simulator with optical finger for sensor connection (or equivalent)
408 with
Nellcor
• Nellcor adult SpO
2
sensor for finger (900-0021-00)
• Fluke Index 2 Pulse Oximetry Simulator with optical finger for sensor connection (or equivalent)
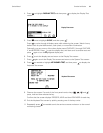
Note
The screen shot examples in this section are for reference only. The content of
the examples may differ from the screens on your monitor.