40
BELT TENSION AND ALIGNMENT
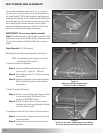
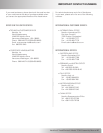
Figure 1
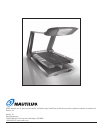
Figure 2:
Belts are correctly aligned when
1/8 inch of roller is showing.
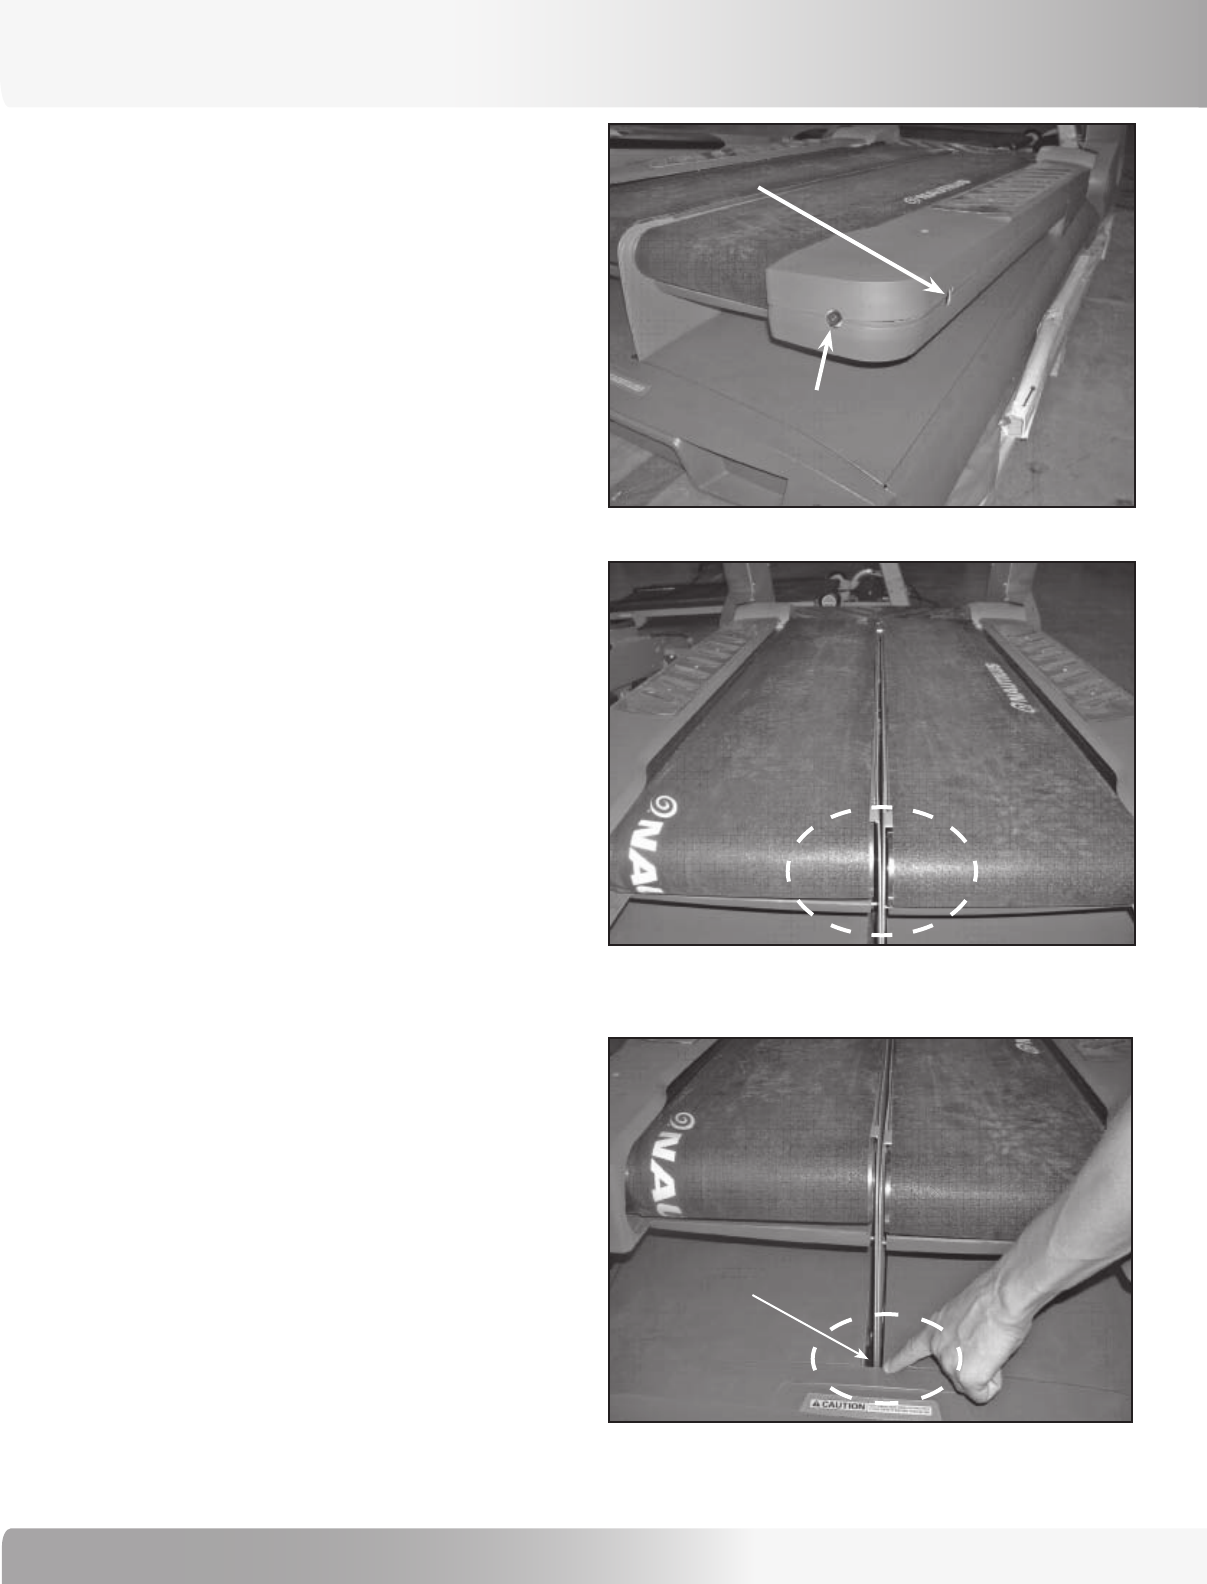
Figure 3:
Tension is too tight, treadle guards are rubbing.
To correct loosen tensioning adjustment screw.
Alignment adjustment
Tensioning adjustment
Tension is slightly off.
During initial installation, within the first 1- to -4 hours of
use, and daily for the first week of use, the treadle belts on
the TreadClimber® TC916 need the tension and alignment
inspected and adjusted. As the TreadClimber® treadle belts
stretch through use it will become necessary to tension the
belts. Adjust the belt tension whenever the belt slips or
moves unsteadily during operation. Failure to follow these
instructions could seriously impact performance.
IMPORTANT- Do not over tighten treadle
belts! The belt need only be tight enough to prevent it from
slipping during use. Excessive belt tension will decrease belt
life and can damage the TreadClimber® rollers and drive
system.
Tools Needed: 5/16 Allen wrench
Belt alignment and tensioning adjustments (see Figure 1).
NOTE: The adjustments are the same on the right
and left side of the machine.
To check for proper belt alignment:
Step 1: Operate TreadClimber® machine so belt is
running at 2.5 - 3 mph (4.0 - 4.8 km/h).
Step 2: Belt is aligned when 1/8” of roller is showing
(see Figure 2).
Step 3: Tightening alignment screw clockwise moves
belt out, loosening screw counter-clockwise
moves belt in.
To check for proper belt tension:
Step 1: Tension is correct when gap between treadles
is even and centered. See Figure 3 for an
example of INCORRECT tension.
Step 2: Tighten (clockwise turn) or loosen (counter-
clockwise turn) tensioning adjustment located
at the end of the treadle.
To completely loosen belt if you want to start from scratch:
Step 1: Totally loosen off alignment screw by turning
counter-clockwise.
Step 2: Loosen tensioning screw by turning counter-
clockwise.


