••
•
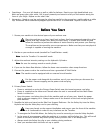
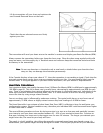
Quadriceps - Put your left hand on a wall or table for balance. Reach your right hand behind your
back and grasp your right ankle. Pull it gently toward your buttocks until you feel tension along the
front of your thigh. Repeat on the other side.
••
•
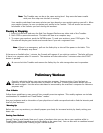
Hamstring - Stand on one leg and prop the other leg parallel to the ground on a stable cabinet or table
top. Slide both hands toward the propped up ankle as far as is comfortable. Repeat on other side.
BeforeBefore
Before
YouYou
You
StartStart
Start
1. Situate your machine in the desired space of your workout area.
Place the machine on a clean, hard, level surface, free from unwanted material or other
objects that may hamper your ability to move freely. A rubber mat should be used
below the machine to prevent the release of static electricity and protect your ooring.
The machine can be moved by one or more persons. Make sure that your own physical
strength is capable of moving the machine.
2. Decide on your workout mode (treadmill or TreadClimber
®
mode).
Note:Note:
Note:
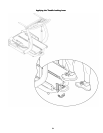
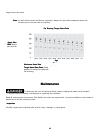
Lock the Treadles if in treadmill mode.
3. Adjust the workout intensity settings on the Hydraulic Cylinders.
Note:Note:
Note:
Be sure the settings match on each cylinder.
4. If you use the Heart Rate Monitor, follow the heart rate transmitter chest strap directions.
5. Connect the power cord to the machine and into a grounded AC Wall Outlet.
Note:Note:
Note:
The machine can be equipped with an external circuit breaker.
Put the power cord alongside the machine, out of your way when you dismount the
machine. Prevent stepping on the power cord and plug.
6. Primary Power Switch.
••
•
Power is switched on using the Primary Power Switch near the incoming power cord plug.
••
•
Power is supplied to the motor and Console when the unit is connected and the Main Power
Switch is turned on.
••
•
Keep the power cord along the side of the machine and out of your way. Attach the power
plug to prevent stepping on it. Always make sure of the location of the cord and plug before
your workout.
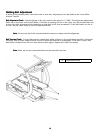
7. Straddle the belts and stand on the Side Foot Support Platforms. Put the Safety Key into the Safety
Keyhole and clip the Safety Key cord to your clothing.
Keep your hands on the support Handlebars and stay as near the front of the machine
as is comfortable in order to stay in balance on the Treadles.
••
•
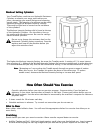
To energize the Drive Belt Motor, the Safety Key must be correctly put into the Safety Keyhole.
••
•
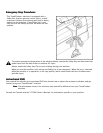
In the event of an emergency while the machine is in motion, pull the Safety Key. This will cut all
power to the belts and will stop them quickly (brace yourself—this is an abrupt stop).
••
•
Always attach the Safety Key clip to your clothing during workouts.
••
•
Start your workout when the belts are up to speed.
1111
11


