


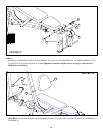
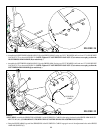
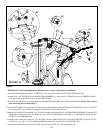
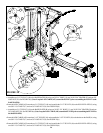
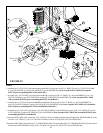
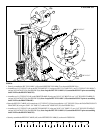
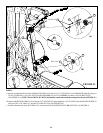
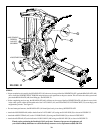
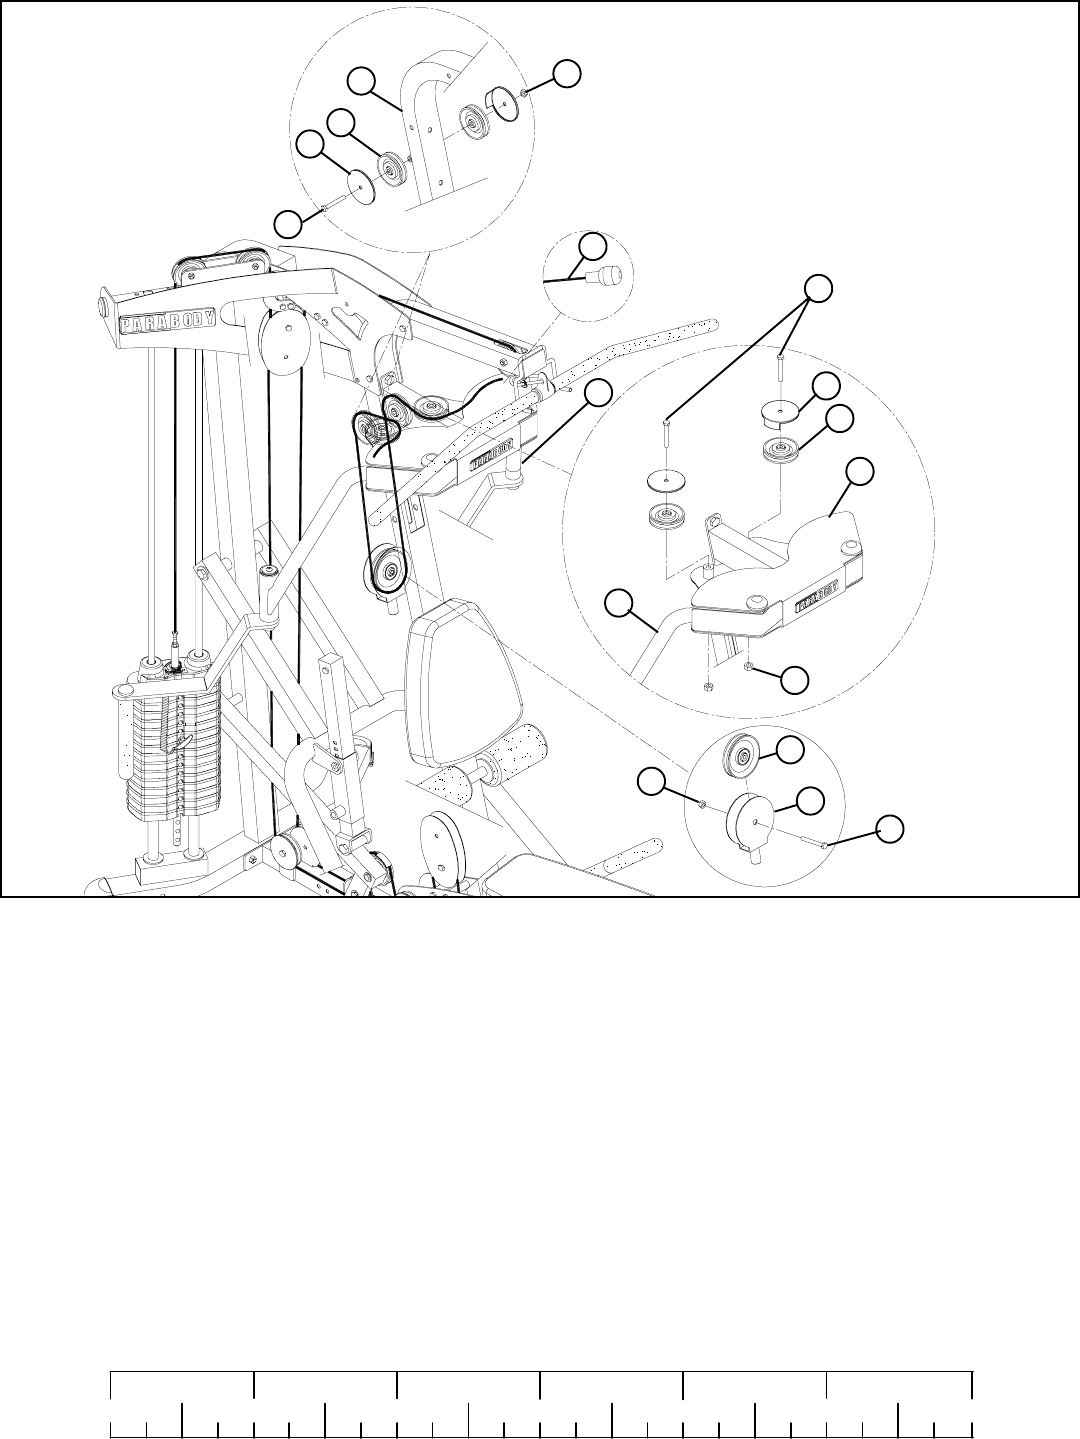
STEP 30:
FIGURE 30
28
• Securely assemble the PEC FLY CABLE (AX) to the RIGHT PEC FLY ARM (T) as shown in FIGURE 30(a)
• Assemble one 3-1/2” PULLEY (49) to the PEC FLY MOUNT (13) using one 3/8 X 2-3/4” BOLT (15), one 3-1/2” PULLEY GUARD (C)
and one 3/8” LOCK NUT (28). See FIGURE 30(a) (Note: Loop the PEC FLY CABLE (AX) around the PULLEY prior to assembling
the PULLEY to the PEC FLY MOUNT.)
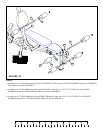
• Assemble two 3-1/2” PULLEYS (49) to the FRONT FRAME (E) using one 3/8 X 5-3/4” BOLT (9), two 3-1/2” PULLEY GUARDS (C)
and one 3/8” LOCK NUT (28). See FIGURE 30(b) (Note: Loop the PEC FLY CABLE (AX) around the PULLEY prior to assembling
the PULLEY to the FRONT FRAME.)
0
1
2
345
6
1/2 1/2 1/2 1/2 1/2 1/2
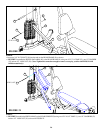
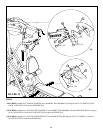
• Route the PEC FLY CABLE (AX) around one 4-1/2” PULLEY (50) and assemble the 4-1/2” PULLEY (50) to the FLOATING PULLEY
BRACKET (W) using one 3/8 X 1-3/4” BOLT (17) and one 3/8” LOCK NUT (28). See FIGURE 30(c)
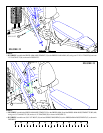
• Securely assemble the PEC FLY CABLE (AX) to the LEFT PEC FLY ARM (S) as shown in FIGURE 30.
• Assemble one 3-1/2” PULLEY (49) to the PEC FLY MOUNT (U) using one 3/8 X 2-3/4” BOLT (15), one 3-1/2” PULLEY GUARD (C)
and one 3/8” LOCK NUT (28). See FIGURE 30(a) (Note: Loop the PEC FLY CABLE (AX) around the PULLEY prior to assembling
the PULLEY to the PEC FLY MOUNT.)
E
15 3/8 X 2-3/4”
17 3/8 X 1-3/4”
3/8 X 5-3/4” 9
W
50
S
28
49
28
C
49
28
U
C
AX
T
(b)
(a)
(c)