


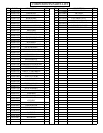
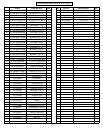
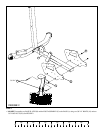
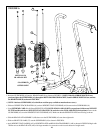

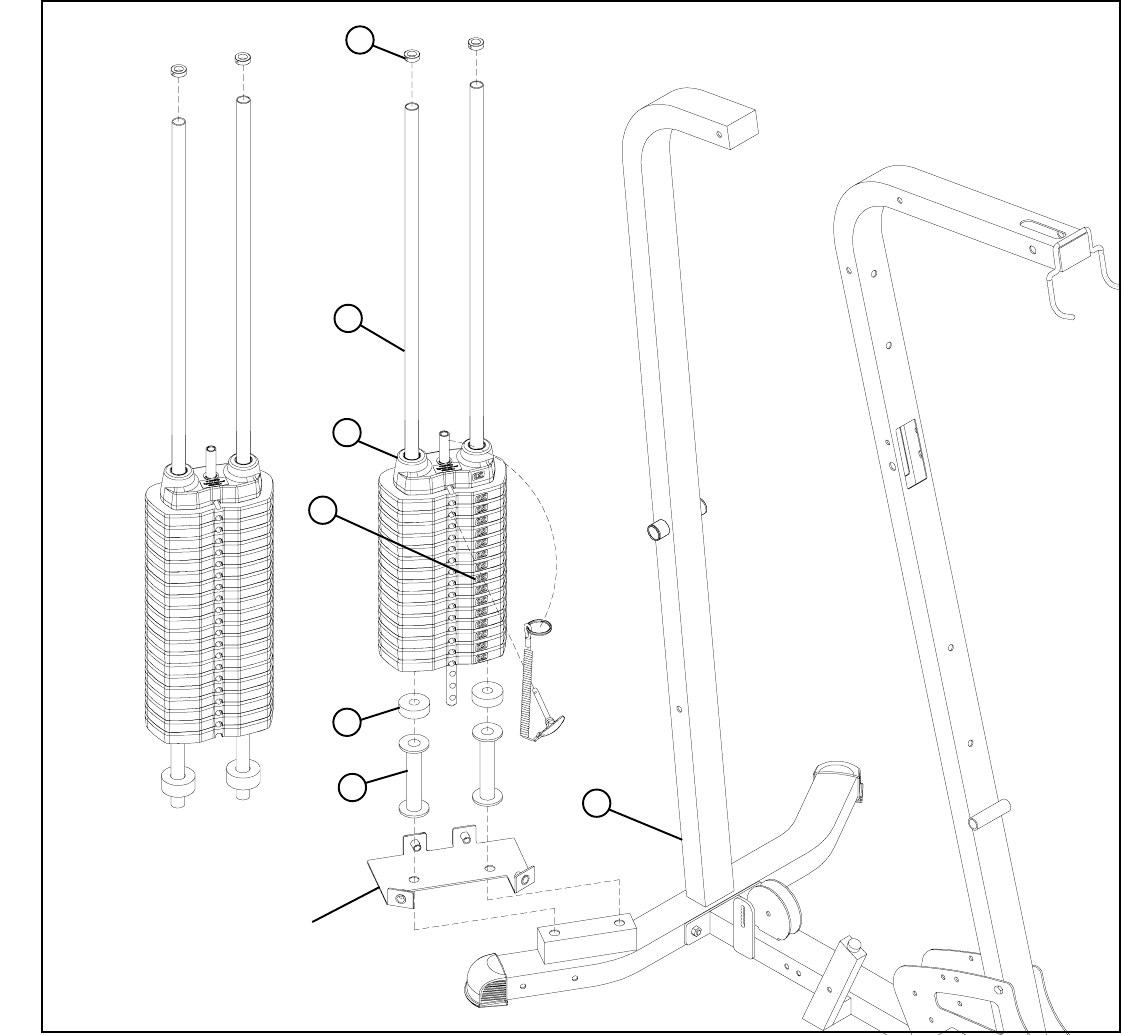
FIGURE 6
STEP 6:
10
• Insert two GUIDE RODS (AI) into the REAR FRAME (O) as shown on FIGURE 6. (NOTE: If theGS-6 SHROUD OPTION was
purchased, place the GUIDE RODS (AI) through the BOTTOM SHROUD BRACKET (found in SHROUD OPTION box) and into
the REAR FRAME (D) as shown in FIGURE 6.
• Slide two WEIGHT STACK SPACERS (AJ), and two WEIGHT STACK CUSHIONS (AN) down over the GUIDE RODS (AI).
• Using EXTREME CARE slide all fifteen WEIGHT PLATES (NOTE: If 50-LB. ADD-ON KIT was purchased, slide twenty WEIGHT
PLATES and discard the two WEIGHT STACK SPACERS (20) and refer to the 50 LB. ADD-ON Kit instructions) down over the
GUIDE RODS (AI) on to the WEIGHT STACK CUSHIONS (AN). Make sure that the WEIGHT PLATES are all facing as shown.
• Slide the HEAD PLATE ASSEMBLY (AK) down over the GUIDE RODS (AI) onto the weight stack.
• Slide two SHAFT COLLARS (37) over the GUIDE RODS (AI) as shown in FIGURE 6.
• (NOTE: Lubricate GUIDE RODS (AI) with silicon or teflon spray available at most hardware stores.)
GS-6 SHROUD
OPTION ONLY!
D
• Apply WEIGHT STACK LABELS (AZ) to WEIGHT PLATES and HEAD PLATE ASSEMBLY (AK) as shown in FIGURE 6. Begin with
number one at the HEAD PLATE (AK) with larger numbers in consecutive order towards bottom of weight stack.
OPTIONAL 50
LB. ADD-ON KIT
AZ
AK
AI
37
AN
AJ