


13
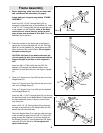
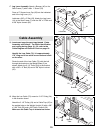
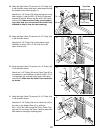
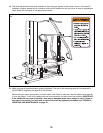
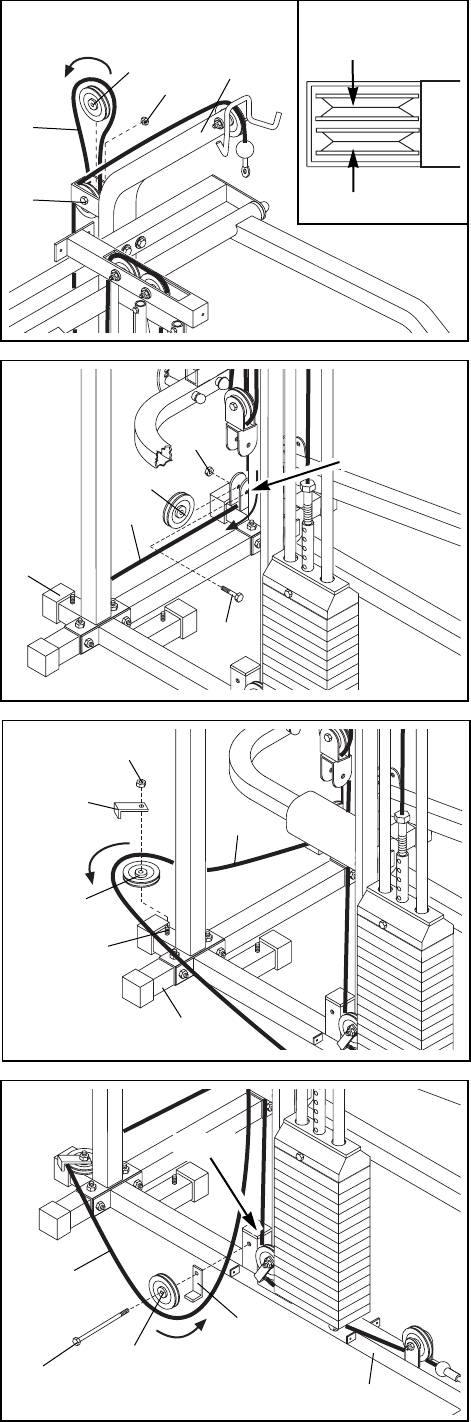
29. Wrap the High Cable (73) around a 3 1/2Ó Pulley (24)
in the direction shown.
Attach the 3 1/2Ó Pulley (24) to the bracket on the
Stabilizer (4) with a 3/8Ó x 2Ó Bolt (54) and a 3/8Ó
Nylon Locknut (50).
29
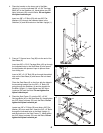
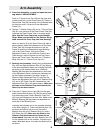
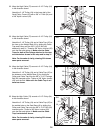
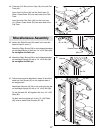
28. Wrap the High Cable (73) around a 3 1/2Ó Pulley (24)
in the direction shown and route it back down through
the bracket on the Main Upright (1).
Attach the 3 1/2Ó Pulley (24) inside the bracket on the
Main Upright (1) with the 3/8Ó x 3Ó Bolt (53) that was
inserted in step 26. Secure the Bolt with a 3/8Ó Nylon
Locknut (50). Make sure the Pulley you are attach-
ing in this step is on the correct side of the Pulley
attached in step 26 (see the inset drawing).
28
50
1
73
53
4
54
24
73
50
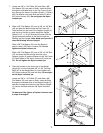
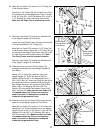
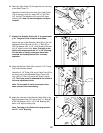
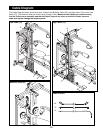
30. Wrap the High Cable (73) around a 3 1/2Ó Pulley (24)
in the direction shown.
Attach the 3 1/2Ó Pulley (24) and a Cable Trap (25) to
the sidearm on the Stabilizer (4) with the 3/8Ó x 3 1/2Ó
Carriage Bolt (62, inserted earlier) and a 3/8Ó Nylon
Jamnut (63). Make sure the Cable Trap is oriented
as shown.
30
24
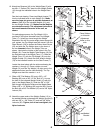
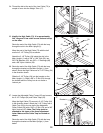
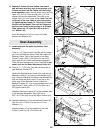
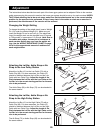
31. Wrap the High Cable (73) around a 3 1/2Ó Pulley (24)
in the direction shown.
Attach the 3 1/2Ó Pulley (24) and a Cable Trap (25) to
the riser on the Weight Base (5) by sliding a
3/8Ó x 4 3/4Ó Bolt (46) through the Pulley, Cable Trap
and riser. Do not use a 3/8Ó Nylon Locknut unless the
Bolt slides out during the following step.
31
Riser
25
24
5
73
46
Second Pulley
Top View
First Pulley
24
25
62
73
4
63
1
Bracket