


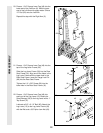


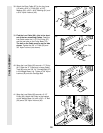
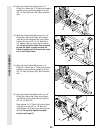
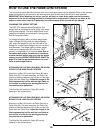
45. Attach the Low Cable (89) to a Small “U”
Bracket (32) with a 1/4” Nylon Locknut (44)
and a 1/4” Washer (37). Do not completely
tighten the Nylon Locknut. It should be
threaded onto the end of the Cable so only
a couple of threads are showing above the
Nylon Locknut, as shown in the inset
drawing.
Attach the Small “U” Bracket (32) to the indi-
cated Weight Tube (25) with a 5/16” x 1 3/4”
Bolt (68) and a 5/16” Nylon Locknut (40).
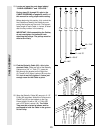
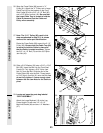
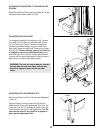
46. Find the Press Cable (88). Attach the end of
the Press Cable (88) to the Large “U” Bracket
(84) with a 1/4” Nylon Locknut (44) and a 1/4”
Washer (37). Do not completely tighten the
Nylon Locknut. It should be threaded onto
the end of the Cable so only a couple of
threads are showing above the Nylon
Locknut, as shown in the inset drawing.
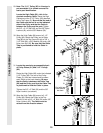
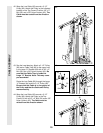
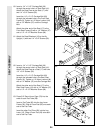
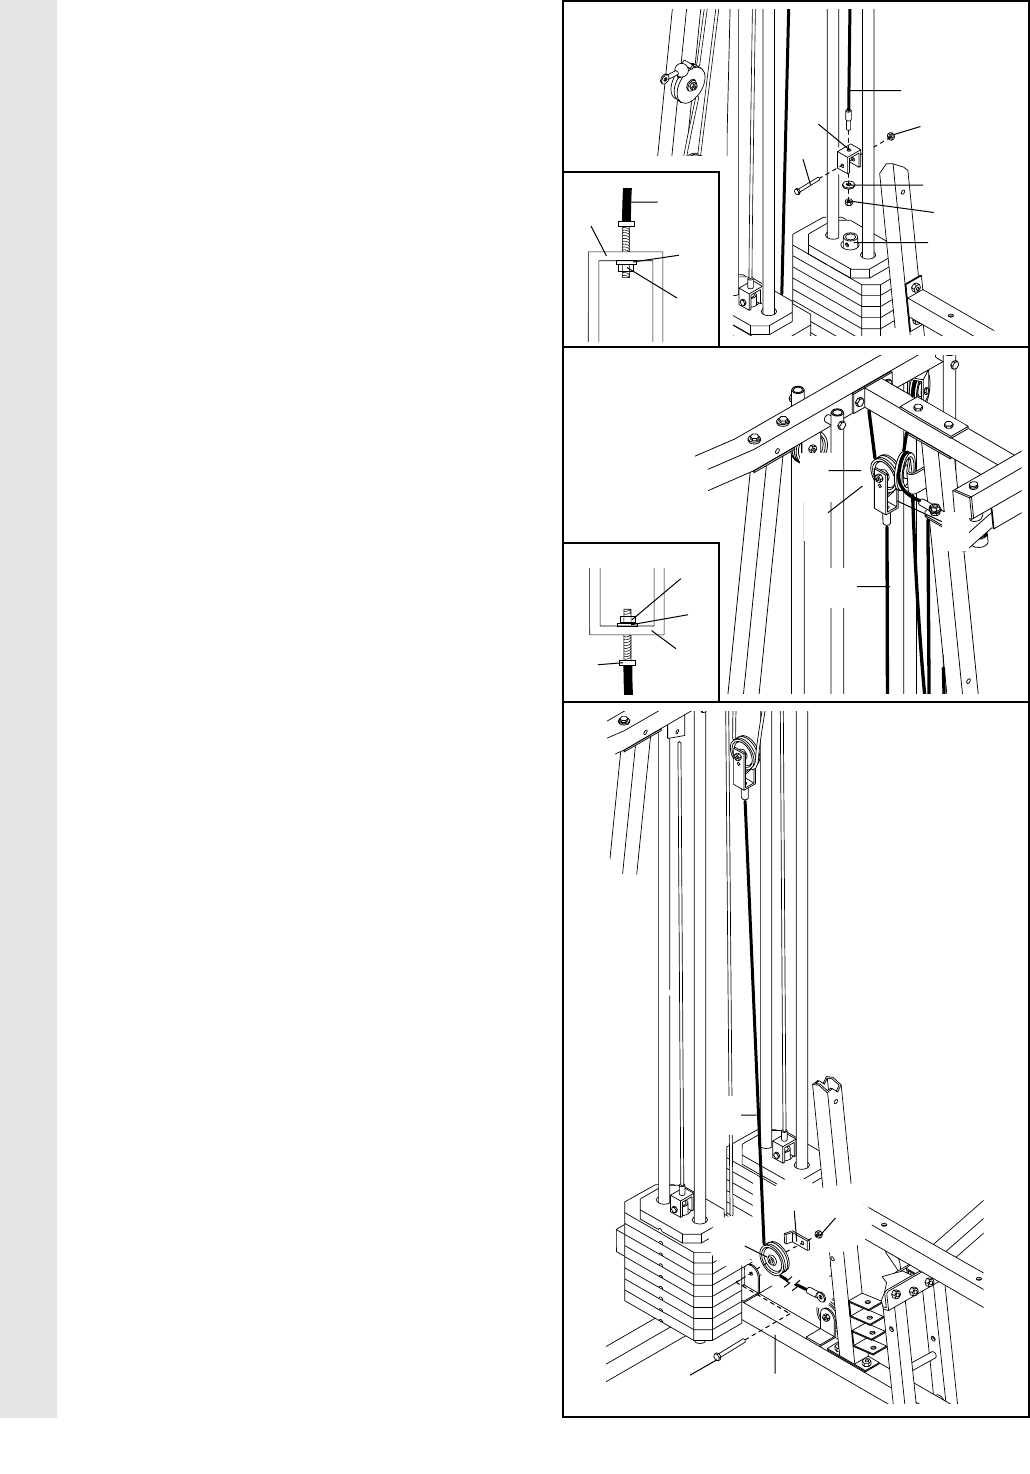
47. Note: The 3 1/2” Pulley (82) in this step is
pre-assembled. It is shown dis-assembled
for easier part identification.
Route the Press Cable (88) around the 3 1/2”
Pulley (82) attached to the indicated bracket
on the Press Base (13). Be sure that the
Cable is in the groove of the Pulley and
that the Cable Trap (80) is turned as shown
to hold the Cable in place. Tighten the 3/8”
x 2” Bolt (50) and the 3/8” Nylon Locknut (42).
45
46
47
20
CABLE ASSEMBLY
37
44
25
32
68
89
40
89
44
32
37
88
37
84
44
88
50
13
82
80
42
44
37
84
88