


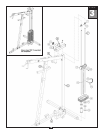

Preparations
CAUTION: To set up this unit, you will need assistance. Do not attempt assembly by yourself.
You must review and follow the instructions in this Owner’s Manual. If you do not assemble and use the G6B
according to these guidelines, you could void the Body-Solid warranty.
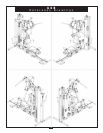
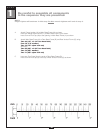
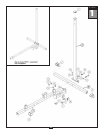
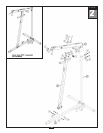
The G6B unit comes in eight boxes. Be careful to
assemble components in the sequence presented in
this guide.
NOTE: With so many assembled parts, proper alignment
and adjustment is critical. While tightening the nuts
and bolts, be sure to leave room for adjustments.
8
CAUTION: Obtain assistance! Do not attempt to assemble
the G6B by yourself. Review the Installation
Requirements before proceeding with the following
steps.
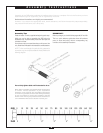
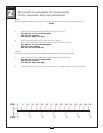
Required Tools
The tools that you must obtain before assembling
the G6B include:
3mm Allen Key
4mm Allen Key
5mm Allen Key
6mm Allen Key
8mm Allen Key
9/16” Open-End W
rench
11/16” Open-End Wr
ench
13/16” Open-End Wrench
3/4” Open-End Wrench
9/16” Box Wrench
11/16” Box Wrench
13/16” Box Wrench
3/4” Box Wrench
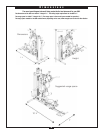
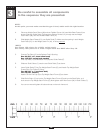
Installation Requirements
Follow these installation requirements when assembling
the G6B:
Set up the G6B on a solid, flat surface. A s
mooth, flat
surface under the machine helps keep it level. A
level machine has fewer malfunctions.
Provide ample space around the machine. Open
space around the machine allows for easier access.
Insert all bolts in the same direction. For aesthetic
purposes, insert all bolts in the same direction unless
specified (in text or illustrations) to do otherwise.
Leave room for adjustments. Tighten fasteners such as
bolts, nuts, and screws so the unit is stable, but leave
room for adjustments. Do not fully tighten fasteners
until instructed in the assembly steps to do so.
Fill out and mail warranty card.