


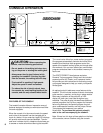
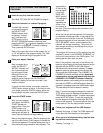
Refer to the drawing at the top of page 8.
A. Telephone—The built-in telephone allows you to
answer or make telephone calls without leaving the
treadmill. The telephone can also be used to call
E-Coach
®
for a Personal Trainer program.
B. Water Bottle Holder—Keeps your water bottle
handy during your workouts.
C. Accessory Tray—Holds your radio or other items.
D. Reading Rack—Allows you to enjoy your favorite
magazine or read a book while you get in shape.
E. Incline Buttons—These buttons control the incline of
the treadmill. Each time one of the buttons is
pressed, the incline will change by 0.5%. The incline
range is 2% to 10%.
F. Stop Button—This button is used to stop the walking
belt. If the button is pressed once, the values of the
LED displays will be retained. If the button is held
down for two seconds, the elapsed time, distance,
incline, and numbers of calories and fat calories
burned will be reset.
G. Speed Buttons—These buttons control the speed of
the walking belt. Each time one of the buttons is
pressed, the speed will change by 0.1 mph. The
speed range of the walking belt is 1 mph to 10 mph.
H. Key with Clip—This key turns the console on and
off. The attached clip is designed to be worn on your
waistband. If the key is pulled from the console, the
power will automatically turn off.
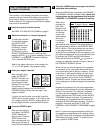
I. Operating Instruction Indicators—These indicators
will guide you through basic console operation. Note:
The SELECT AGE indicator is used only with the
optional pulse kit.
J. Program Display—This display tracks your progress
during workout programs, and shows upcoming
speed or incline changes.
K. Enter Button—This button is used to enter selections.
L. Start Button—This button starts the walking belt.
M.Personal Trainer Button—This button is used to ac-
tivate Personal Trainer Programs. (See PERSONAL
TRAINER PROGRAMS on page 15.)
N. SELECT Buttons—These buttons are used to make
various selections.
O. Learn Button—This button is used to program the
Learned 1 and Learned 2 programs.
P. Monitor Displays—The large LED displays
provide continuous feedback of elapsed time,
speed, distance, incline, and the numbers of calo-
ries and fat calories you have burned.
Q. Manual/Program Indicators—These indicators show
whether the manual mode or one of the workout
programs is selected.
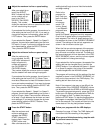
R. Program Profiles—These profiles show how the
speed or incline of the treadmill will change during
workout programs. During the Speed 1 program, for
example, the speed will gradually increase during
the first half of the program, and then gradually de-
crease during the last half.
S. Personal Trainer Program Indicators—These indica-
tors show when a Personal Trainer program is se-
lected. (See PERSONAL TRAINER PROGRAMS
on page 15.)
T. Optional Pulse Kit—An optional pulse kit includes a
state-of-the-art chest strap pulse monitor, a receiver,
and a plug-in pulse module. After easy installation of
the pulse kit, an LED display will track your heart
rate during your workouts. The pulse kit also
includes three additional workout programs: the Fat
Burn program, the Aerobic program, and the unique
Fitness Test program. To purchase the optional
pulse kit, refer to the card accompanying the
treadmill.
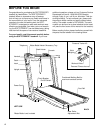
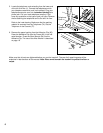
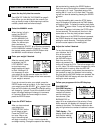
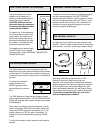
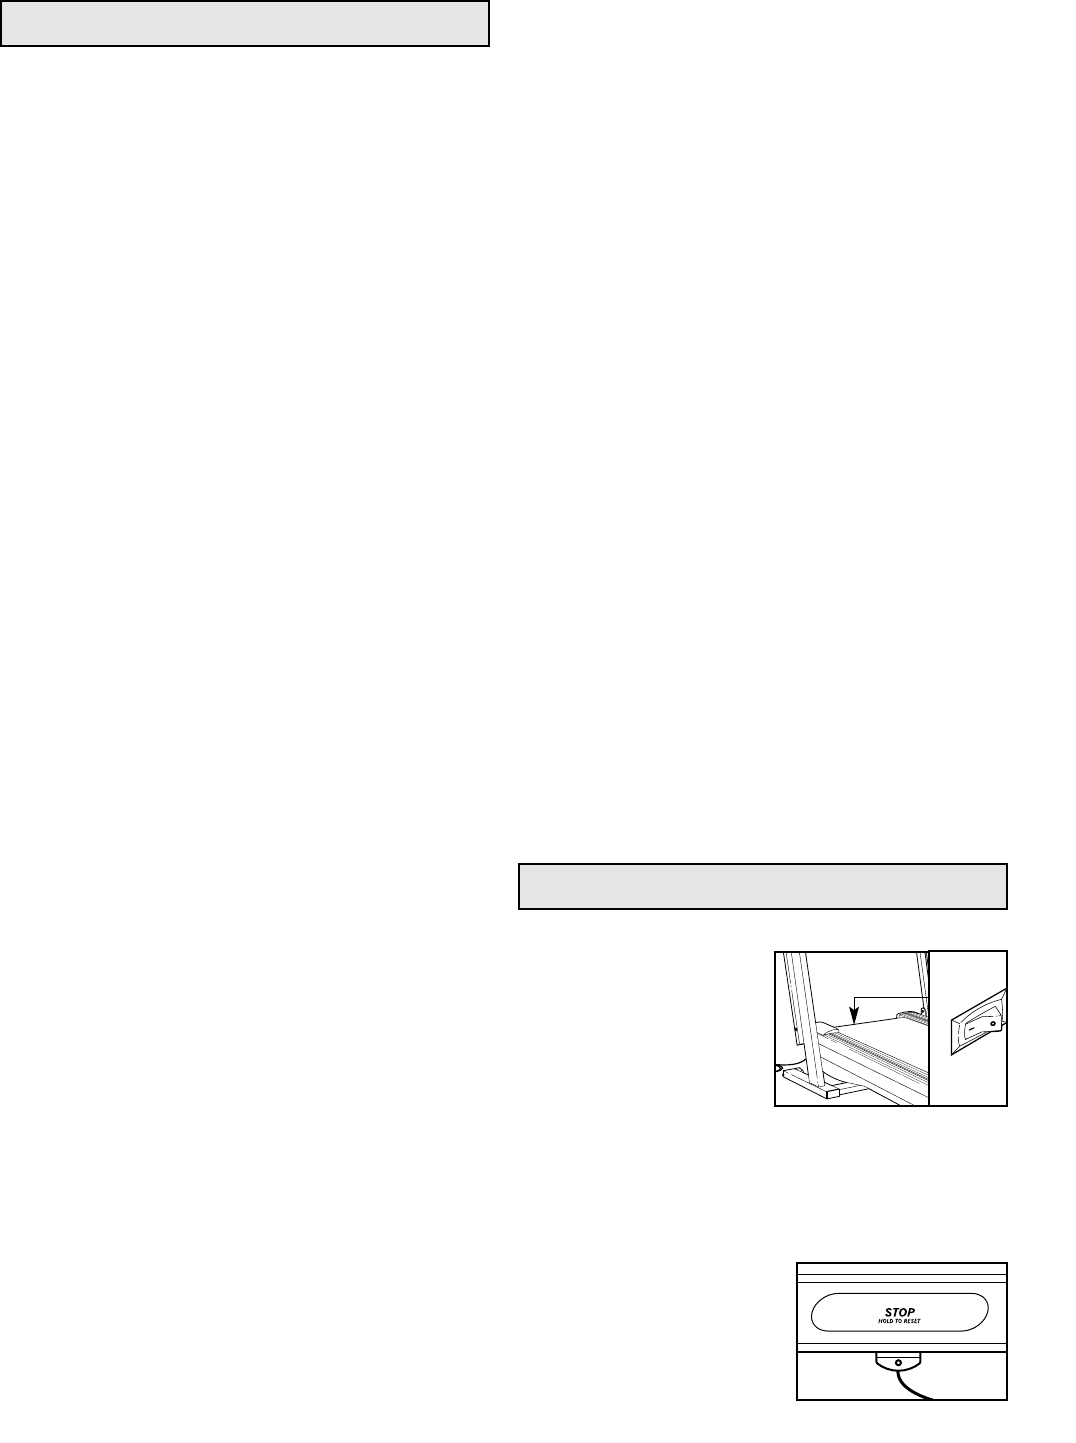
Make sure that the on/off
switch located on the
front of the treadmill is in
the “on” position.
Next, make sure that the
power cord is properly
plugged in (see page 7).
Note: If the key is in the console when the power cord is
plugged in, the letters “PO” will flash in the
CALORIES/FAT CALORIES display. If this occurs, re-
move the key.
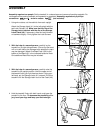
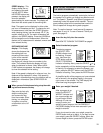
Step onto the foot rails of
the treadmill. Find the clip
attached to the key, and
slide the clip onto the waist-
band of your clothing. Insert
the key fully into the con-
sole.
DIAGRAM OF THE CONSOLE
HOW TO TURN ON THE POWER
9
“On”