


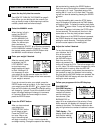
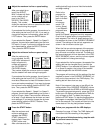
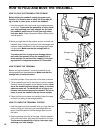


Adjust the maximum incline or speed setting.
After your weight is en-
tered, the ADJUST
MAX. indicator will flash
and a number will ap-
pear in the CALO-
RIES/FAT CALORIES
display. This number
shows the maximum incline or speed that the tread-
mill will reach during the program.
If you selected the Incline program, the maximum in-
cline setting can be from 5% to 10%. If you want to
change the maximum incline setting, press the SE-
LECT buttons. Then, press the ENTER button.
If you selected the Speed 1, Speed 2, or Speed 3
program, the maximum speed setting can be from
2.5 mph to 10 mph. If you want to change the maxi-
mum speed setting, press the SELECT buttons.
Then, press the ENTER button.
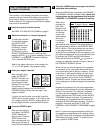
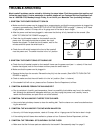
Adjust the minimum incline or speed setting.
After the maximum set-
ting is adjusted, the AD-
JUST MIN. indicator will
begin to flash and a
number will appear in
the CALORIES/FAT
CALORIES display.
This number shows the minimum incline or speed
that the treadmill will reach during the program.
If you selected the Incline program, the minimum in-
cline setting can be from 2% to 7%. (Note: There
must be a difference of at least 3% between the min-
imum and maximum settings.) If you want to change
the minimum incline setting, press the SELECT but-
tons. Then, press the ENTER button.
If you selected the Speed 1, Speed 2, or Speed 3
program, the minimum speed setting can be from 1
mph to 8.5 mph. (Note: There must be a difference
of at least 1.5 mph between the minimum and maxi-
mum settings.) If you want to change the minimum
speed setting, press the SELECT buttons. Then,
press the ENTER button.
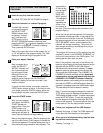
Press the START button.
After the maximum and
minimum settings are
adjusted, the PRESS
START indicator will
begin to flash. Press the
START button once.
After a few seconds, the
walking belt will begin to move. Hold the handrails
and begin walking.
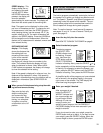
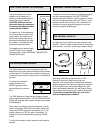
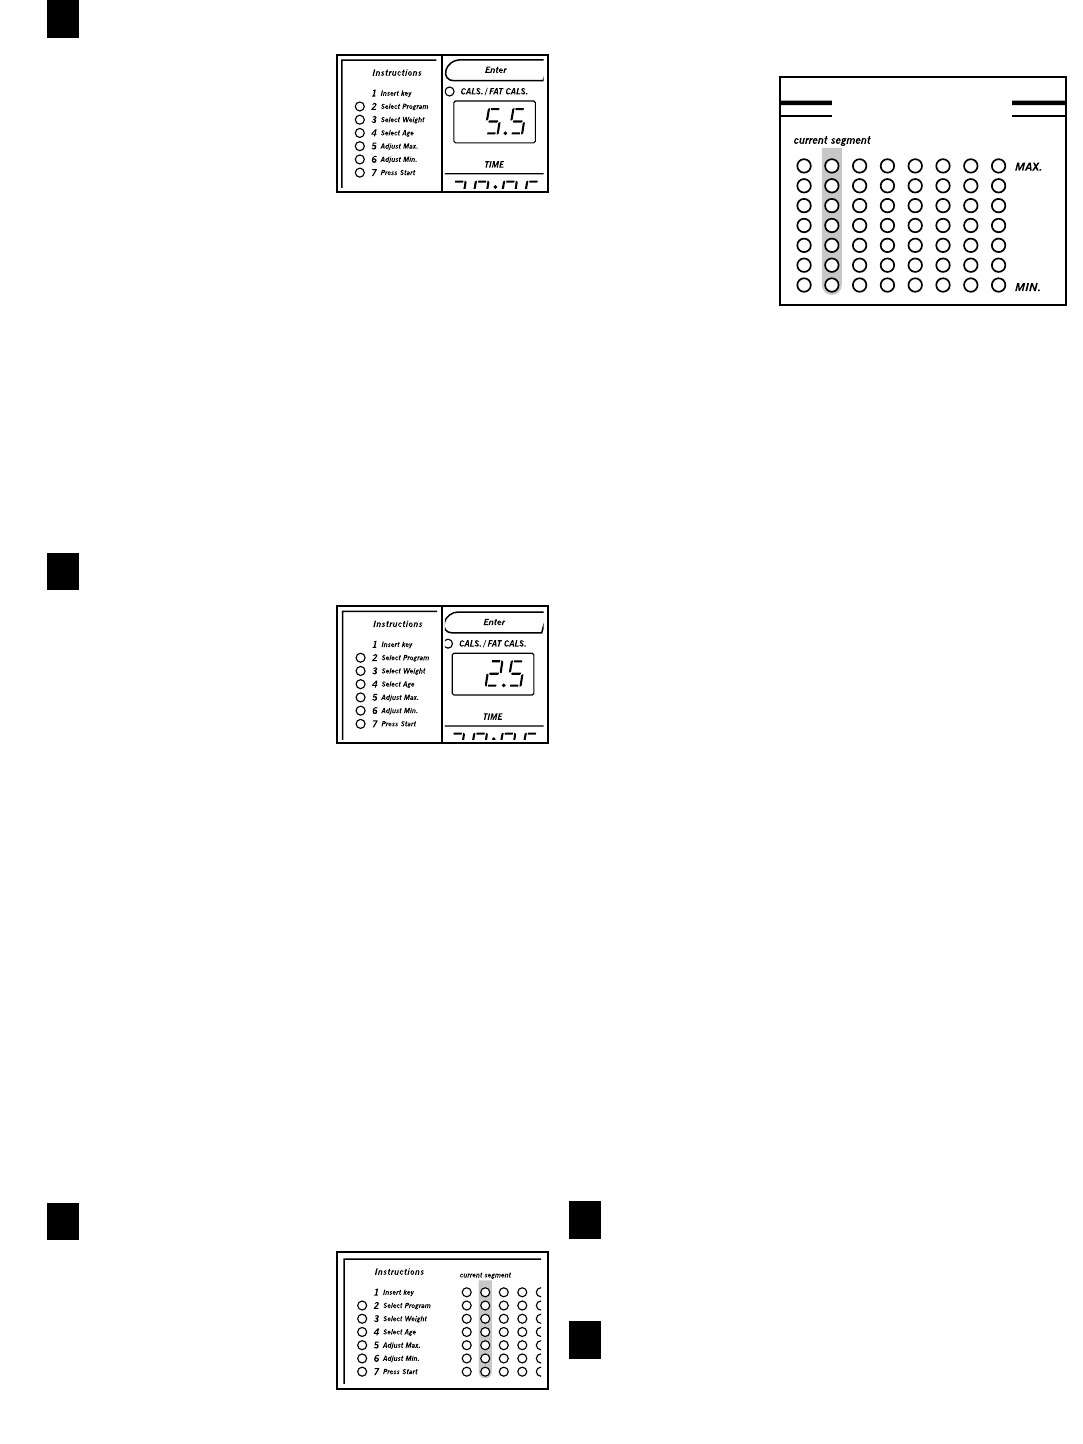
Refer to the
program dis-
play. Each pro-
gram is divided
into one-
minute seg-
ments. The
Incline, Speed
1, and Speed 2
programs have
twenty seg-
ments; the Speed 3 program has thirty segments.
One incline or speed setting is programmed for
each segment. The incline or speed setting of the
first segment is shown in the CURRENT SEGMENT
column. The settings of the next six segments are
shown in the six columns to the right.
When the first one-minute segment of the program
is completed, all settings shown in the program dis-
play will move one column to the left. The setting of
the second segment will then be shown in the CUR-
RENT SEGMENT column, and the incline or speed
of the treadmill will change accordingly.
If you selected the Incline program, the speed of the
walking belt can be changed at any time with the
SPEED buttons. If you selected the Speed 1, Speed
2, or Speed 3 program, the incline of the treadmill
can be changed with the INCLINE buttons.
The program will continue until the setting of the last
segment is shown in the CURRENT SEGMENT col-
umn and no time remains in the TIME display. The
walking belt will then slow to a stop.
Note: If the program is too easy or too difficult, the
setting shown in the CURRENT SEGMENT column
can be adjusted with the SPEED or INCLINE buttons.
To pause the program temporarily, press the STOP
button once. All displays will pause and the TIME dis-
play will begin to flash. To restart the program,
press the START button. To stop the program before
the program is completed, hold down the STOP but-
ton for two seconds. The console will then be in the
same state as if the key had just been inserted.
Follow your progress with the LED displays.
See step 6 on page 10. Note: The TIME display will
count down the time remaining in the program.
When you are finished exercising, stop the walk-
ing belt and remove the key.
See step 7 on page 11.
4
5
6
7
8
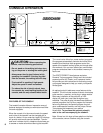
Program Display
12