


Access to “Diagnostics” menu
To determine the condition of the various electrical and mechanical components, you will need to enter into the
DIAGNOSTICS menu as follows:
1. Turn power OFF.
2. Simultaneously hold down the speed INCREASE and DECREASE keys and turn power ON.
3. Release the speed INCREASE and DECREASE keys once entered into the Diagnostics menu.
4. Press JustGo
TM
/ENTER to access Diagnostic items.
When you access the Diagnostics menu, you will notice the following message: “TXXX VERSION”
The message above indicates the version of the computer software installed in your computer display monitor. This
information is helpful in diagnosing certain computer related conditions. Keep in mind that the version number may
change depending on the model number of your T360–T560 treadmill.
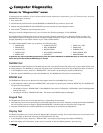
The T360–T560 treadmills allow you to perform the following tests:
To perform any one of the above procedures, press the Speed INCREASE or DECREASE keys to select the one you
want and press the JustGo
TM
/ENTER key to accept.
NVRAM Test
The NVRAM (Non-Volatile Random Access Memory) test will not erase all stored information such as user identification, and
all saved programs. The NVRAM is a computer chip that saves information even when the treadmill has been turned off.
1. In the Diagnostics menu, select the “NVRAM TEST” and accept it by pressing the JustGo
TM
/ ENTER key.
2. Press the JustGo™/ENTER key to start the NVRAM test. The NVRAM test will perform automatically.
EPROM test
The EPROM test allows you to determine if the program stored in the EPROM chip is intact.
1. In the Diagnostics menu, select the ‘‘EPROM TEST’’ and accept it by pressing the JustGo
TM
/ ENTER key. The EPROM TEST
will perform automatically.
• The display will show ‘‘EPROM IS OK’’ if the EPROM is intact and it will display a “CHECKSUM” code (for Bodyguard
®
internal use only).
• The display will show ‘‘EPROM IS NOT OK’’. This means the EPROM might be damaged.
Keypad Test
The keypad test allows you to verify that each key is responding when pressed.
1. Press each key one at a time and verify the confirmed response on the screen. Example, pressing the Elevation INCREASE
key will cause the screen to display “ELEVATION INCREASE” indicating that the key press was recognized.
2. Press the CLEAR/STOP and JustGo
TM
/ENTER keys simultaneously to terminate the keypad test.
Display Test
The display test allows you to verify that each display light is properly working. If you notice that one or more areas on the
screen do not light up during an exercise, you should perform this test.
1. In the Diagnostics menu, select the “DISPLAY TEST” and accept it by pressing the JustGo
TM
/ ENTER key.
2. Now the display will illuminate a certain way. To proceed to the next display patterns, press any key.
25
CCoommppuutteerr DDiiaaggnnoossttiiccss
Computer Diagnostics
5
• NVRAM TEST
• EPROM TEST
• KEYPAD TEST
• DISPLAY TEST
• BEEPER TEST
• HEART RATE TEST
• BELT ALIGNMENT
• MOTOR CHECK
• ELEVATION CALIBRATION
• STATISTICS
• SAFETY KEY TEST
• ERROR LOG
• CURRENT TEST
• SPEED SENSOR TEST
• MAINTENANCE