


8
OWNER'S MANUAL
•
R60
9. If you have set a goal value, the console gives a
signal and the displayed value starts blinking after
the goal has been reached. Reset the display by first
pressing START/STOP and thereafter RESET.
EXERCISE PROFILES
1. After the console is switched on, press + or - key
until the display shows a profile code (P1-P8) and
the profile form. All profiles are so called standard
power profiles: the faster you row, the faster you
move forward in distance measured by the meter.
All of the preprogrammed profiles are 20 minutes
in duration.
2. Select the desired profile by the + / - keys. Press
SET to switch to setting the exercise profile
duration; with the + / - keys you can set the time
in five minutes increments between 10 and 90
minutes.
3. Start exercising by pressing START/STOP. Start
rowing. With the + /- keys, you can change
the resistance level in the section of the profile you
are performing at the moment. The + key increases
the resistance; the - key decreases it.
4. You can interrupt the exercise by pressing
START/STOP (”Over” is shown in the display).
The program information stays in the console
memory for five minutes. If you resume with
training within this time, simply press the START/
STOP key again to continue.
5. You can stop exercising by pressing RESET when
the console is in the pause mode.
If you complete the whole profile, the console gives
a signal tune and the displayed value starts blinking
after the goal has been reached. Reset the display
by first pressing START/STOP and thereafter
RESET.
RECOVERY – MEASURING
THE RECOVERY PULSE
Measure your recovery pulse rate at the end of the
workout.
1. To start the measuring of the recovery pulse rate,
press RECOVERY. The display also shows the
word ”Recovery”.
2. The measuring starts automatically and takes
two minutes.
3. Upon completion of the measurement, the
display shows the recovery rate as a percentage.
The smaller the rate, the fitter you are. Please
note that your results are in a relation to the pulse
level in the beginning of the measurement, and
that your results are personal and cannot directly
be compared with any other person’s results.
In order to improve the reliability of recovery
pulse measurement, always try to standardize the
measurement situation as accurately as possible;
start measuring at the same heart rate level as
precisely as possible.
4. To switch back to the main display by pressing
RESET. The console will also automatically
switch to the main display one minute after the
completion of the measurement.
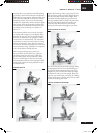
TRANSPORT AND STORAGE
Move the device according to the following
instruction, because lifting the cycle incorrectly
may strain your back or cause other risk of
accidents:
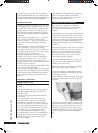
Stand behind the device and grip the rail with one
hand and the seat with the other. Tilt the device
so that is rests on the transportation wheels. Move
the device by wheeling it on transportation wheels.
Lower the device onto floor while holding on to
the rail and the seat,all the time remaining behind
the device.
Transport the equipment with caution over uneven
surfaces, for example over a step. The equipment
should never be transported upstairs using the
wheels over the steps, instead it must be carried.
We recommend that you use a protective base
when transporting the equipment.
To prevent malfunctioning of the cycle, store in
a dry place with as little temperature variation as
possible, protected from dust.
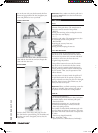
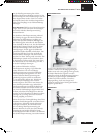
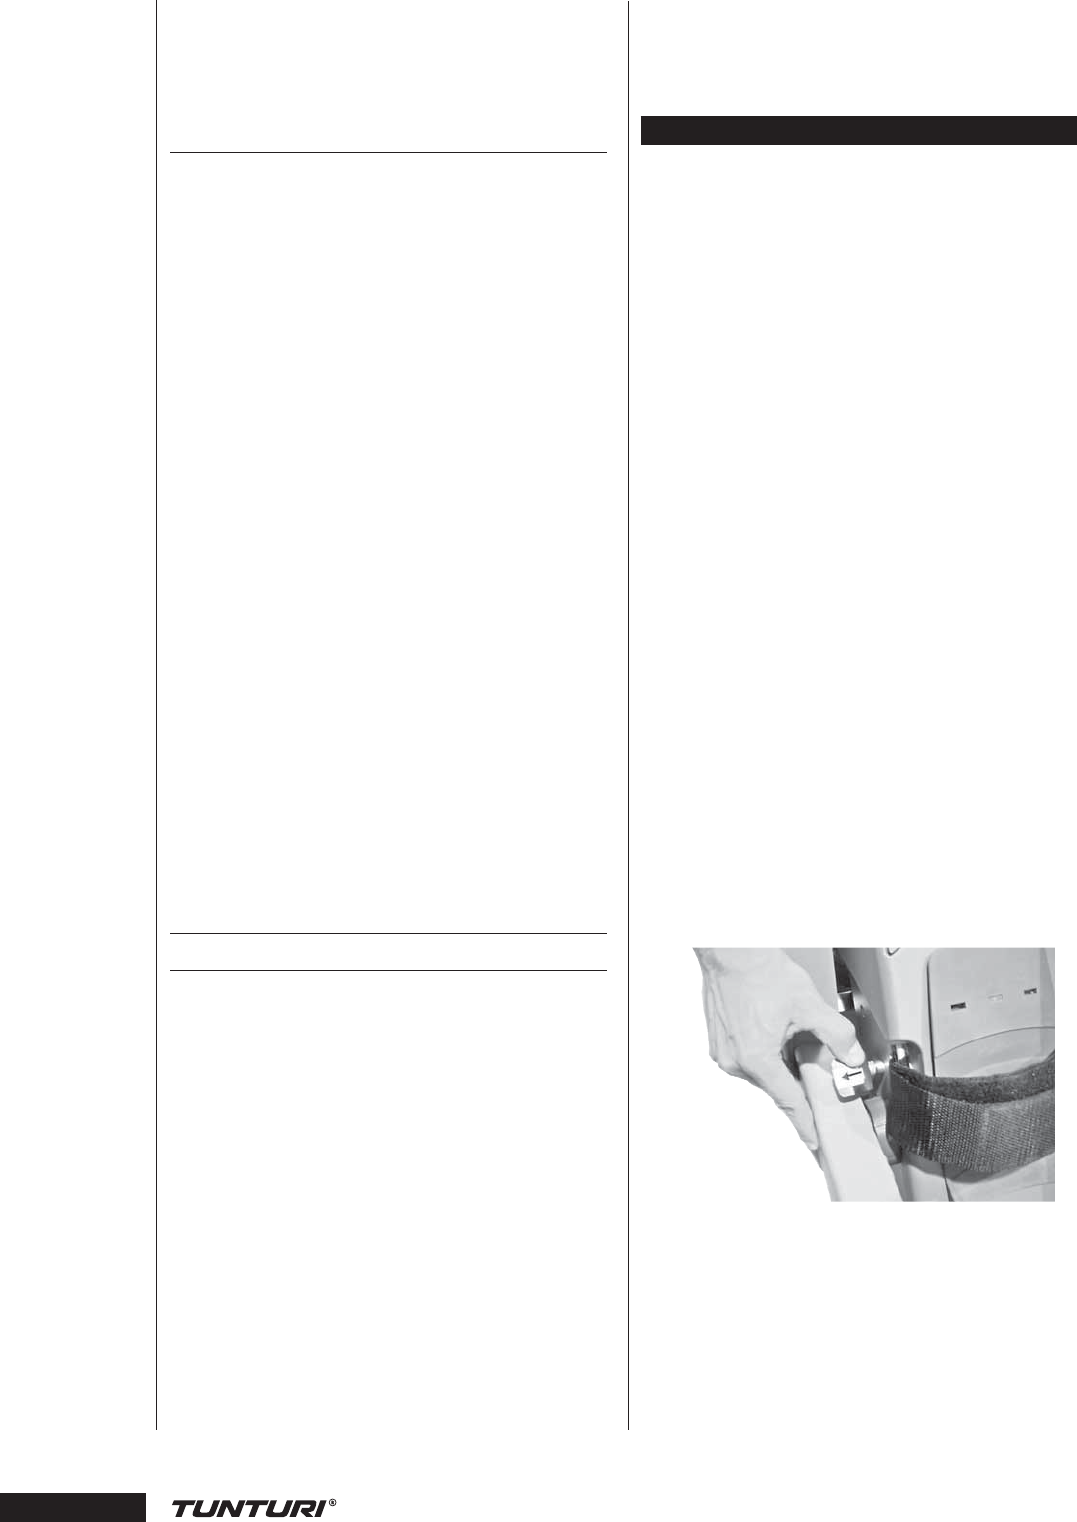
R60 rowing machine may be lifted to an upright
space-saving storage position as follows:
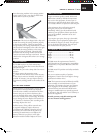
1. Loosen the locking pin under the front frame,
press the front frame downward slightly and pull
the locking pin upward.
2. Open the latch on the left hand side by pressing
the tab to the side. Lift the front frame up at the
same time.
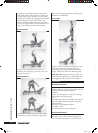
3. Lower the front frame carefully in between the
rails and lock it with the retainer in the front end
of the seat. Ensure that the front frame is locked.
4. Grasp the cross bar at the back of the rowing
machine and lift the device to an upright position
so that it is supported by the front end support
legs.
R60.indd 8R60.indd 8 2.3.2006 17:22:092.3.2006 17:22:09