


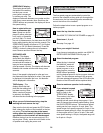


18
When the FIT-
NESS TEST
program is com-
pleted, the LED
matrix will show
the word
ÒCOOL,Ó
indicating that
the cool-down
period has begun. The TIME display will then count
down from 2 minutes. When the cool-down period
is completed, the walking belt will slow to a stop.
Note: During the last ten seconds of the cool-
down period, the incline of the treadmill will au-
tomatically adjust to the lowest setting. Keep
your feet and objects from beneath the treadmill.
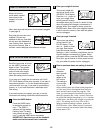
After the
FITNESS TEST
program is com-
pleted, the LED
matrix will show
your fitness
level. There are
10 fitness
levels, with level
10 (ÒFIT LVL 10Ó) being the highest. Remember,
the FITNESS TEST program is intended only to
indicate your relative fitness level.
Note: The SPEED and INCLINE buttons will not
function while the FITNESS TEST program is se-
lected. If your pulse is not detected during the pro-
gram, the letters ÒPLSÓ will flash in the PULSE dis-
play. If your pulse is not detected during the last
thirty seconds of any 4-minute period (after 4 min-
utes, after 8 minutes, etc.), the program will end
and the TIME display will show a fitness level of 0
(ÒFIT LVL 0Ó). (See HEART RATE MONITOR
TROUBLE-SHOOTING on page 6.) The FITNESS
TEST program cannot be stopped temporarily and
then restarted. However, the program can be
stopped at any time by pressing the STOP button.
The TIME display will then show an estimated fit-
ness level.
When you are finished exercising, remove the
key.
Make sure that the incline of the treadmill is at the
lowest setting. The incline must be at the lowest
setting when the treadmill is folded to the stor-
age position or the treadmill will be damaged.
Remove the key from the console and put it in a
secure place. In addition, move the on/off switch to
the off position and unplug the power cord.
The Custom 1 and Custom 2 programs are workout
programs that you create. The programs control both
the speed and the incline of the treadmill, and can be
up to 40 minutes long. The programs are stored in
memory and can be changed as many times as desired.
Follow the steps below to create a custom program.
Insert the key into the console.
See HOW TO TURN ON THE POWER on page
12.
Select user 1, 2, or 3.
See step 2 on page 13.
Enter your weight if desired.
If you have not entered your weight, see HOW TO
ENTER USER INFORMATION on page 12.
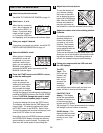
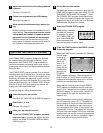
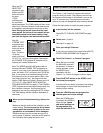
Select the Custom 1 or Custom 2 program.
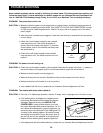
When the key is inserted,
the MANUAL mode will
be selected. To select a
custom program, press
the MODE button
repeatedly until the
Custom 1 or Custom 2 program indicator lights.
Press the START button or the SPEED + but-
ton to start the program.
A moment after the button is pressed, the walking
belt will begin to move. Hold the handrails and
carefully begin walking.
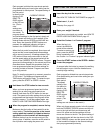
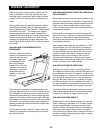
Press the LEARN button and program the
desired speed and incline settings.
When the LEARN button
is pressed, the LEARN in-
dictor will light. Speed
and incline settings can
be programmed only
when the indicator is lit.
6
5
4
3
2
1
7
HOW TO CREATE CUSTOM PROGRAMS