


page 10
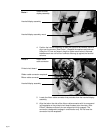
12. Place the lift motor cover over the lift motor. Locate the four 3/8" screws
and appropriate hex key in the hardware kit. Use the screws to securely
attach the cover to the lift motor. Do not overtighten the screws. Overtight-
ening can cause damage to the plastic cover.
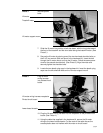
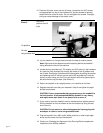
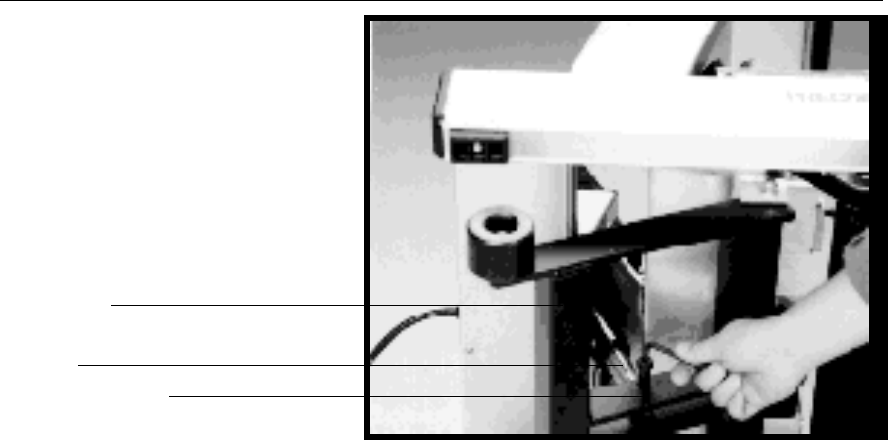
Photo 5
Secure lift
platform and lift
tube.
Lift platform
Long shoulder bolt
Lift tube
13. Lay the treadmill on its right-hand side with the help of another person.
Note: Right and left are determined while standing behind the treadmill,
facing towards the front of the machine.
14. Locate the long shoulder bolt, 7/8" washer and 3/8" locknut in the hardware
kit. Insert the long shoulder bolt through the center of the lift platform and
the lift tube. Secure the lift platform and tube together by sliding the washer
and fastening the 3/8" locknut onto the end of the shoulder bolt. Hold the
locknut in place using your 9/16" box end wrench while fully tightening the
bolt with the hex key provided. (See Photo 5.)
15. Return the treadmill to an upright position, so it rests flat on the floor.
16. Replace the black hood that you removed in Step 2 and tighten the eight
phillips-head screws.
CAUTION: Precor recommends that two people move the treadmill to
its final location. A fully-assembled M9.5sp treadmill is very heavy,
and might cause back strain if one person tries to move it.
17. If you need to move the treadmill, ask for assistance from another person.
Roll the treadmill on its front wheels to the new location by lifting the rear
end of the unit.
CAUTION: Do not remove or otherwise bypass the 3-prong plug with
an adapter in order to use a non-grounded outlet.
18. Plug the treadmill into a 220v outlet. Make sure that no other major appli-
ances use the same circuit as the treadmill.
19. Continue to
Checking the Alignment of the Running Belt
to complete the
installation of the M9.5sp treadmill.