


21
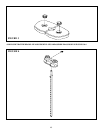
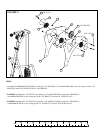
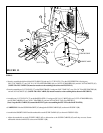
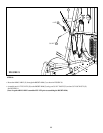
STEP 13:
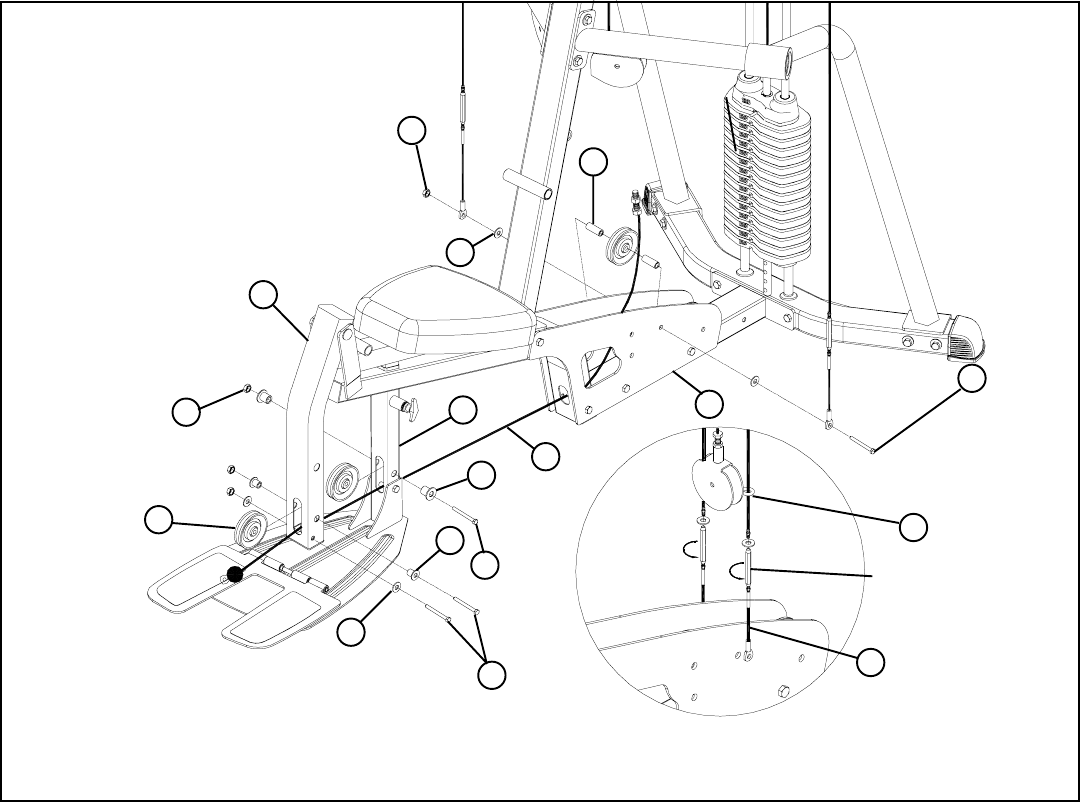
FIGURE 13
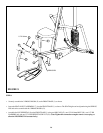
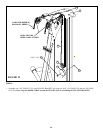
• Securely assemble the ball end of the LEG CABLE (30) and one 3-1/2” PULLEY (37) to the LEG PEDESTAL (8) using two
3/8 X 3-3/4” BOLTS (57), two 3/8” X 1-1/16” FLANGE SPACERS (49), two 3/8” FLAT WASHERS (64), and two 3/8” LOCKNUTS (63).
(NOTE: The LEG CABLE (30) must be routed over the retaining bolt as shown in FIGURE 13.)
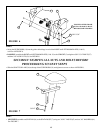
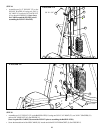
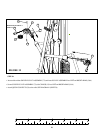
• Securely assemble one 3-1/2” PULLEY (37) to the FRONT BASE (1) using one 3/8 X 3” BOLT (67), two 3/8 x 3/4” FLANGE SPACERS (48)
and one 3/8” LOCKNUT (63). (NOTE: The LEG CABLE (30) must be routed over the retaining bolt as shown in FIGURE 13.)
3/8 X 3-3/4” 57
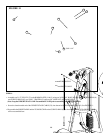
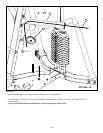
• Assemble one 3-1/2” PULLEY (37) to the BASE PLATES (11) using one 3/8 X 4-1/4” BOLT (68), two 3/8” FLAT WASHERS (64),
two GUIDE CABLES (65), two 3/8 X 1” SPACERS (51) and one 3/8” LOCK NUT (63). See FIGURE 13.
(Note: Loop the LEG CABLE (30) around the PULLEY prior to assembling the PULLEY to the BASE PLATES.)
8
11
51
63
30
37
64
49
48
3/8 X 4-1/4” 68
3/8 X 3”
64
63
2
67
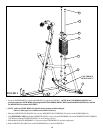
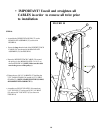
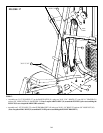
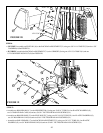
• Adjust the turnbuckle on each GUIDE CABLE (65) to add tension to the GUIDE CABLES (65) until they are taut. Secure
turnbuckle with the JAM NUTS as shown in FIGURE 13(B).
• Assemble the SHORT CABLE and the turnbuckle to each GUIDE CABLE (65) as shown in FIGURE 13(B).
• CAREFULLY slide the GUIDE BRACKET (42) through the GUIDE CABLES (65) as shown in FIGURE 13(B).
42
SHORT CABLE
65
(B)
TURN BUCKLE