


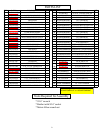
10
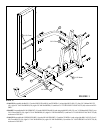
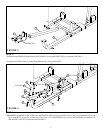
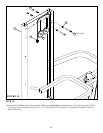
STEP 9:
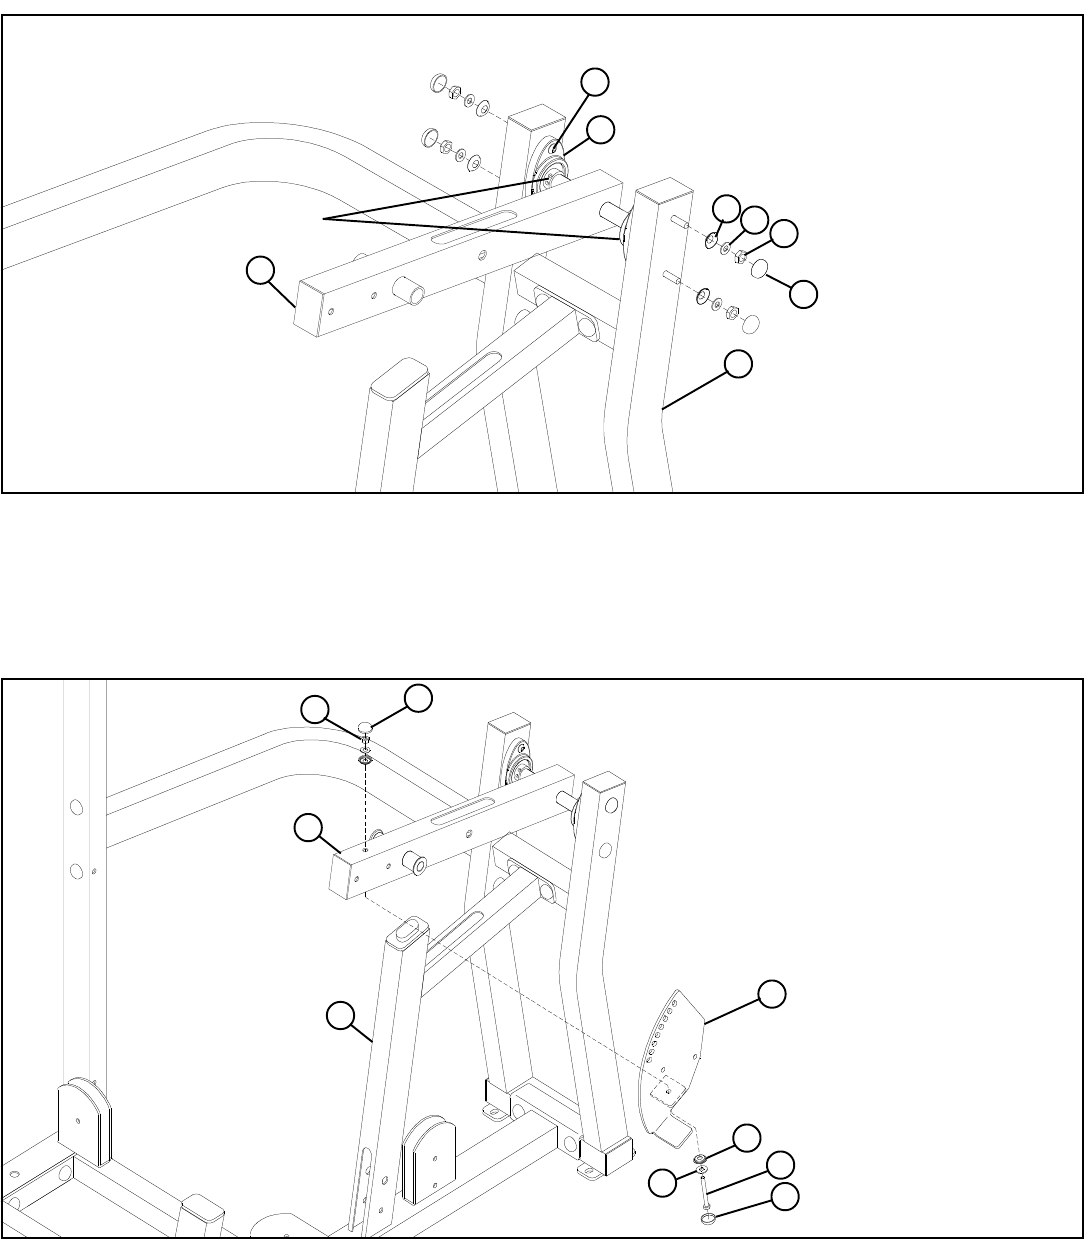
FIGURE 9
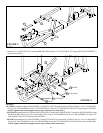
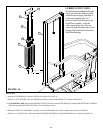
STEP 10:
FIGURE 10
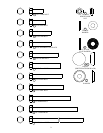
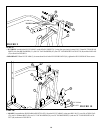
• SECURELY assemble the PIVOT ARM (5) to the REAR UPRIGHT (15) using four previously inserted 3/8 X 76mm BUTTON HEAD
BOLTS (46), four RH WASHERS (51), four 3/8” SAE WASHERS (50), four 3/8” LOW HEIGHT LOCK NUTS (49) and four RH CAPS
(53) as shown in FIGURE 9.
• IMPORTANT! When PIVOT ARM (5) is centered and level in the PILLOW BLOCKS (18), tighten the PILLOW BLOCK set screws.
15
51
50
49
18
53
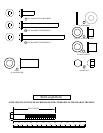
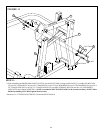
• LOOSELY assemble the PRESS ARM ADJUST PLATE (10) to the PIVOT ARM (5) using one RH CAP (53), one BLACK RH CAP
(52), one 3/8 X 90mm BOLT (42), two 3/8” SAE WASHERS (50), two 3/8” RH WASHERS (51) and one 3/8” LOW HEIGHT LOCK
NUT (49) as shown in FIGURE 10.
53
8
49
10
51
50
42 3/8 X 90mm
TIGHTEN!
5
52 BLACK
46
5