


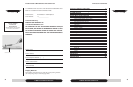

1180 Er Owner’s Manual
9
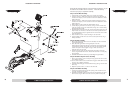
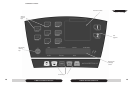
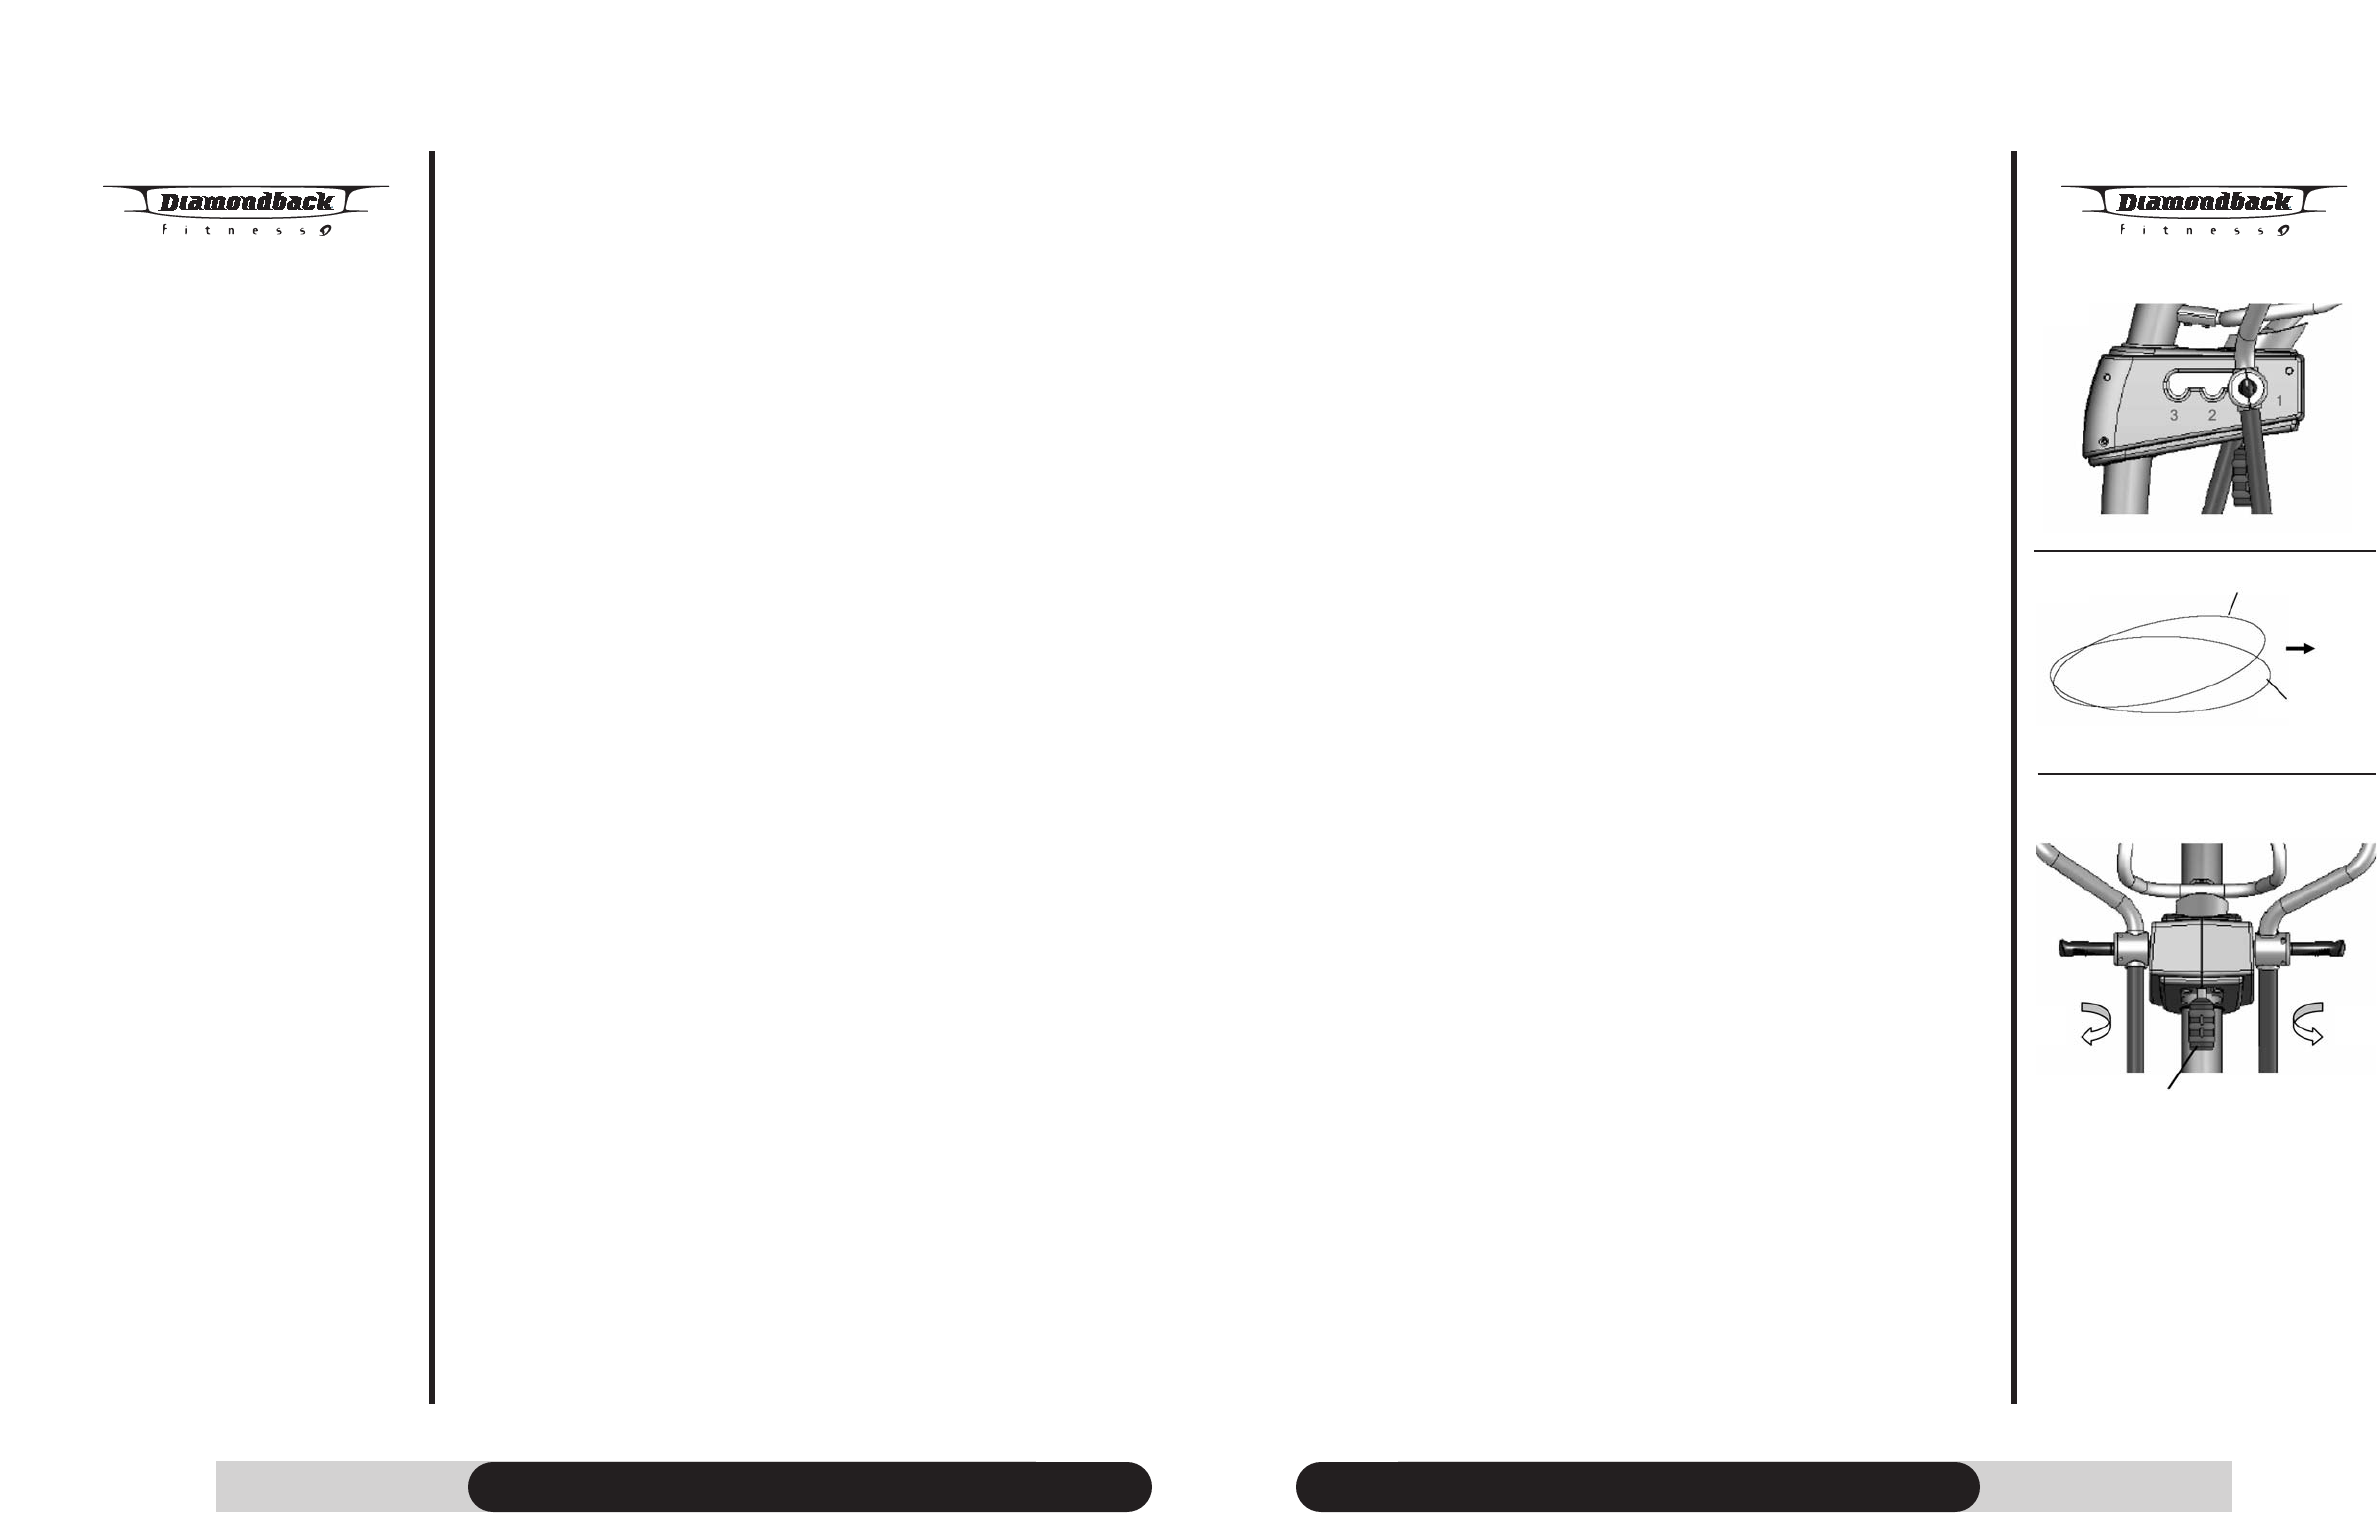
BodyFit Angle Adjustment
The 1180Er is equipped with bodyfit ellipse angle adjustment system to fit your
exercise better. The different ellipse angle will change the form of your elliptical
exercise; the higher ellipse angle will make your elliptical motion feel more like an
Uphill Climbing and the lower ellipse angle will make the ellipse motion feel more
like a Skiing/Jogging exercise. The different ellipse angle will result in different dif-
ficulties of exercises even though you are in the same resistance level.
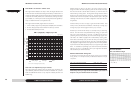
The Difference in Ellipse Angle:
There are 3 angle adjustments on the 1180Er — Position 1–3, position 1 being the
position closest to user and position 3 being farthest away from user. See figure on
the right.
At position 1, the ellipse angle is 9 degrees higher than position 3 and the step
motion will feel more like hill climbing. It also will bring you closer to the console
mast.
At position 3, the ellipse angle is more flat and feels more like a sprint. It also push-
es user away from the console mast.
In order to get the best workout experience, it is recommended to try all three posi-
tions first. Find the best one to fit your workout preference and your body features
and adjust it for your workout.
Adjusting the Ellipse Angle:
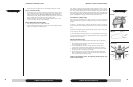
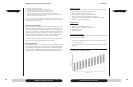
To adjust the position of the footpad, please follow below steps for adjustment:
1. Turn the adjusting knob clockwise all the way down to loosen the pivot
structure. See figure on the right.
2. It is recommended that you step on the floor and face the back of the
console. Then put both hands under handles and raise the pivot structure.
3. Move the pivot structure to the next desired position and rest it down. Make
sure the pivot axle is inside the groove securely.
4. Turn the adjusting knob counter clockwise to tighten the knob. Make sure
there is no additional movement on the pivot structure after locking and the
whole structure is securely locked in place.
Caution: Not tightening down the adjusting knob pr
operly may
result in a fall or injury
8
1180 Er Owner’s Manual
Assembly Instructions
harness during this procedure, as this will damage the electronic console.
Step 5: Console Assembly
1. Connect both plugs, from main wire harness and hand pulse harness, to the
plug receptors on the backside of the console, taking care to install correctly
(see plug alignment marks). WIRING HARNESS INSTALLATION HINT: Any
excess wiring must be carefully inserted (“storied”) back into the console mast
before installing the console onto the console mounting plate.
2. Fasten the console to the console mounting plate with the four M5 x 12mm
screws and washers, using a Philips screwdriver.
Step 6: Water Bottle & Leveling Pads
1. Place the water bottle into the water bottle holder.
2. Adjust the leveling pads if necessary, located on the front stabilizer bottom, to
ensure your equipment is leveled with floor.
Positions:
Ellipse angle
Difference
Pivot Structure
Loosen Tighten
Position 1
Position 3
Front
Adjusting Knob