


be pitted or blackened on one edge. Too many of these indicate a worn
commutator, and the motor should be replaced. The commutator may
be cleaned with narrow commutator stone if carbon build-up is present.
(File down the stone if it won’t fit in the brush holder hole.) Brush dust
can be loosened from the brush holder area by lightly filing the surfaces.
Dirt and brush dust inside the drive motor can cause a short and should
be vacuumed out of the motor.
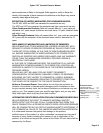
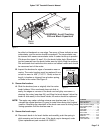
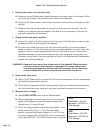
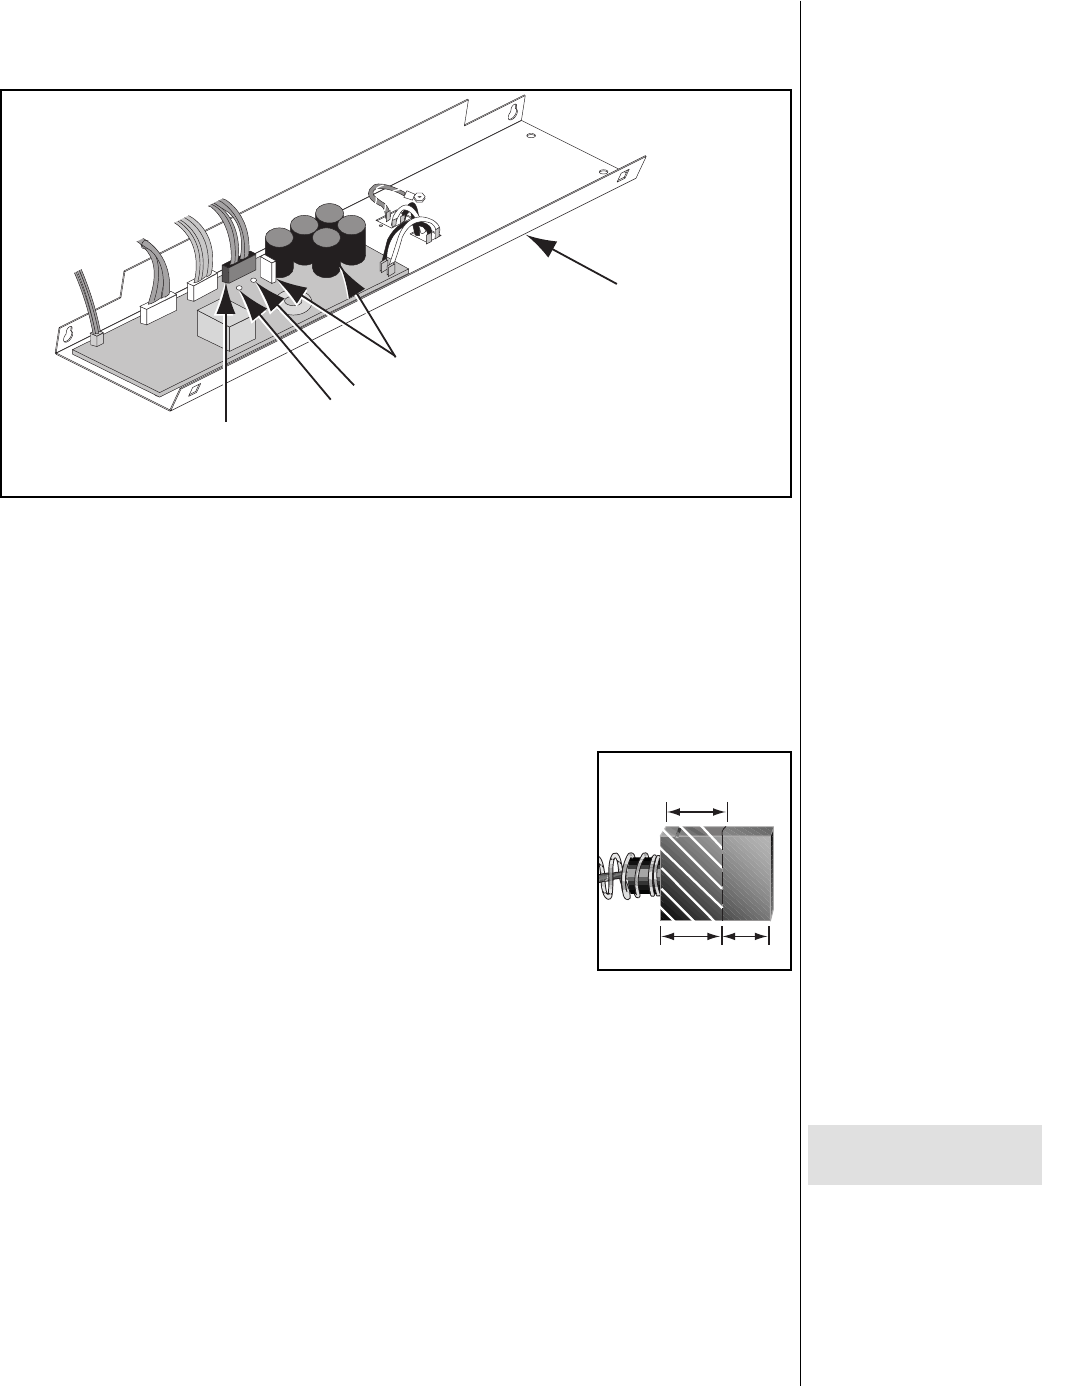
B. Inspect the brushes for signs of excessive wear or
cracks. The motor brushes must be replaced if one
or both is worn to .438” (7/16"/11.13mm) or less in
length, is broken or chipped, has a broken spring,
or binds in the motor. See Figure 2.
8. Secure the brushes.
A. Slide the brushes (new or original) into the motor
brush holders. If the new brush does not slide in
easily, the edges or corners of the brush can be lightly filed down. If
cleaning the motor, (see step 6A), and filing the brush doesn't allow the
brush to slide easily in the brush holder, the motor should be replaced.
NOTE: The motor may make a clicking noise as new brushes wear in. If you
reinstall the original brushes it is good to install them facing their original
position. Reversing the orientation of the brush can cause a clicking noise
during operation until the brushes wear in.
9. Secure the brush caps.
A. Place each brush in its brush holder and carefully push the spring in
while screwing on the brush cap. If the brush cap is damaged, order
Cybex replacement part number HX-10300-2.
Cybex 710T Treadmill Owner’s Manual
Page 7-3
Control During Operation . . 3-4
Data Readouts. . . . . . . . . . . 3-5
Selecting Programs
& Options . . . . . . . . . . . . . 3-6
Displaying Heart Rate . . . . . 3-6
Use of Programs . . . . . . . . . 3-7
Manual Mode . . . . . . . . . . . 3-8
P1 - Fitness Test Program. . 3-8
P2 - Weight Loss Program 3-10
P3 - Cardiovascular Program 3-12
P4 - Speed Challenge
Program . . . . . . . . . . . . . 3-14
P5 - Express Program. . . . 3-16
P6 - Hill Interval Program . 3-17
P7 - Speed Interval
Program . . . . . . . . . . . . . 3-18
P8 - Pike’s Peak Program . 3-19
P9 - River Run Program . . 3-20
P10 - 5 Kilometer Program 3-21
P11 - Demonstration
Program . . . . . . . . . . . . . 3-22
P101-P110 - Saved
Program . . . . . . . . . . . . . 3-22
Workout Tips. . . . . . . . . . . 3-24
4
Preventive Maintenance
Regular Maintenance
Activities. . . . . . . . . . . . . . 4-1
Cleaning Your Treadmill. . . . 4-1
Running Belt Maintenance . 4-2
Other Preventive
Maintenance . . . . . . . . . . . 4-6
Service Schedule . . . . . . . . . 4-7
Log Sheet. . . . . . . . . . . . . . . 4-8
5 Setup & Assembly
Quick Setup . . . . . . . . . . . . 5-1
Choosing & Preparing a Site 5-1
Electrical Power
Requirements. . . . . . . . . . 5-3
Unpacking. . . . . . . . . . . . . . 5-3
Assembling the Treadmill. . . 5-4
Testing the 710T Operation. 5-9
Setting Operation Options. 5-10
6 Customer Service
Contacting Service . . . . . . . 6-1
Serial Number & Voltage . . . 6-1
Warranty . . . . . . . . . . . . . . . 6-1
Return Material Authorization . .
(RMA) . . . . . . . . . . . . . . . . 6-4
Damaged Parts . . . . . . . . . . 6-4
Ordering Parts. . . . . . . . . . . 6-5
7 Service
Service Instruction . . . . . . . . 7-1
Motor Brushes. . . . . . . . . . . 7-1
Motor Current & Voltage . . . 7-4
Running Belt & Deck . . . . . . 7-7
Drive Belt. . . . . . . . . . . . . . . 7-9
Front Roller . . . . . . . . . . . . . 7-9
Rear Roller . . . . . . . . . . . . 7-10|
Error Codes. . . . . . . . . . . . 7-11
Diagnostic Tests . . . . . . . . 7-13
Parts List . . . . . . . . . . . . . . 7-20
Exploded View . . . . . . . . . . 7-23
710T Schematic . . . . . . . . . 7-24
Figure 2
.438" (7/16")
(11.13 mm)
Replace OK
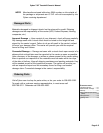
Motor
Cable
Front
Panel
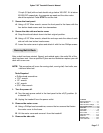
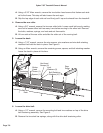
!WARNING: Avoid Touching
R34 and Black Capacitors
+
-
Figure 1