


Cybex 445T Treadmill Owner’s Manual
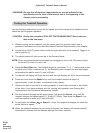
#16
#6
#8
#16
#7
Setup
and
Assembly
Page 5-8
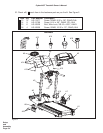
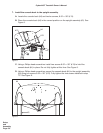
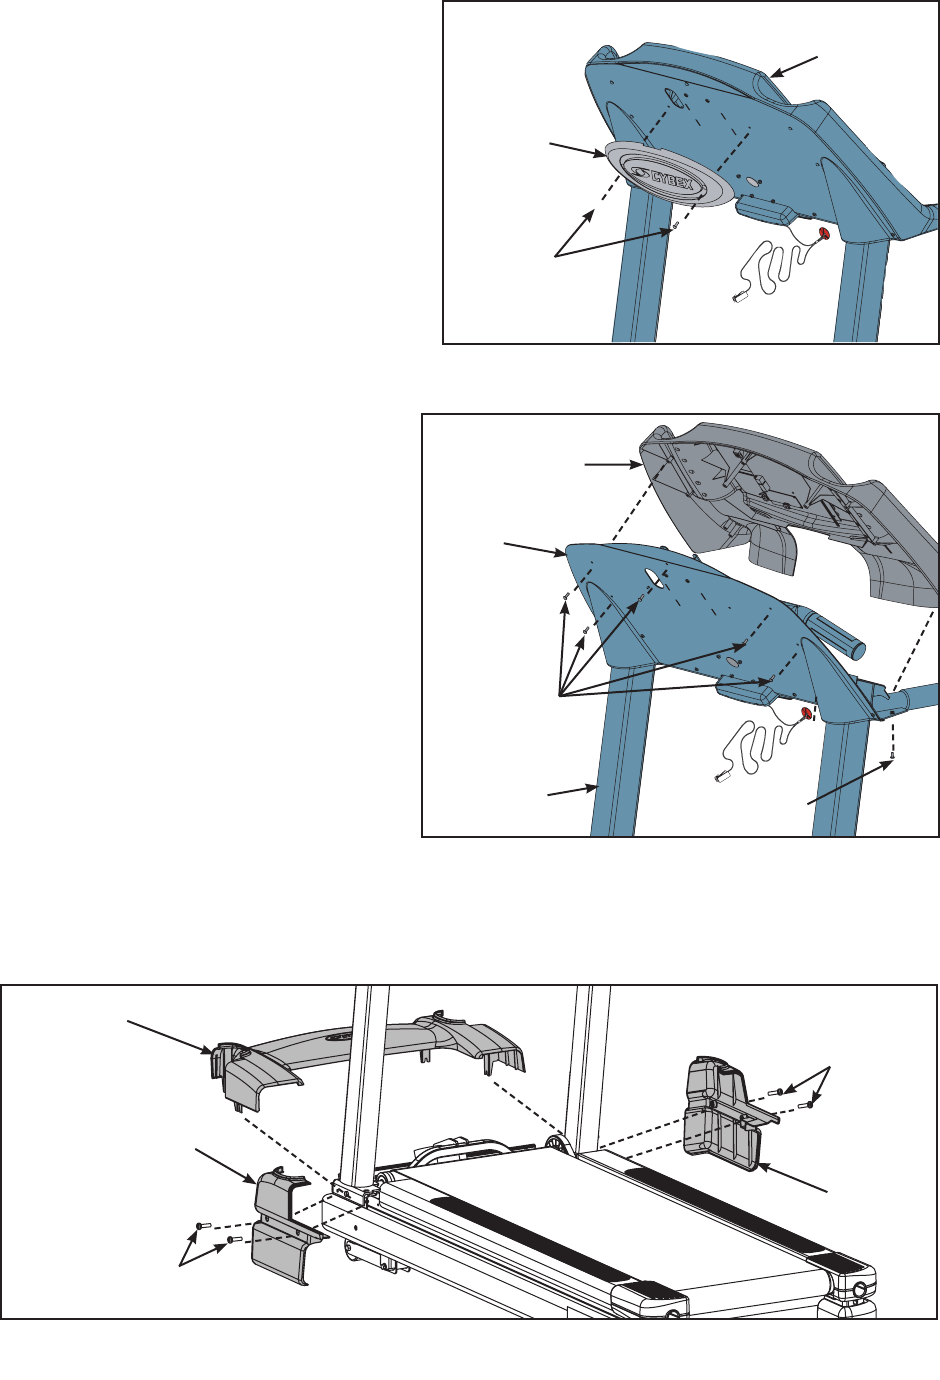
Figure 11
D. Check to see that all of the cables
are connected firmly in their proper
place. See Figure 8.
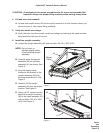
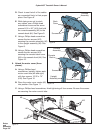
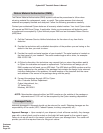
E. While being sure not to pinch
any cables, use a Philips head
screwdriver to secure the seven
screws 8-16 x .50” (#14) that hold
the console assembly (#2) to the
console back (#4). See Figure 9.
F. Using a Philips head screwdriver
secure the two screws (#13)
securing the console assembly (#2)
to the upright assembly (#3). See
Figure 9.
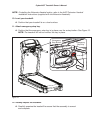
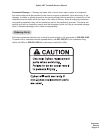
G. Using a Philips head screwdriver
secure the two screws (#14)
securing the console back cover
(#5) to the console front (#4). See
Figure 10.
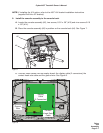
9. Attach the motor cover (three
pieces).
A. Using a Phillips head
screwdriver, partially tighten each
motor cover side (left and right)
with four screws, 10-32 x .75”
(#16). See Figure 10.
B. Place the motor cover center (#6)
into position. See Figure 11.
C. Using a Phillips head screwdriver, finish tightening all four screws. Be sure the screws
are securing the motor cover’s tabs.
Figure 9
Console
Assembly
Back
Cover
Screws
Figure 10
Screws
Machine Screw
Console
Assembly
Upright
Assembly
Console
Back