


Updated 23/05/07 RAOM0507 Apollo Bicycle Company Pty. Ltd. ABN: 60 001 914 469
47
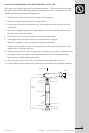
Installation and Adjustment– U-Brakes
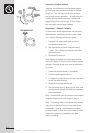
To install U-Brakes:
1. Lubricate the contacting surfaces of the frame bosses and the brake arm
attaching area.
2. Secure the spring to the hole on the brake arm, spring cover and fixing arm nut.
3. Fasten the attaching bolt with a 5mm Allen key wrench to a torque of 6 Nm to 8 Nm.
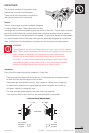
Note: The spring winds in different directions for the right and left arms. (See Fig.1)
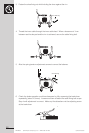
When adjusting brake shoes, the brake arm needs to be able to move freely.
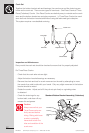
To adjust and secure brake shoes:
1. Attach the brake shoe so the direction of the arrow sign is the same as the rim rotation
direction.
2. Face the shoe surface to the rim, and set it as shown in Fig 2.
3. Use a 5mm Allen key wrench to hold the brake in position and secure the nut with
a 10mm wrench to a torque of 7 Nm to 9 Nm. (See Fig.3)
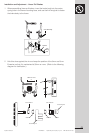
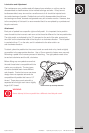
To connect the braking cables refer to the following steps and Fig.1.
1. Attach the braking cable to the straddle cable bridge.
2. Set the straddle cable as in Fig.1, and alter the shoe-rim until a clearance of 1.5mm
on both sides is achieved.
3. Fasten the straddle cable with the cable fixing nut to a tightening torque of 5 Nm to 7 Nm
4. Trim the excess straddle cable and connect the cable cap.
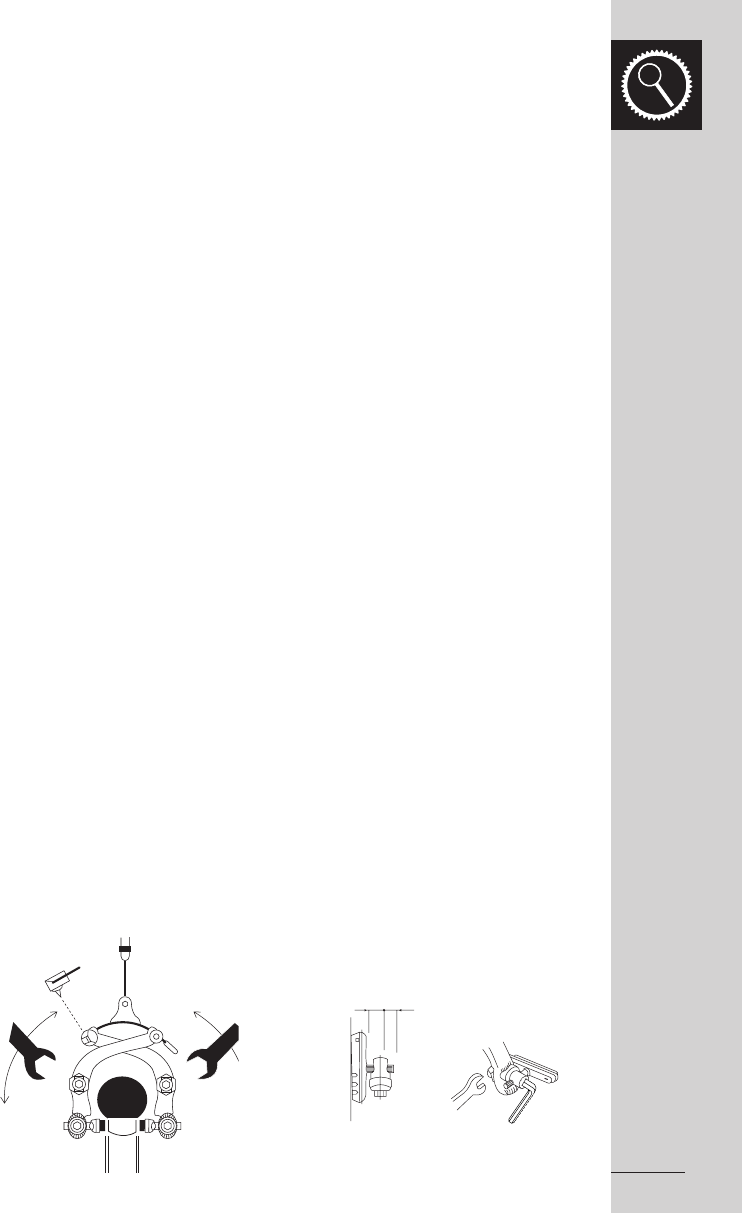
Refer to Fig. 1 to help you fine tune the shoe clearance. You will need a 13mm wrench
to make the adjustments.
1. If a in Fig.1 is greater than b, (the left side), turn the arm fixing nut anti-clockwise
(in the A direction).
2. If b is greater than a (the right side), turn the arm fixing nut clockwise
(in the B direction).
To make fine adjustments of the spring tension refer to Fig. 1 and use a 13mm wrench to:
1. Tighten the spring tension, turn the arm fixing nut to A and A’ as in Fig.1.
2. Loosen the spring tension, turn to B and B’.
A
BB
A
ab
Fig.1 Fig.2 Fig.3