Updated 23/05/07 RAOM0507 Apollo Bicycle Company Pty. Ltd. ABN: 60 001 914 469
41
Cable Tension Adjustment
1. The rotor bearing unit should appear parallel to
the upper and lower cable stops once installed.
If the unit is tilted, pull each cable end one at a
time, to see which one has slack on the bearing
hook. Pick up the slack through the adjusting
barrel. When even pull on all four cables is
reached secure all four lock nuts.
2. Check for even pull on all four cables by rotating
the handlebar while the front wheel is off the
ground. If a fluttering noise is heard in the rotor
bearing unit as the upper and lower cables pass
each other, repeat the adjusting step 1.
SADDLE AND SEAT POST
Inspection
Part of your monthly maintenance tasks needs
to include inspection and adjustment of the
seat post binder bolt and the seat fixing bolt,
ensuring both are firmly secured. When the
seat post is removed from the frame, a mark
about 65mm up from the bottom can be
observed, with the words “max. height” or
“minimum insertion”. At all times a minimum
of 65mm of seat tube must always remain
in the frame.
Never ride a bicycle with the
minimum insertion/max. height mark
visible on the seat post. Doing so
may damage the seat post, the
frame or potentially even the rider.
Lubrication
Remove the seat post from the frame and
clean thoroughly. Lightly grease the part that
will be inserted into the frame. Replace the
seat post into the frame and adjust and fasten.
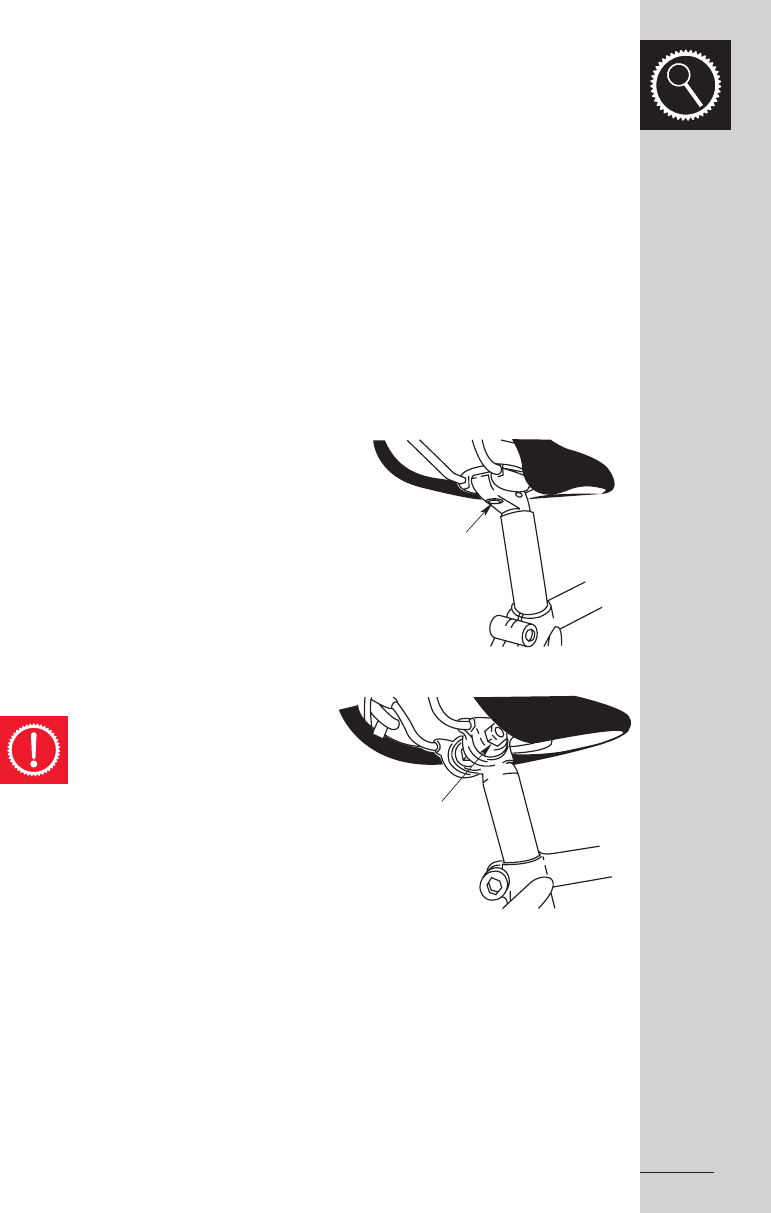
Adjusting Bolt
Micro Adjustable Seat Post
Seat Clamp Nut
Standard Seat Post


