


GB
OWNER’S MANUAL
•
T60
3
ASSEMBLY
Before assembling the device, insure all parts are present:
1. Frame
2. Handrails
3. Horizontal handlebar
4. Console
5. Power cord
6. Assembly kit (contents are marked with an * in the
spare part list): keep the assembly tools, as you may need
them e.g. for adjusting the equipment
The directions left, right, front and back are defined as
seen from the exercising position. In case of problems
contact your Tunturi dealer. Two people are needed for
the installation. Assemble the equipment as follows:
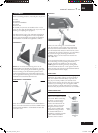
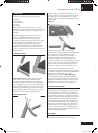
HANDRAILS
NOTE! Do not remove the fastening screws on the
handrails! Place the handrails into position at the sides
of the frame: when placing the left handrail, gently pull
the wire coming out of the handrail upward so that it
won’t be damaged between the handrail and the frame.
Do not tighten the fastening screws until the horizontal
handlebar and console have been secured.
HORIZONTAL HANDLEBAR
Place the horizontal handlebar between the handrails so
that it is curved towards the rear of the treadmill. Secure
the horizontal handlebar to the handrails on both sides
with a hex screw.
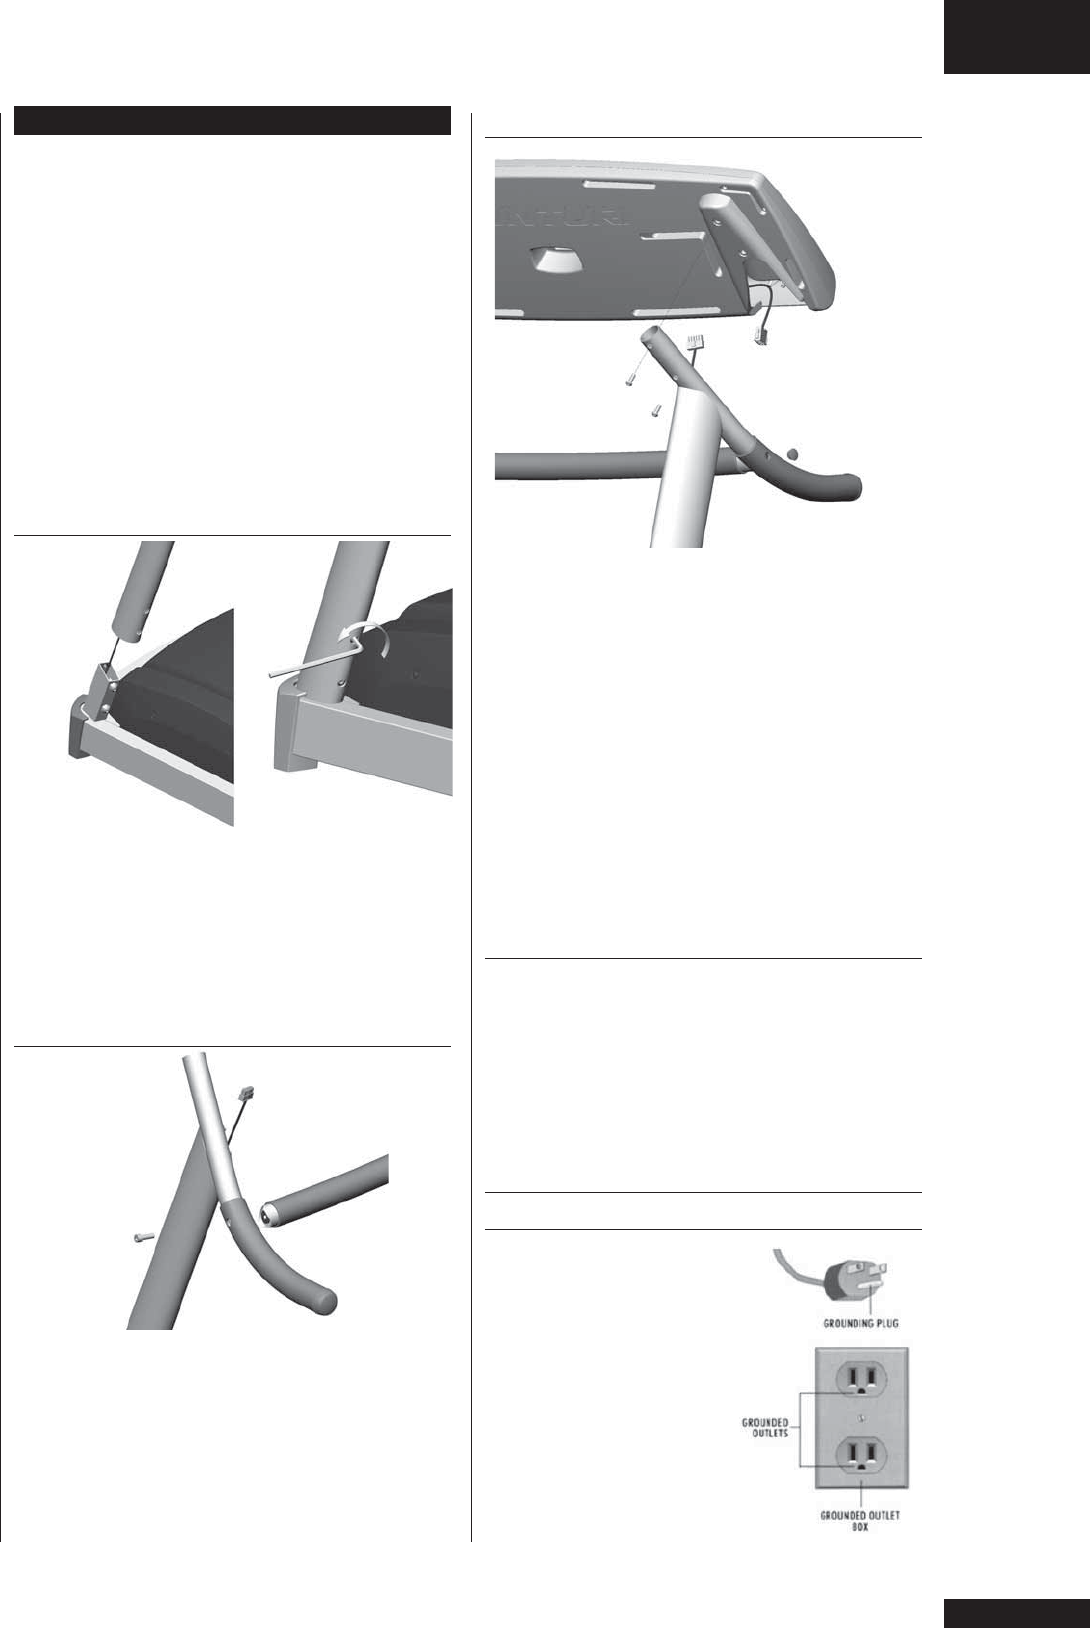
CONSOLE
Connect the wire coming out of the left handrail
with the connector in the console wire and push the
connected wire inside the handrail. Push the console
onto the handrail ends and secure with four hex screws
at the back of the console. If necessary, you can facilitate
the console securing by loosening the horizontal
handlebar; however, do not loosen the end with the
black rubber nut.
Secure now both handrails with two hex screws. Tighten
the two fastening screws by pushing the Allen key
through the hole in the handrail to the screw head.
NOTE! Tighten the fastening screws by turning them
anti-clockwise! Be careful not to over tighten. Push the
plastic end caps onto the holes in the handrails. Remove
the protective film from the display.
SAFETY KEY
The treadmill cannot be used if the key is not properly
installed on the console; if the key is removed from its
place, the treadmill will immediately stop. Insert the
safety key into the key holder at the left side of the
console. Ensure that the clip of the safety key is properly
attached to your clothing; as the cord tightens, make
sure the clip does not detach itself from your clothing
before the safety key disconnects from the user interface.
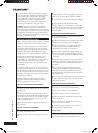
POWER CORD AND
GROUNDING INSTRUCTIONS
Plug the socket end of the power
cord into the treadmill at the left
front corner. Before connecting
the device to a power source,
make sure that local voltage
matches that indicated on the
type plate. Turn on the power
using the switch next to the
socket on the treadmill. This
treadmill must be grounded.
If it should malfunction or
breakdown, grounding provides
a path of least resistance for
electrical current to reduce
T60_manual_uusi versio_j.indd 3T60_manual_uusi versio_j.indd 3 25.10.2006 13:33:4825.10.2006 13:33:48