20
Right Crank Arm
1. Follow procedures for “Removing the Chain Guard” above.
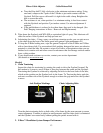
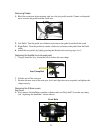
2. Use an 8mm Hex key to remove the pedal crank bolt.
3. Thread a bicycle crank arm puller onto the crank arm shaft.
4. As you tighten the crank arm puller on the shaft, the crank arm will be extracted from the
crank arm shaft. Remove the crank arm from the frame.
5. Apply a thin coat of grease on the right bottom bracket shaft and install the right crank
arm on the bottom bracket spindle. Align the right crank arm 180º from the left crank arm
and push the crank arm onto the crank arm shaft.
6. Apply 1-2 drops of Loctite® 222 on the right crank arm bolt threads. Install the crank
arm bolt and tighten to secure the crank arm. Rotate the pedals a few revolutions and then
tighten the crank arm bolt again to ensure that the crank arm is tightened to a torque of
22ft/lb (30Nm)
7. Refit the Chain guard by following procedures for “Removing the chain guard” above.
NOTE: Inspect the Pedal crank arm bolts again after 30 hours (approx. one week). If
loose, remove the bolts; apply Loctite®222 and reinstall. Retighten the bolts to 22ft/lb
(30Nm). Monitor over the following week and if the problem persists, contact your
service department (Details for your closest dealer found at www.trixter.net)
Tightening the Bottom Bracket Bearings
1. Follow procedures for “Removing the chain guard” above.
2. Then follow the procedures for removing the pedal crank arms above.
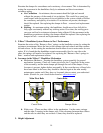
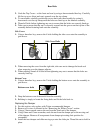
3. Loosen the locking cap on the left side of the bike using the locking cap removal tool.
4. Ensure that the right bearing cup is tight. If necessary, tighten with the bottom bearing
cup tool. Note: the right bearing cup is reverse threaded.
5. Check the left bearing cup. If the bearing cup is loose, tighten with your fingers. Then use
the bottom bracket tool to tighten the bearing cup by rotating the bottom bearing cup tool
an additional 10º clockwise.
6. Verify that the bottom bracket spindle is not loose by tugging on the spindle shaft.
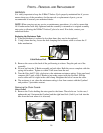
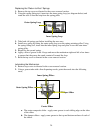
7. Use the lock ring removal tool to tighten the lock ring. Note: Prevent the left bearing cup
from spinning by stabilizing it with the bottom bearing cup tool.
8. Apply a thin coat of grease on the left bottom bracket shaft and install the left crank arm
on the bottom bracket shaft. Apply 1-2 drops of Loctite® 222 on the left crank arm bolt
threads. Install the crank arm bolt and tighten to secure the crank arm. Rotate the pedals a
few revolutions and then tighten the crank arm bolt again to ensure that the crank arm is
tightened to a torque of 22ft/lb (30Nm)
9. Apply a thin coat of grease on the right bottom bracket shaft and install the right crank
arm on the bottom bracket spindle. Align the right crank arm 180º from the left crank arm
and push the crank arm onto the crank arm shaft. Apply 1-2 drops of Loctite® 222 on the
left crank arm bolt threads. Install the crank arm bolt and tighten to secure the crank arm.
Rotate the pedals a few revolutions and then tighten the crank arm bolt again to ensure
that the crank arm is tightened to a torque of 22ft/lb (30Nm)
10. Follow procedures for “Replacing the Chain” and complete the operation by adhering to
the section for “Removing the Chain Guard”
NOTE: Inspect the Pedal crank arm bolts again after 30 hours (approx. one week). If
loose, remove the bolts; apply Loctite®222 and reinstall. Retighten the bolts to 22ft/lb
(30Nm). Monitor over the following week and if the problem persists, contact your
service department (Details found at www.trixter.net for your closest dealer)


