8
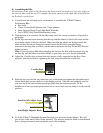
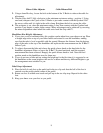
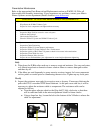
Minor Cable Adjuster Cable Release Bolt
2. Using a 6mm Hex key, loosen the bolt at the bottom of the V-Brake to release the cable for
adjustment.
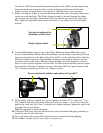
3. Turn the Grip-shift™ fully clockwise to the minimum resistance setting – position 1. Using
one hand, compress the 2 pads of the V-Brake to just make contact with the flywheel. Pull
the excess cable until it is tight in the cable clamp. Retighten the bolt to secure the cable.
4. The resistance is set, when the minimum setting is free from contact with the flywheel and
position 2 just begins to make slight contact. Minor adjustment can be achieved by screwing
the minor adjustment wheel where the cable exits from the Grip-shift™.
Handlebar (Bar Height) Adjustment
1. If you own a road or mountain bike, this position can be taken from your chosen set up. Place
a straight edge ruler on top of your bikes saddle and extend it over the handlebar, making
sure that the ruler is level or parallel with the ground. Measure the distance from the bottom
edge of the ruler to the top of the handlebar and replicate this measurement on the X-Bike™
Indoor Cycle.
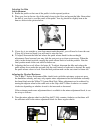
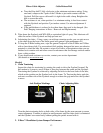
2. To adjust, dismount the bike and release the quick release knob on the head tube for the
handlebar adjustment. Raise or lower the X-Bar™ System headstock until the required
measurement has been achieved. Reapply the quick release knob to lock. Note the final
position mark on the handlebar stem for future use.
3. If you do not own a bike and are setting the height up for the first time it is suggested to set
the handlebars at the same height as the seat for a datum and then try different heights to get
the arrangement most suitable for you.
Pedal Strap Adjustment
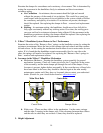
1. Place the ball of each foot on the pedal and in the toe clip such that the ball of the foot is
centred over the pedal spindle (centre of the pedal)
2. Rotate one foot to within arms reach and pull up on the toe clip strap. Repeat for the other
foot.
3. Keep your knees over your foot as you pedal.


