


16
620-7992 Rev 001
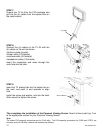
This completes the installation of the Personal Viewing Screen on the S-TRx treadmill. Now it
is time to set it up. Turn to the appropriate section for your Personal Viewing Screen.
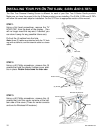
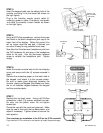
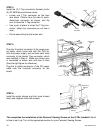
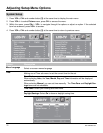
STEP 4.
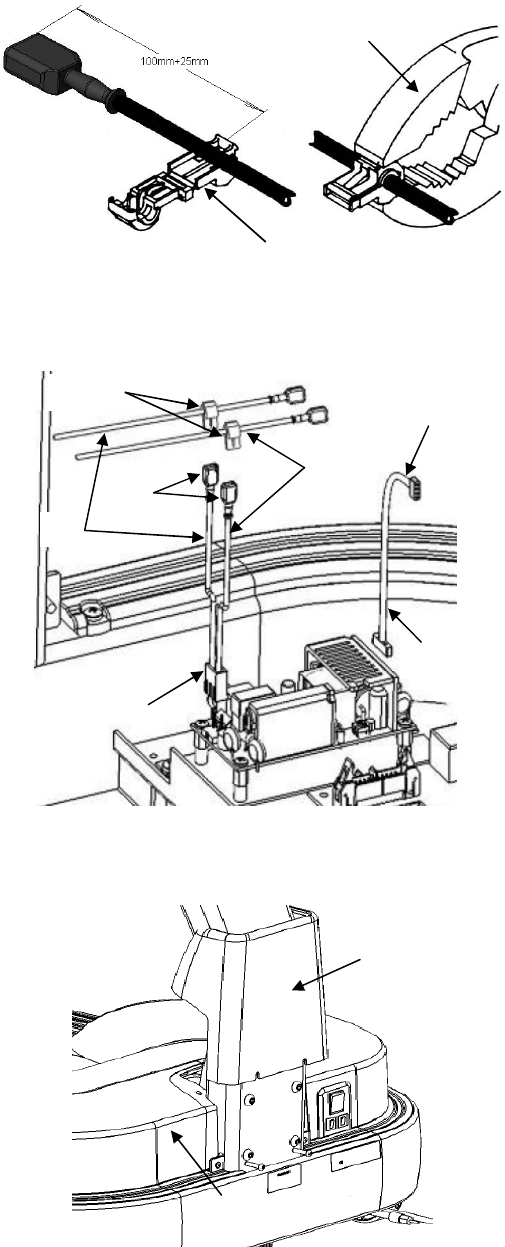
Install the (2) T-Tap connectors (female) to the
(2) AC-MCB blue and brown wires:
•
Locate one T-Tap connector on the blue
wire about 100mm from the side of quick-
disconnect connector as shown, and flip
over to close the T-Tap connector.
•
Use a pair of pliers to crimp the T-Tap con-
nector. (
When fully connected you will hear a
click)
.
•
Do the same thing for the brown wire.
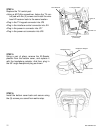
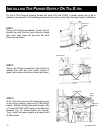
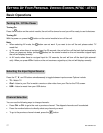
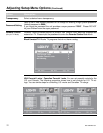
STEP 5.
Plug the 2-contact connector of the power sup-
ply cable, which came with with the PVS kit,
onto the power supply, and connect each male
connector to the female T-tap connector, which
was installed in Step 4. Make sure brown wire
is connected to brown wire and blue to blue
(See the right figure for reference).
Plug the 4-contact connector of the DC power
cable onto the 4-contact connector on the
board.
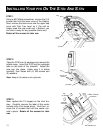
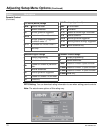
STEP 6.
Install the motor shroud and front neck shroud
back, and retighten them with screws.
Pliers
T-Tap
Connector
Front Motor
Shroud
Front Neck
Shroud
Brown
Wires
Blue
Wires
2-contact
Power Supply
DC Power
Cable
Male
Connectors
Female
Connectors
From PVS
Neck