


Page 62
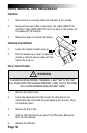
TO REDUCE THE RISK OF EYE INJURY, WEAR EYE
PROTECTION WHEN REMOVING SNAP RINGS.
!
WARNING
2. Remove the master link from the drive chain.
3. Remove the drive chain from the sprockets.
4. Reinstall the drive chain, ensuring the master link is properly installed.
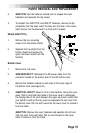
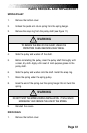
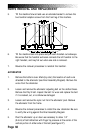
5. Check the drive chain tension. There should be a total of 1 to
1-1/2" (2.5 to 4.0 cm) of play, up and down, at the slackest point in the
chain (see Figure 27). If the drive chain tension needs adjustment,
refer to the “Drive Hub Assembly” section.
6. Lubricate the chain with 30W motor oil and wipe off the excess.
7. Reinstall the covers.
DRIVE SHAFT ASSEMBLY
1. Remove the bottom cover.
2. Remove the step chain retainers.
3. Support the pedal arm. Unhook the pedal arm return spring from the
spring hanger. Lift the step chain up and off the clutch sprocket and
lower the pedal arm to the floor. Repeat on the other side.
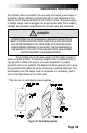
4. Remove the snap ring from the left end of the drive shaft.
PARTS REMOVAL AND REPLACEMENT
!
WARNING
IF THE DRIVE CHAIN IS TOO TIGHT, THE DRIVE TRAIN WILL WEAR
EXCESSIVELY, SHORTENING THE LIFE OF THE DRIVE HUB. IF THE
CHAIN IS TOO LOOSE, THE MACHINE WILL BE NOISY AND WILL
OPERATE AT LESS THAN PEAK EFFICIENCY.