I
I
Step
A.
4
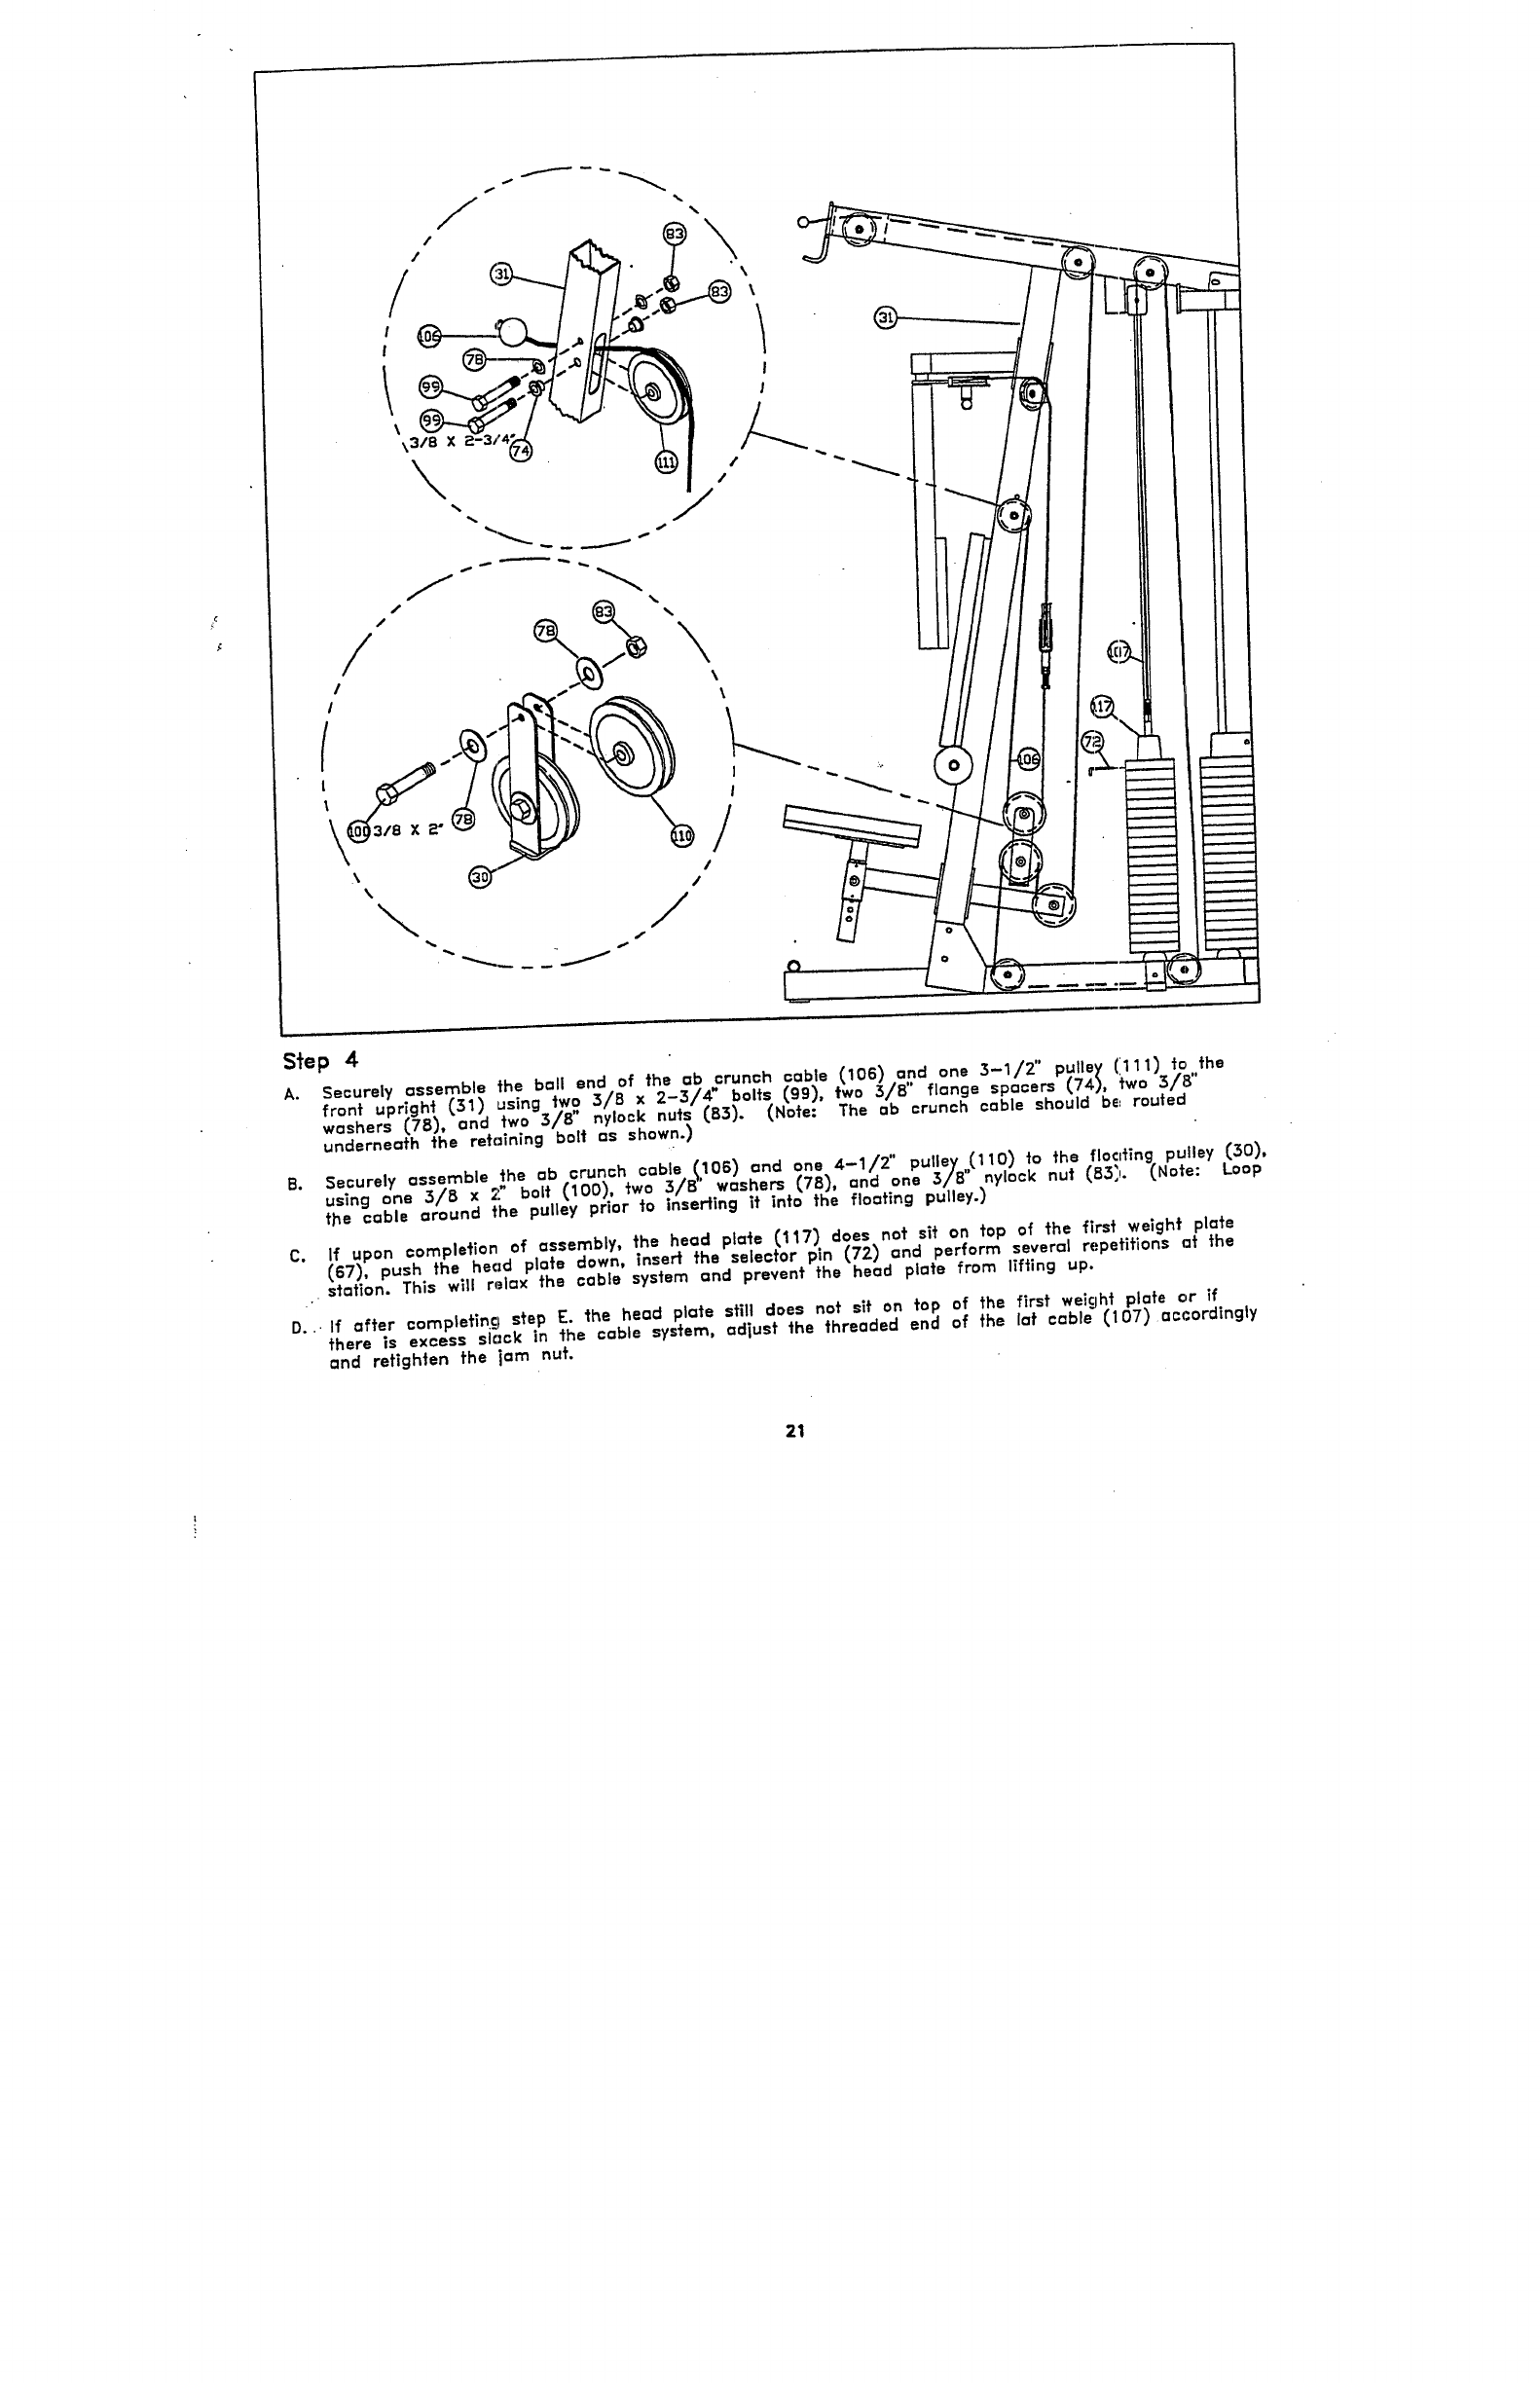
Securely assemble the ball end of the ab .crunch cable (106).a,,nd one 3-1/2" pu. lley (’.111).t~,,,the
front upright (51) using tw.o 3/6 x 2-3/4: bolts (gg), two 3/8’ flange spacers (74),
washers (78), and two 3/8 nylock nuts (83). (Note: The ab crunch cable should be routed
underneath the retaining bolt as shown.)
the ab crunch cable. I,106) o.d o..e ,+-I12 pu,ey,,(;;O.) ! the f~oc,ting pu~ey
B.
Securely as_se._mble.,. ,._,+ r+nn’~ two 3]8 washers ~78), and one 3],.8 ,nymcK nut (83~. (Note: Loop
the cable arouna the put,my p-,+--+
C.
If upon completion of assembly, the head plate (117) does not sit on fop of the first weight plate
~67), push the head plate down, inser~ the selector pin (72) and perform several repetitions at
station. This will relax the cable system and prevent the head plate from lifting up.
D.
If after completin.Cl step ~. the head plate still does not sit on top of the first weic.jht plate or if
there is excess slack in the cable system, adjust the threaded end of the let cable (107)accordingly
and retighten the ~am nut.
21


