


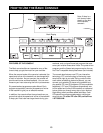

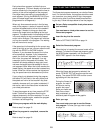
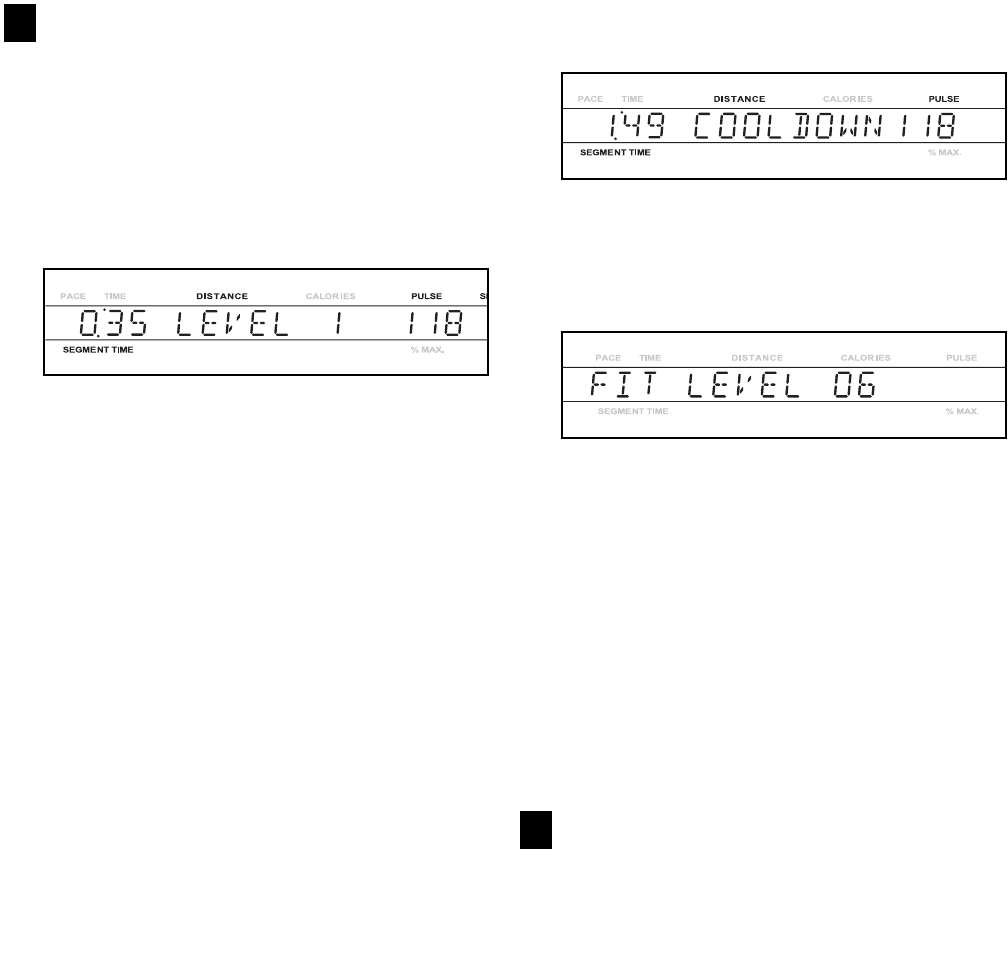
Press the START button or the SPEED + button
to start the program.
When the button is pressed, the main display will
show the words LEVEL 1, indicating that the first
four-minute level of the fitness test program has
begun. The incline of the treadmill will then auto-
matically adjust to 3% and the walking belt will
begin to move at 1.5 mph. Hold the handrails and
begin walking.
The fitness test program is divided into seven,
four-minute levels. One speed setting and one in-
cline setting are programmed for each level.
At the end of each minute of the program, a tone
will sound; when the first four-minute level is com-
pleted, a tone will sound and the main display will
show the words LEVEL 2, indicating that the sec-
ond four-minute level has begun. The incline will
then change to 4% and the speed of the walking
belt will increase to 2.5 mph.
At the beginning of each four-minute level, the
speed and/or incline of the treadmill will automati-
cally increase. The fitness test program will con-
tinue in this way until your heart rate reaches 70%
of your estimated maximum heart rate and the cur-
rent four-minute level is completed. The fitness
test program will then end, regardless of how
many levels remain.
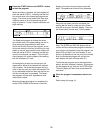
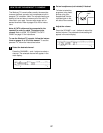
When the fitness test program is completed, the
words COOL-DOWN will be shown in the main
display and a two-minute cool-down period will
begin. The speed and incline will then decrease.
When the cool-down period is completed, the
walking belt will slow to a stop and your fitness
level will be shown in the main display. There are
ten fitness levels; fitness level 10 is the highest.
Note: The SPEED and INCLINE buttons will not
function while the fitness test program is selected. If
your pulse is not detected during the program, the
letters PLS will flash in the main display. If your
pulse is not detected at the end of any four-minute
level, the fitness test program will end and the
main display will show a fitness level of 0.
The fitness test program cannot be stopped tem-
porarily and then restarted. However, the program
can be stopped at any time with the STOP button.
The main display will then show an estimated fit-
ness level.
When the program is completed, remove the
key.
Refer to step 6 on page 18.
6
5
21