_ STEP4 - Seat Cushion and Backrest Installation
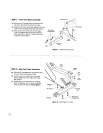
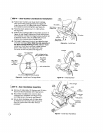
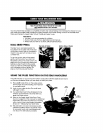
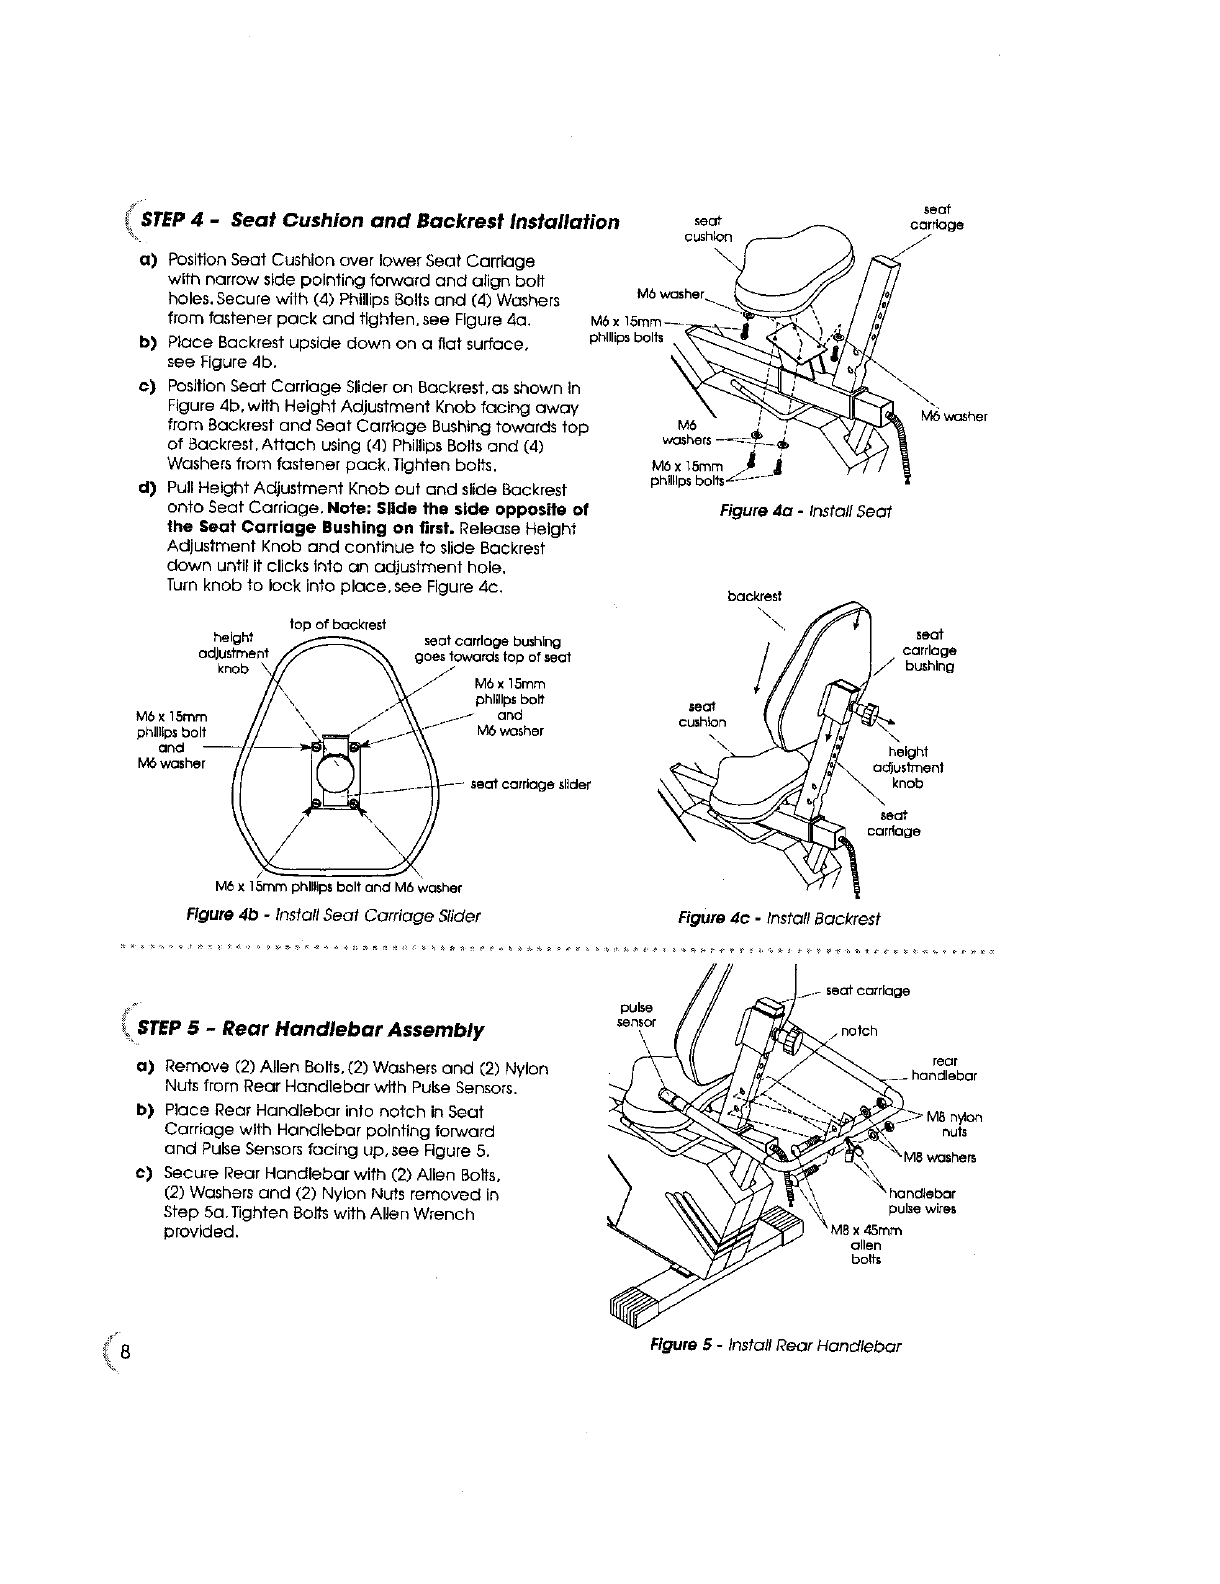
a) Position Seat Cushion over lower Seat Carriage
with narrow side pointing forward and align bolt
holes. Secure wilh (4) Phillips Bolts and (4) Washers
from fastener pack and tighten, see Figure 4a,
b) Place Backrest upside down on a flat surface,
see Figure db,
c) Position Seat Carriage Slider on Backrest, as shown in
Figure 4b, with Height Adjustment Knob facing away
from Backrest and Seat Carriage Bushing towards top
of Backrest, Attach using [4) Phillips Bolts and (4)
Washers from fastener pack, Tighten bolts,
d) Pull Height Adjustment Knob out and slide Backrest
seat
cushlon_
M6washer_
iv_ x 15turn- "
phl,ip,bolts--__,'_
M6x _5mm / _
phillips bolts _:_---_
seat
carriage
/"
onto Seat Carriage. Note: Slide the side opposite of
the Seat Carriage Bushing on first. Release Height
Adjustment Knob and continue to slide Backrest
down until it clicks into an adjustment hole,
Turn knob to lock into place, see Figure 4c,
top ofbackrest
height _ seatcarriagebushing
adjustment /ff _ goes towards top of seat
knob \_/'/ \"_ /"
l_ phllllp_ bolt
M6 x 15ram
M6 x 15mrn ..// and
phillips bolt "_" iv16,_asher
and --
M6 washer
--- seatcarriage slider
M6 x 15ram phlllll_ bolt and M6 washer
Figure 4b - Install Seat Carriage Slider
Figure 4a - Install Seat
backrest
"\
_\ seat
carriage
bushing
height
I/\- nob
seat
_ carriage
Figure 4e - Install Backrest
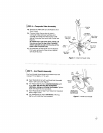
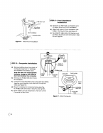
I STEP 5 - Rear Handlebar Assembly
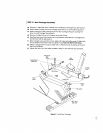
a) RemOve (2) Alien Bolts, (2) Washers and (2) Nylon
Nuts from Reclr Handlebar with Pulse Sensors.
b) Place Rear Handlebar into notch inSeat
Carriage with Handlebar pointing forward
and Pu_se Sensors f_clog up, see Figure 5.
c) Secure Rear Handlebar with (2) Allen Bolts,
(2) Washers and (2) Nylon Nuts removed in
Step 5a.Tighten Bolts with Allen Wrench
prov_ed,
notch
rear
3ndiebar
_, pulse wires
_M8 x 45rnm
allen
boffs
i Figure 5 - Install Rear Handlebar


