


18
0
1 2 3 4 5
6
1/2 1/2 1/2 1/2 1/2 1/2
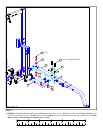
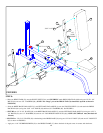
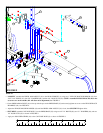
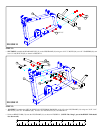
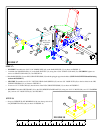
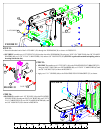
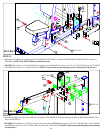
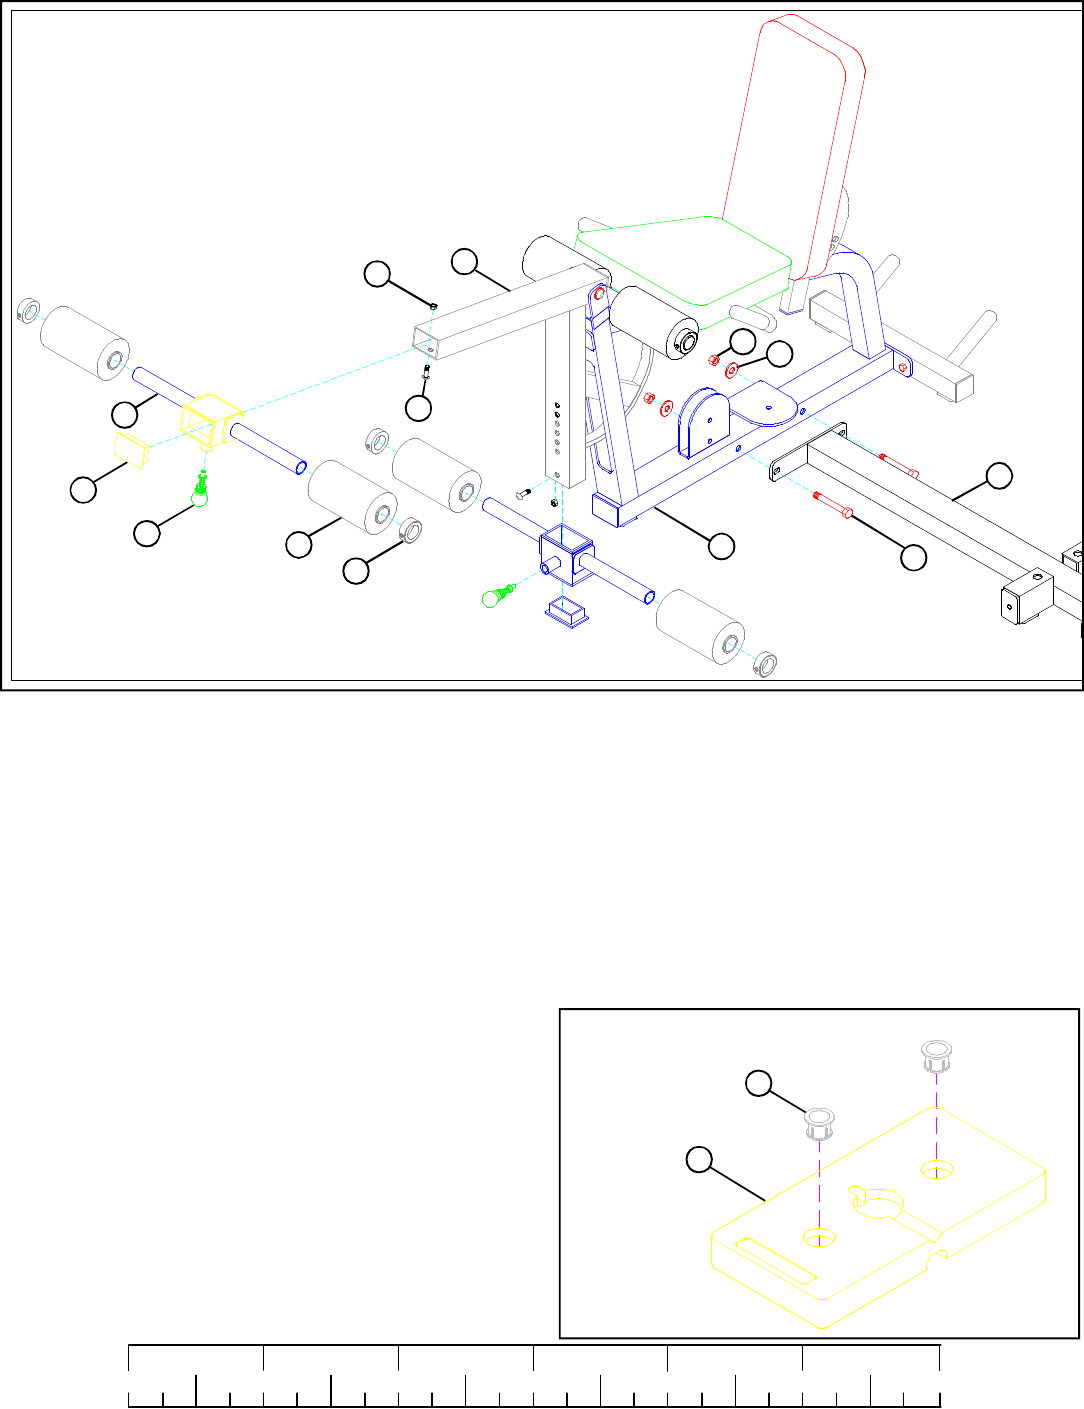
STEP 17:
FIGURE 17
• SECURELY assemble two 3/8 X 2-3/4” SPRING PINS (62) to the PAD SLEEVES (33) as shown in FIGURE 17.
• Assemble four ROLLER PADS (41) to the PAD SLEEVES (33) using four 1-5/16” SHAFT COLLARS (79). SECURELY tighten set
screws on SHAFT COLLARS (79). See FIGURE 16.
• Slide PAD SLEEVES (33) over LEG CURL/EXTENSION (32) until the spring pin pops into the holes. (NOTE: PAD SLEEVES should be facing
as shown in FIGURE 17.)
• Insert two 3 X 2” END CAPS (65) into the ends of the LEG CURL/EXTENSION (32) as shown in FIGURE 17.
• SECURELY assemble two 3/8 X 1” BUTTON HEAD CAP SCREWS (87) and two 3/8” LOCK NUTS (82) to the last holes in the LEG
CURL/EXTENSION (32) as shown in FIGURE 17.
• SECURELY assemble LEG FRAME (34) to the LEG WEIGHT STACK BASE (23) using two 1/2 X 4” BOLTS (96), two 1/2” WASHERS
(84), and two 1/2” LOCK NUTS (85). See FIGURE 17.
85
84
23
79
62
41
33
65
82
32
1/2 X 4” 96
87 3/8 X 1-1/4”
BUTTON
HEAD
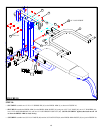
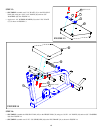
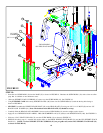
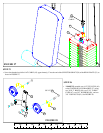
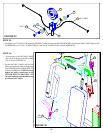
STEP 18:
FIGURE 18
109
106
• Snap two WEIGHT PLATE BUSHINGS (109) into the top side of all
sixty WEIGHT PLATES (106) as shown in FIGURE 18.
34