


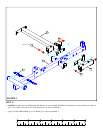
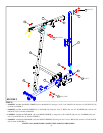
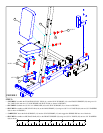
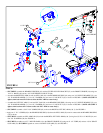
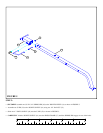
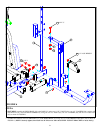
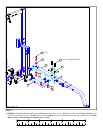
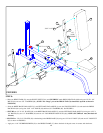
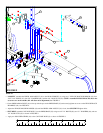
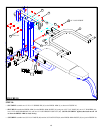
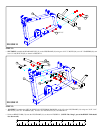
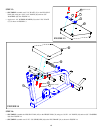
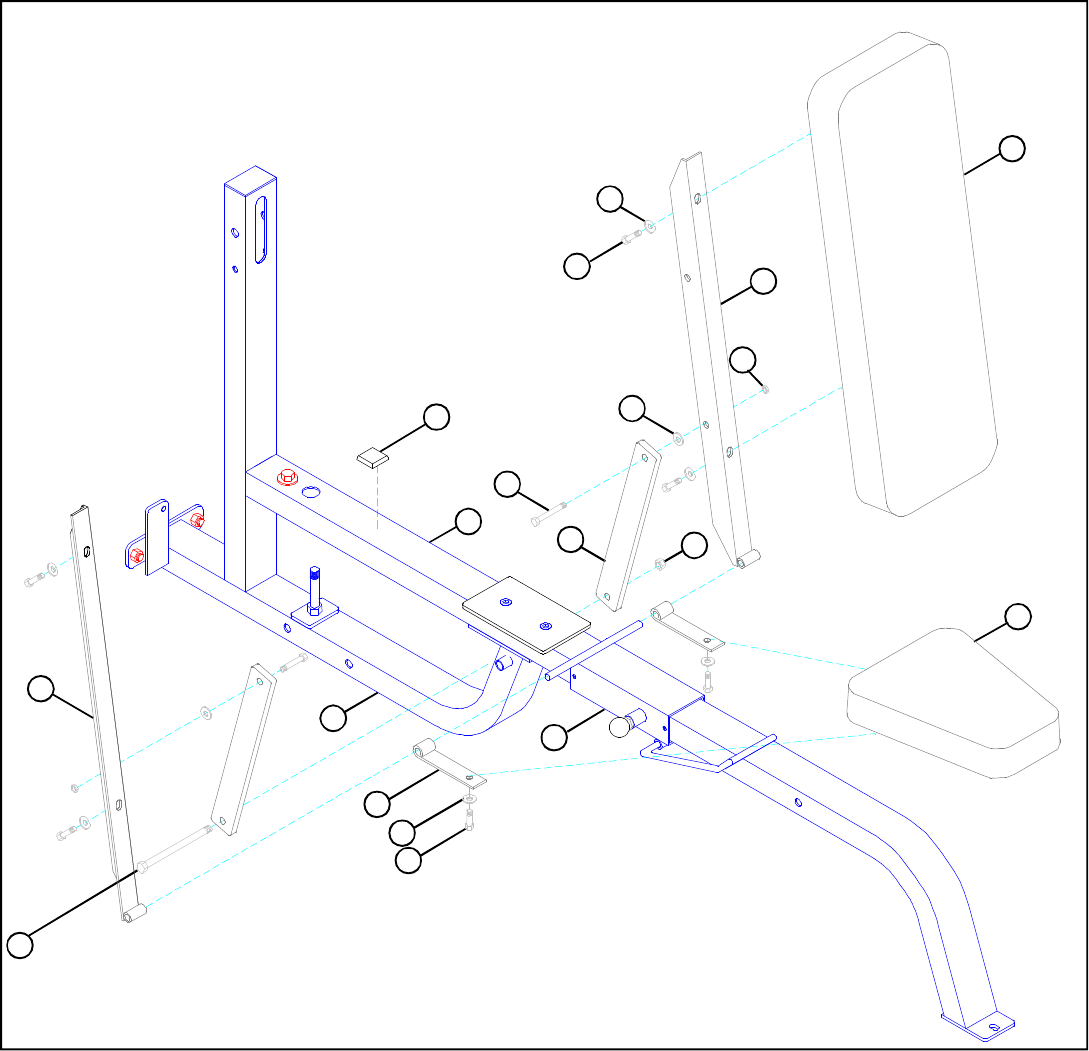
STEP 8:
FIGURE 8
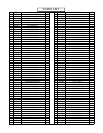
11
• Slide two HINGE TABS (76) onto the WOLFF SLEEVE (14) and SECURELY attach PRESS SEAT PAD (100) using two 3/8 X 1-1/4”
BOLTS (88) and two 3/8” WASHERS (80). (NOTE: The “hinge” part of the HINGE TAB (76) should face upward as shown in
FIGURE 8.)
• Slide the RIGHT BACK PAD ANGLE (5) and LEFT BACK PAD ANGLE (4) onto the WOLFF SLEEVE (14) and attach the PRESS
BACK PAD (101) using four 3/8 X 1-1/4” BOLTS (88) and four 3/8” WASHERS (80). See FIGURE 8.
• SECURE two 2 X 15-1/2” PLATES (56) to the RIGHT BACK PAD ANGLE (5) and the LEFT BACK PAD ANGLE (4) using two 1/2 X 1-
1/4” BOLTS (93), two 1/2” WASHERS (84) and two 1/2” LOW HEIGHT LOCK NUTS (86). (NOTE: SECURE lock nuts, then back off
1/4 turn.)
• SECURE the 2 X 15-1/2” PLATES (56) to the bushing in the PRESS BASE (38) using one 1/2 X 6-1/2” BOLT (97) and one 1/2” LOCK NUT
(85) as shown in FIGURE 8.
• Apply one 1-1/4” RUBBER BUMPER (54) to the PRESS FRAME (37) where the back of the pad comes in contact with the frame.
4
5
80
54
37
85
100
14
76
80
84
1/2 X 1-1/4” 93
3/8 X 1-1/4” 88
116
86
101
3/8 X 1-1/4” 88
1/2”
LOW
HEIGHT
38
97 1/2 X 6-1/2”