


12
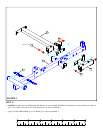
STEP 9:
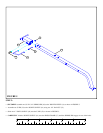
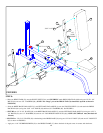
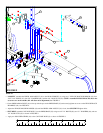
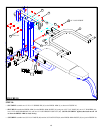
FIGURE 9
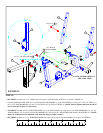
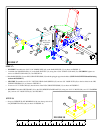
• LOOSELY assemble the PRESS ARM ADJUST (36) to the REAR UPRIGHT (1) using two 1” PILLOW BLOCK BEARINGS (49), four
3/8 X 3-1/4” BOLTS (91), four 3/8” WASHERS (80), and four 3/8” LOCK NUTS (82). (NOTE: Assemble PILLOW BLOCKS (49) so the
set screws are on the outside, this will allow more adjustment.) See FIGURE 9.
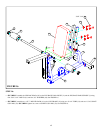
• Apply two NON-SKID STRIPS (61) to the CALF/LOW ROW (9) as shown in FIGURE 9.
• SECURELY assemble CALF/LOW ROW (9) to the PRESS BASE (38) using two 1/2 X 4” BOLTS (96), two 1/2” WASHERS (84), and two
1/2” LOCK NUTS (85) as shown in FIGURE 9.
0
1 2 3 4 5
6
1/2 1/2 1/2 1/2 1/2 1/2
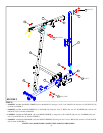
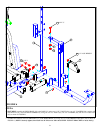
• Adjust the PILLOW BLOCK BEARINGS (49) until the PRESS ARM ADJUST (36) is level, then SECURELY tighten bolts.
• Center PRESS ARM ADJUST (36) to line up with the post on the PRESS BASE (38) and securely tighten set screws on the PILLOW BLOCK
BEARINGS (49). See FIGURE 9.
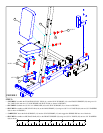
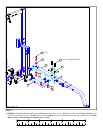
84
85
38
9
61
36
82
49
1
80
96 1/2 X 4”
91 3/8 X 3-1/4”