


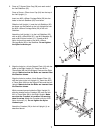
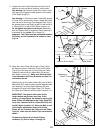
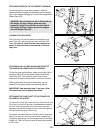
3. Align the holes in a 4-hole Support Plate (16) with the
holes in the Right Upright (2). Insert four M10 x
72mm Bolts (68) into the Support Plate and the Right
Upright. Make sure that the Bolts are inserted from
the direction shown.
Align the holes in another 4-hole Support Plate (16)
with the holes in the Left Upright (1). Insert four M10
x 72mm Bolts (68) into the Support Plate and the Left
Upright. Make sure that the Bolts are inserted from
the direction shown.
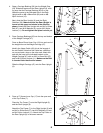
While a second person holds the Right Upright (2),
slide the bracket on the Crossbar (20) over the four
M10 x 72mm Bolts (68) in the Right Upright. Make
sure that the Crossbar is turned so the warning
decal is on top. Attach the Crossbar with four M10
Nylon Locknuts (11). Do not tighten the Nylon
Locknuts yet.
Attach the Crossbar (20) to the Left Upright (1) as
described above.
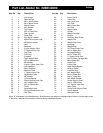
3
7
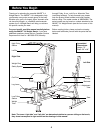
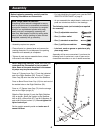
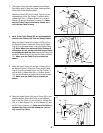
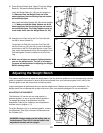
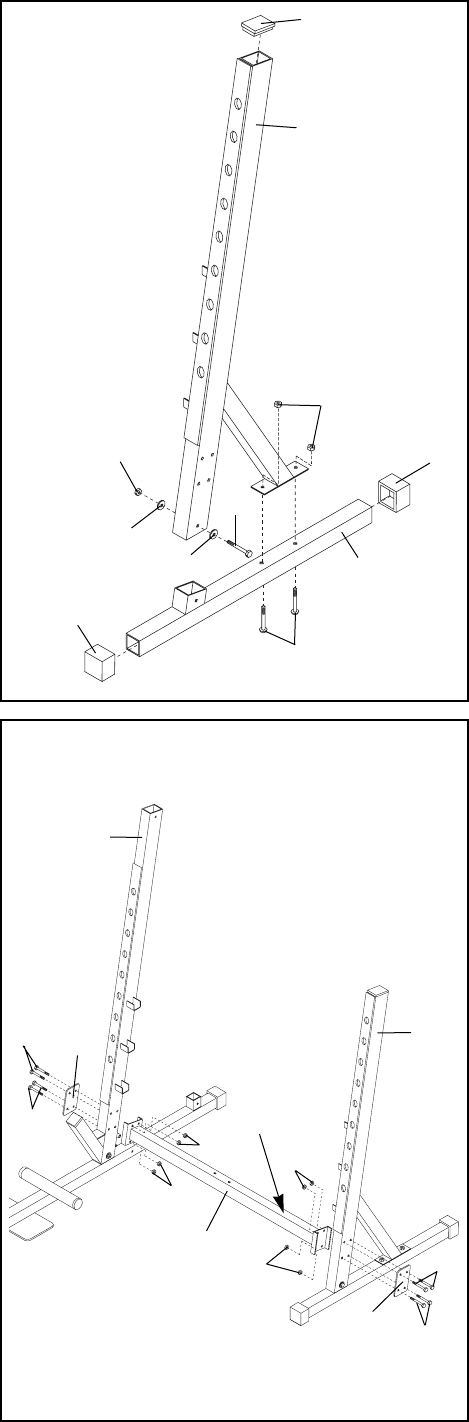
2. Press a 2Ó Square Outer Cap (58) onto each end of
the Left Stabilizer (25).
Press a 51mm x 76mm Inner Cap (24) into the top of
the Left Upright (1).
Insert two M10 x 62mm Carriage Bolts (59) into the
holes in the Left Stabilizer (25) from below.
Slide the Left Upright (1) onto the Left Stabilizer (25)
as shown, so the bracket on the Left Upright fits over
the M10 x 62mm Carriage Bolts (59) in the Left
Stabilizer.
Attach the Left Upright (1) to the Left Stabilizer (25)
with an M10 x 65mm Bolt (67), two M10 Washers (6),
and an M10 Nylon Locknut (11). Thread an M10
Nylon Locknut onto each of the M10 x 62mm
Carriage Bolts (59) in the Stabilizer. Do not tighten
the Nylon Locknuts yet.
2
1
24
59
25
67
11
6
6
11
58
58
1
68
68
68
68
16
16
2
20
Decal
11
11
11
11